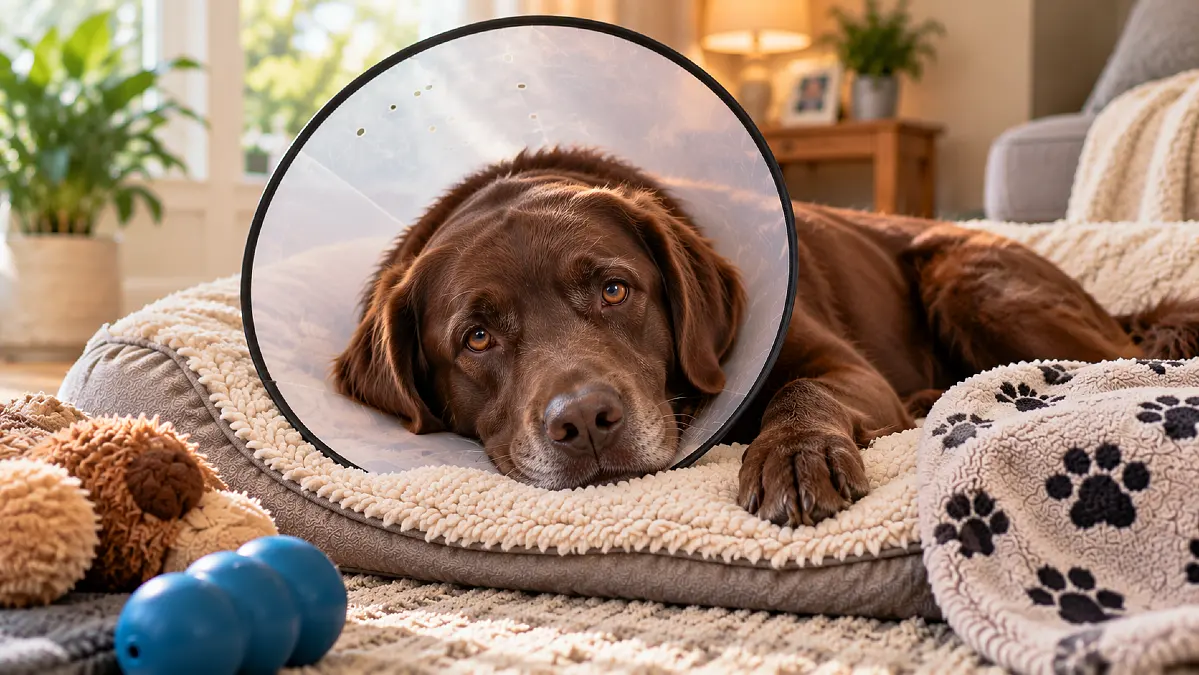
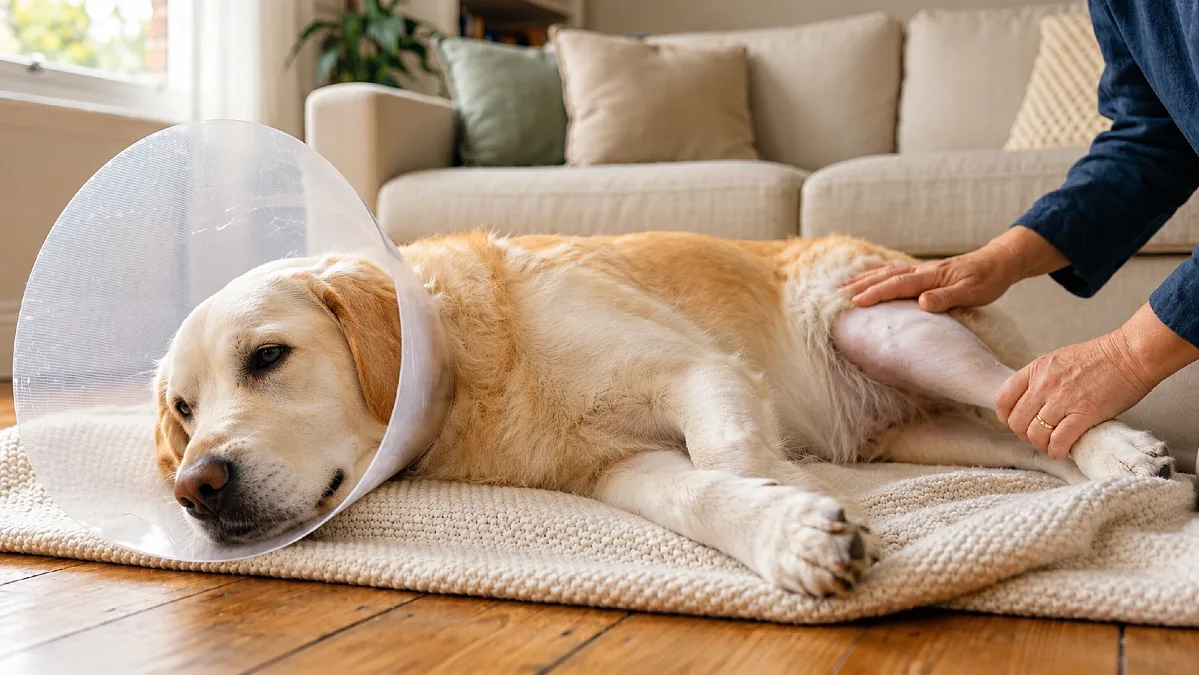
Watching your dog struggle to walk after TPLO surgery can make even simple activities feel worrying. You want to help them regain strength, but you also know that too much movement could put their healing knee at risk.
Some dogs begin using their operated leg within days, while others take longer to feel comfortable. Even when your dog starts walking better, the bone still needs time to heal. That is why choosing the right TPLO rehab exercises at the right time matters.
The good news is that gentle, controlled rehabilitation can help your dog regain movement, balance, and muscle strength. Many exercises can be done at home using simple equipment, such as a leash, nonslip mat, and support sling. You can also follow a broader TPLO recovery timeline to see how rehabilitation fits into the full healing process.
If your dog has not yet had surgery, our guide to dog CCL tears and surgery versus conservative care explains the treatment choices. You can also review dog ACL surgery costs to prepare for surgery, follow up visits, and possible rehabilitation expenses.
TPLO Rehab Exercise Wheel
Choose your dog’s recovery week and select only the exercises approved by your veterinary team. Spin to pick one from your approved list.
Select Veterinarian-Approved Exercises
Check only activities your dog’s surgeon or rehabilitation therapist has specifically approved. Week ranges are general guides, not medical clearance.
1. Gentle TPLO Knee Bends for Weeks 1 and 2
Recovery stage: Early healing and joint movement
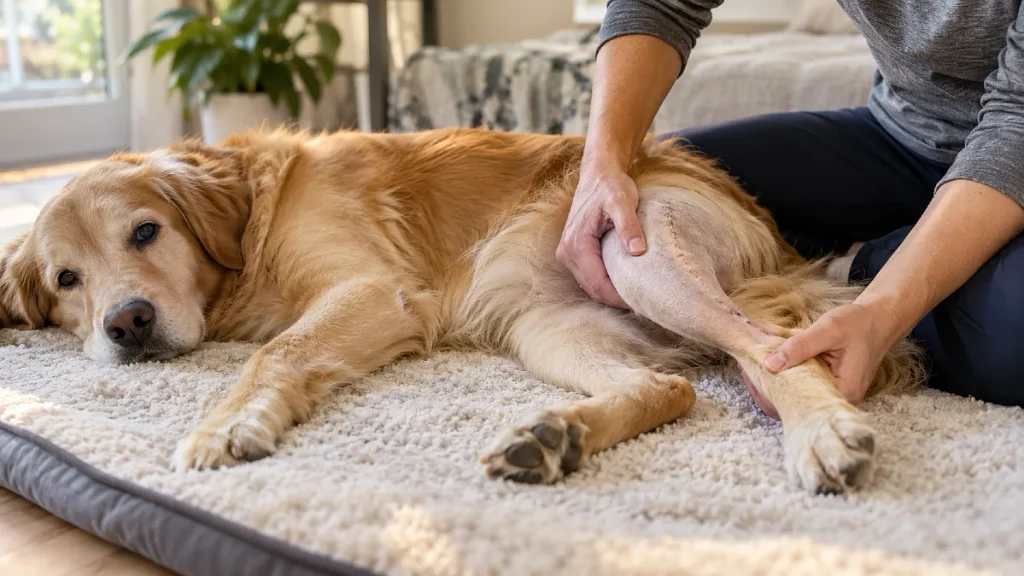
Your dog’s knee may feel stiff after surgery because of swelling, discomfort, and reduced movement. Gentle passive range of motion exercises can help maintain comfortable joint motion without requiring your dog to actively move the leg.
The American College of Veterinary Surgeons includes passive movement among the rehabilitation activities used after cruciate ligament surgery. However, your surgeon or rehabilitation therapist should demonstrate the technique before you try it at home.
How to Do Gentle Knee Bends
Have your dog lie comfortably on their side, with the operated leg facing upward. Place one hand near the thigh and use the other to support the lower leg.
Slowly bend and straighten the knee within the comfortable range your veterinarian has shown you. Keep the movement gentle, and avoid twisting the leg or forcing the joint to bend farther.
Brunswick Veterinary Hospital’s TPLO instructions describe 10 to 20 passive movement repetitions during early recovery. That is an example from one protocol, so use the number and frequency prescribed for your dog.
When to stop: If your dog cries, pulls away, tightens their muscles, or appears uncomfortable, stop the movement. Contact your veterinary team before trying again.
Gentle knee bends should feel calm and controlled. The aim is to maintain comfortable movement, not stretch the knee as far as possible.
2. Supported Standing to Help Your Dog Bear Weight in Weeks 1 and 2
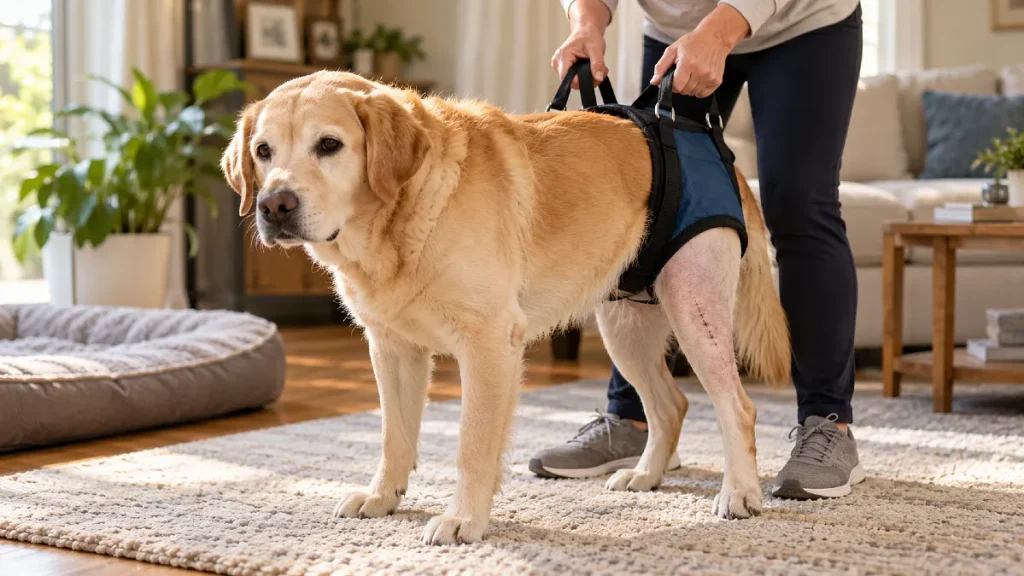
Recovery stage: Early weight bearing and stability
Standing can be difficult when your dog is protecting a sore surgical leg. Supported standing helps them practice placing their paws on the floor while reducing the risk of losing balance.
This exercise may be particularly useful for larger dogs that need assistance getting up. It should begin only when your veterinarian confirms that standing practice is appropriate.
How to Practice Supported Standing
Choose a flat area with good traction, such as a room with nonslip rugs. Place a support sling under your dog’s hindquarters and gently assist them into a standing position.
Allow your dog to place their feet naturally while you provide enough support to prevent slipping. Do not force the operated leg onto the floor or make your dog stand longer than they can comfortably manage.
A rolled towel can sometimes provide short term support, while a fitted harness may be easier for larger dogs. Our dog lift harness and support sling guide explains the different options and how to choose one.
Signs Your Dog Is Ready for Supported Standing
Watch your dog’s posture rather than focusing only on how long they can stand. These signs can help you decide when to continue and when to contact your veterinarian.
| What you notice | What it may mean | What to do |
|---|---|---|
| Paw rests on the floor | Accepting some weight | Continue gently |
| Body sways or slips | Balance is limited | Provide support |
| Dog avoids the leg | Pain or weakness | Ask your vet |
| Sudden loss of progress | Possible complication | Contact your vet promptly |
Early weight bearing can be uneven, and your dog may need more support on some days than others. The goal is to encourage comfortable standing without pushing through pain.
If your dog refuses to use the leg after previously improving, do not treat it as a normal part of exercise. Contact your surgeon for advice.
3. Controlled Leash Walks to Protect the Knee From Week 1
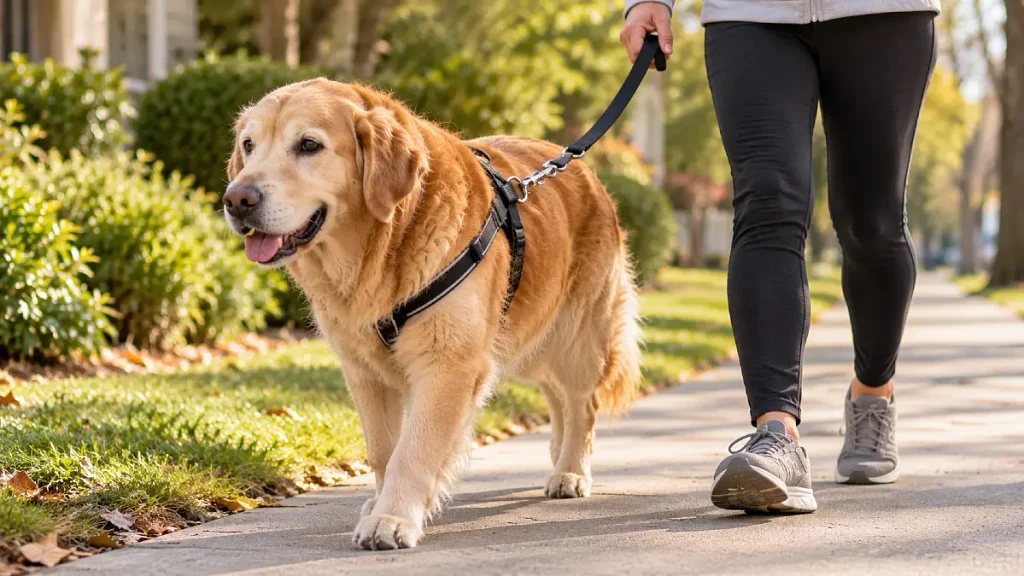
Recovery stage: Early movement and gradual walking
Controlled leash walking is one of the most important activities during TPLO recovery. It allows your dog to move the operated leg naturally while you control their speed and prevent sudden movements.
However, walking for bathroom breaks is different from exercise walking. During the earliest recovery stage, your surgeon may allow only short bathroom trips rather than additional walks.
How to Walk Your Dog Safely
Use a short leash and choose a flat surface with good traction. Walk slowly enough that your dog can place each paw without rushing, hopping, or pulling forward.
Avoid busy parks, steep paths, and places where other dogs may approach. Sudden excitement can cause running or jumping before the healing knee is ready.
As your dog improves, your veterinary team may allow slightly longer walks. A qualified rehabilitation professional can also assess walking patterns and help plan progress, as explained in our dog physical therapy guide.
TPLO Walking Guide by Recovery Stage
Brunswick Veterinary Hospital describes how walking may progress as healing advances. The following table is a general example and must be adjusted to your surgeon’s instructions.
| Recovery stage | Walking approach | Main restriction |
|---|---|---|
| Weeks 1 to 2 | Short bathroom outings | No extra walks |
| Weeks 3 to 4 | Brief, slow walks if approved | No running |
| Weeks 5 to 10 | Gradually longer walks | No free running |
| Weeks 11 to 16 | Build activity after clearance | Avoid sudden increases |
Walking should gradually become smoother as your dog recovers. If limping increases during a walk or your dog seems sorer afterward, reduce activity and contact your veterinary team.
Do not increase walking distance simply because your dog reaches a certain week. Comfortable movement and veterinary approval matter more than the calendar.
4. Gentle Weight Shifts to Encourage Leg Use in Weeks 2 to 4
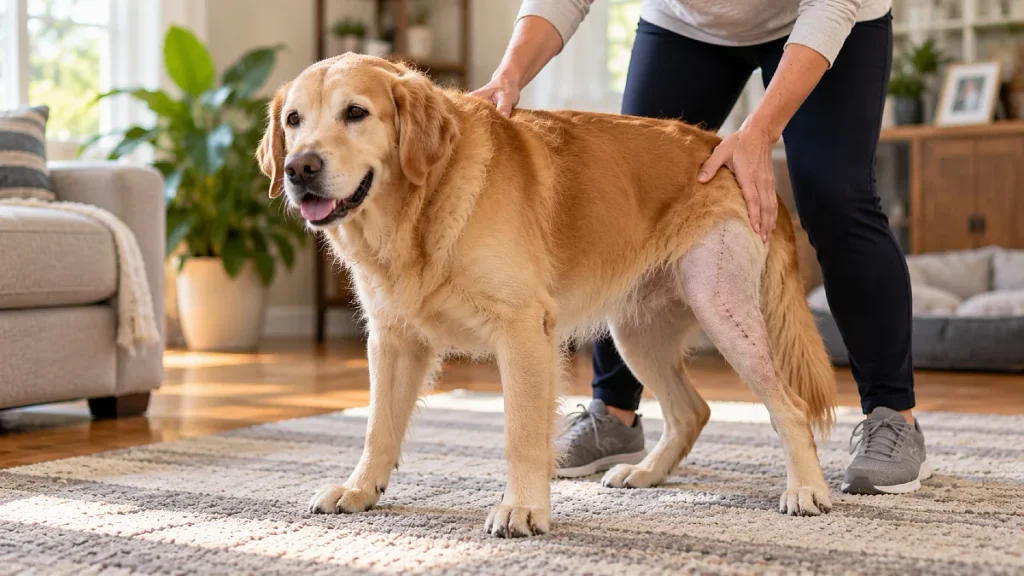
Recovery stage: Balance and controlled weight bearing
Some dogs continue putting most of their weight on the healthy hind leg even after surgery. Gentle weight shifting exercises can encourage them to use the operated leg more evenly.
MedVet describes a similar movement called hip sways in its home recovery guide. The exercise looks simple, but it should be demonstrated by a veterinary professional so you know how much movement is safe.
How to Do Weight Shifting
Have your dog stand on a firm, nonslip surface with all four paws placed comfortably. Stand beside or behind them and keep a support sling available if they are still unsteady.
Place your hands gently near your dog’s hips and guide a very small movement from one side to the other. Allow the body to return to a natural position between movements.
Avoid pushing the hips sharply or forcing most of your dog’s weight onto the operated leg. The movement should be small enough that your dog can remain comfortable and balanced.
Helpful tip: Choose a quiet room where your dog is unlikely to become excited. This makes it easier to notice changes in posture, muscle tension, or discomfort.
If your dog cannot stand comfortably or becomes anxious during the movement, stop. Our dog rehabilitation candidate checklist can help you prepare questions about whether professional rehabilitation would be useful.
5. Sit to Stand Practice to Build Strength in Weeks 3 to 5
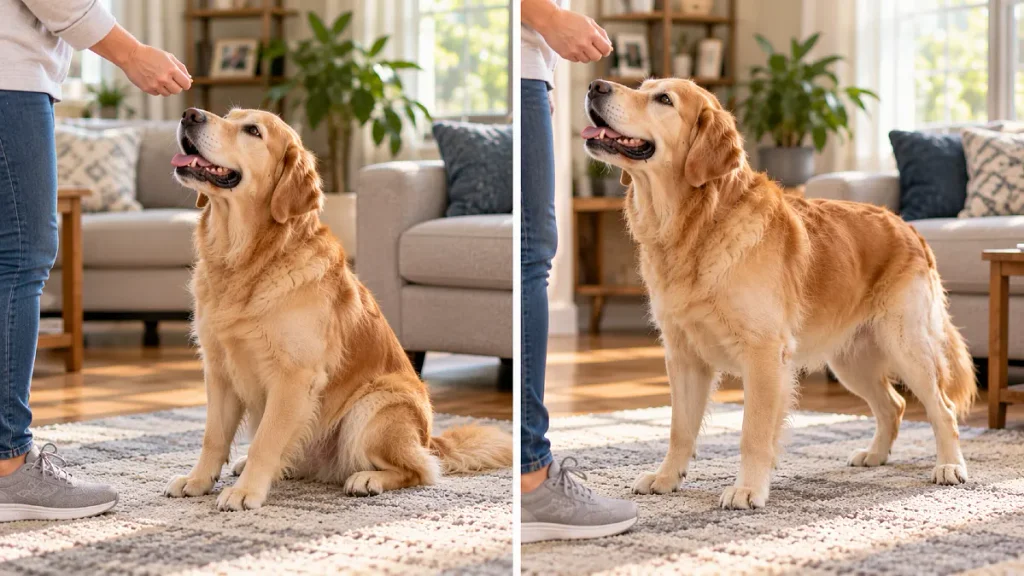
Recovery stage: Controlled hind leg strengthening
Sitting down and standing up requires your dog to use the muscles around their hips and knees. Once approved by your surgeon, this simple movement can become an effective strengthening exercise.
Dogs sometimes lose muscle in the operated leg because they are resting more and avoiding normal activity. Our guide to dog muscle atrophy in the back legs explains why this happens and how rehabilitation may help.
How to Practice Sit to Stand
Choose a nonslip surface and encourage your dog to sit slowly. Watch whether both hind feet stay under the body rather than allowing the operated leg to extend far out to the side.
Hold a small treat near your dog’s nose and guide them into a standing position. Let them rise at their own pace without pulling on the collar or lifting them into place.
Brunswick Veterinary Hospital introduces five sit to stand repetitions twice daily in its weeks 3 and 4 protocol. Other rehabilitation programs begin later, so follow your dog’s individual plan.
Sit to Stand Form Checklist
The quality of each movement matters more than the number of repetitions. Use this checklist to identify when your dog may need a smaller challenge.
| What to check | Good form | When to adjust |
|---|---|---|
| Hind feet | Under the body | Leg sticks outward |
| Standing motion | Slow and steady | Hopping or sudden pushing |
| Floor surface | Firm grip | Paws slide |
| Exercise effort | Comfortable movement | Limping increases |
Some dogs find it easier to sit straight when positioned beside a wall. Your rehabilitation therapist can show you how to use this method without forcing the operated leg.
Stop if your dog repeatedly sits unevenly, struggles to stand, or shows pain. A few controlled repetitions are more useful than a longer session with poor movement.
6. Wide Figure Eight Walks to Improve Turning in Weeks 5 to 8
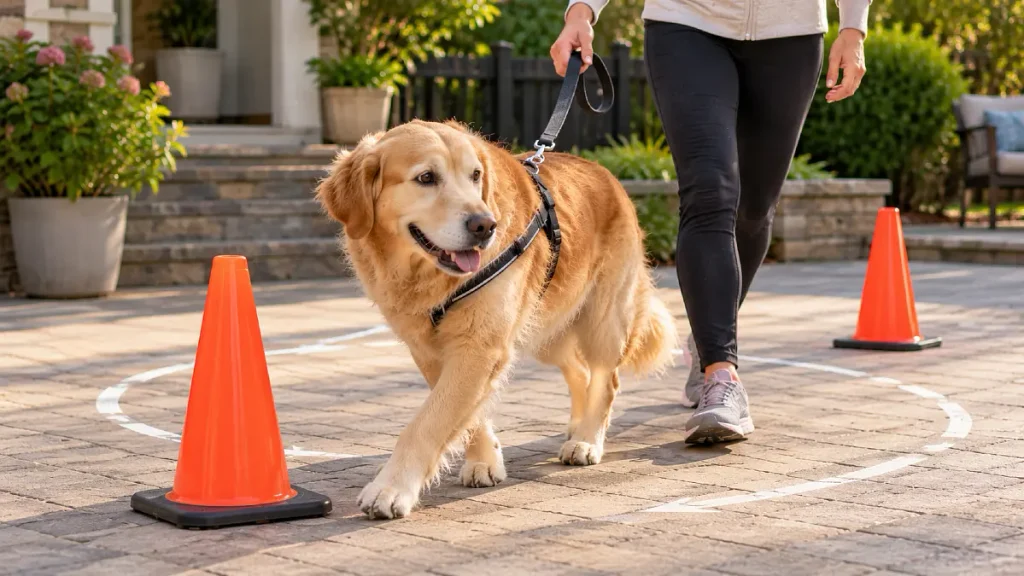
Recovery stage: Coordination and gentle turning
Walking in a straight line is usually easier than changing direction. Wide figure eight exercises help your dog practice gentle turns while shifting weight between their legs.
Veterinary Specialty Center and MedVet include figure eight walking in rehabilitation programs. Your dog should already be walking comfortably before you introduce this activity, and your surgeon must approve it.
How to Walk a Figure Eight
Place two stable objects several feet apart in an open area with good footing. Large cones or sturdy household objects can work if they cannot tip over or roll.
Keep your dog on a short leash and walk slowly around the first object. Continue around the second object to form a wide figure eight pattern.
Use large, gentle curves rather than tight circles. Sharp turns can place extra demands on the healing knee, especially before bone healing has been confirmed.
Begin with a small number of passes approved by your rehabilitation therapist. Rest between attempts and keep the pace slow enough for your dog to place their paws carefully.
What to watch for: Your dog should turn comfortably in both directions without stumbling or hopping. If they begin limping more or struggle on one side, stop and ask your veterinarian to assess the problem.
The aim is better coordination, not faster movement. Your dog should complete the exercise calmly rather than treating it like a game of chase.
7. Low Ground Poles to Improve Paw Placement in Weeks 8 to 12
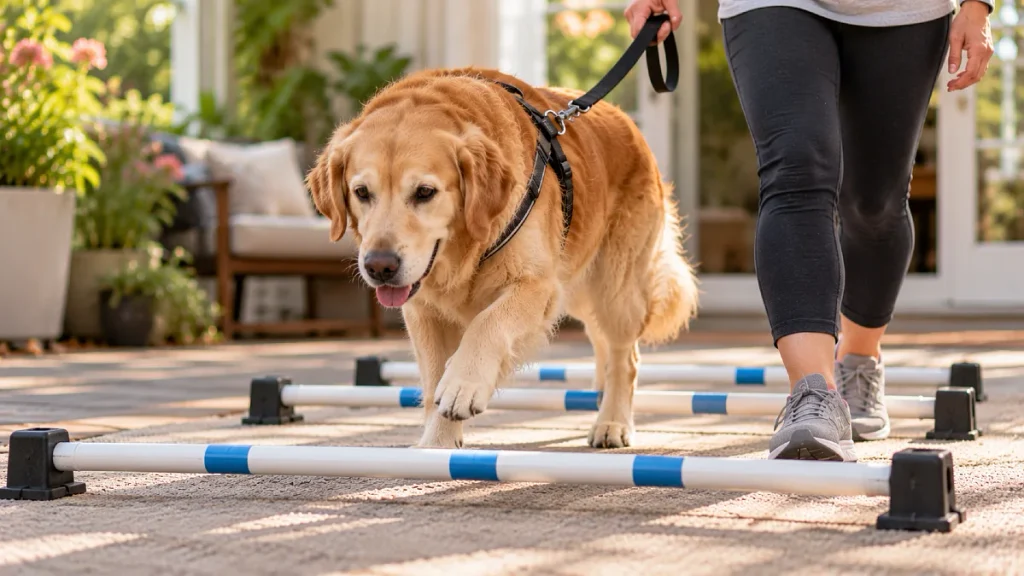
Recovery stage: Coordination after veterinary clearance
Low ground poles encourage your dog to lift and place each paw carefully. This can help rebuild coordination and body awareness after several weeks of restricted activity.
MedVet includes ground pole exercises in its rehabilitation program. The starting week depends on the surgeon’s protocol, and a cautious approach is to wait for the healing assessment before introducing this added challenge.
How to Set Up Ground Poles
Choose a flat area with a nonslip surface and enough room for slow walking. Place several stable poles on the floor, with spacing appropriate for your dog’s size and normal stride.
Ask your rehabilitation therapist to demonstrate the correct spacing and height. The poles should not roll, and your dog should be able to step over them without jumping.
Guide your dog forward slowly on a short leash. Allow enough time for them to look down and place their paws between the obstacles.
If your dog repeatedly catches their feet, hops, or walks around the poles, stop and simplify the setup. Do not raise the poles or increase the number of obstacles without professional guidance.
When Ground Pole Work May Need Professional Help
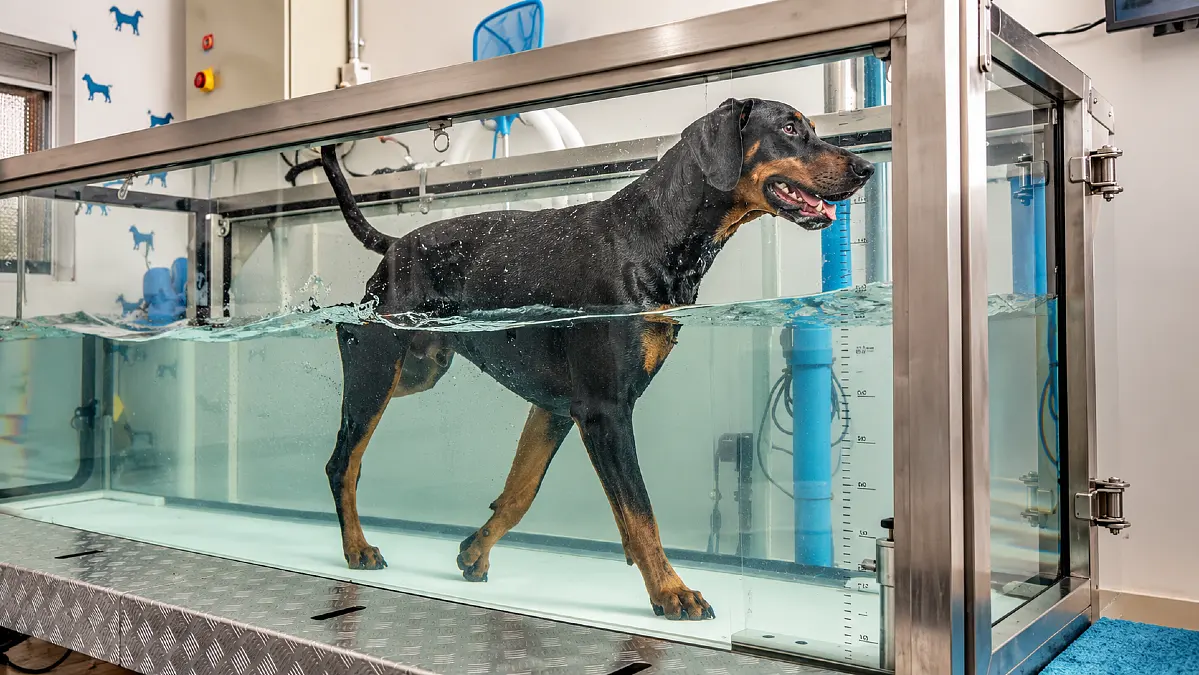
Some dogs need more support than a home exercise routine can provide. A veterinary rehabilitation clinic may use controlled equipment or an underwater treadmill to help them rebuild movement.
Our guide to hydrotherapy for dogs explains when supervised water exercise may be considered. You can also compare an underwater treadmill versus swimming for dogs to see how these therapies work differently.
Water exercise is not a substitute for surgical clearance, and it is not safe for every dog. Incisions must be healed, and a veterinarian must decide whether and when water therapy is appropriate.
8. Gentle Hill Walks to Build Hind Leg Strength in Weeks 8 to 12
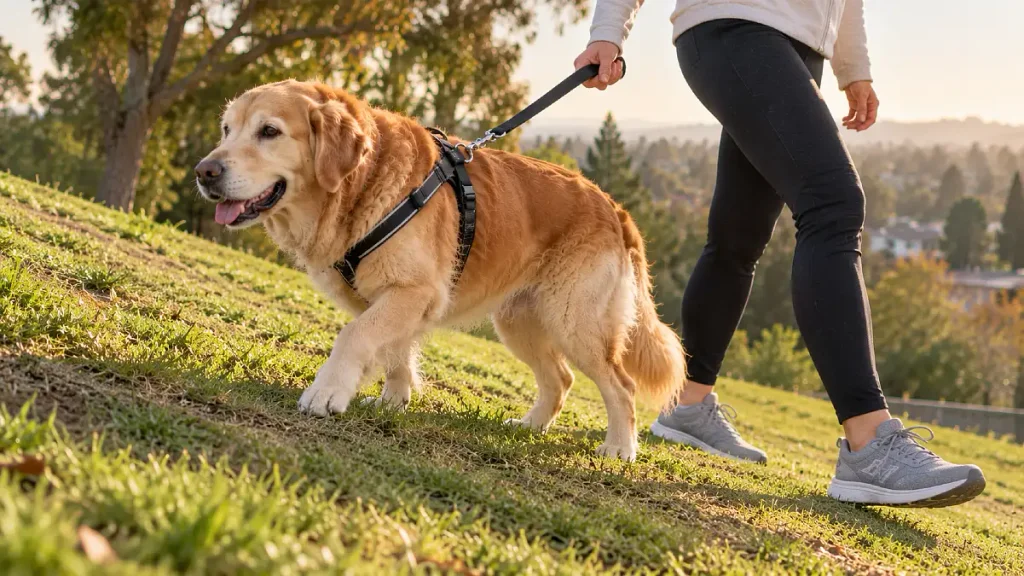
Recovery stage: Gradual strengthening after the healing check
Walking uphill makes your dog use their hind legs differently from walking on flat ground. Gentle slopes can become a useful strengthening exercise once your surgeon confirms that the knee is healing well.
Brunswick Veterinary Hospital includes hill walking during progressive rehabilitation. However, the amount of incline work your dog can manage depends on their strength, walking pattern, and veterinary assessment.
How to Introduce Gentle Hill Walking
Find a short, gradual slope with firm, even footing. Avoid steep hills, wet grass, loose stones, and other surfaces where your dog might slip.
Walk slowly uphill with your dog on a short leash. Keep the session brief and stop before they become tired or begin moving unevenly.
Walking downhill can require extra control, so do not assume it is equally comfortable. Ask your rehabilitation therapist whether downhill walking should be introduced separately.
What to watch for: Your dog should maintain a steady walking pace without dragging their paws or hopping. Increased limping later in the day or the next morning can also mean the activity was too demanding.
Why Strengthening Both Hind Legs Matters
Protecting the operated knee is important, but you should also pay attention to your dog’s other hind leg. Dogs with a cranial cruciate ligament injury in one knee may develop a similar problem in the opposite knee.
Our guide to the risk of tearing the other ACL in dogs explains the warning signs and factors that may affect future knee health. There is no guaranteed way to prevent another tear, but maintaining a healthy body weight and building steady fitness are sensible goals to discuss with your veterinarian.
9. Low Curb Steps to Restore Movement Control in Weeks 10 to 16
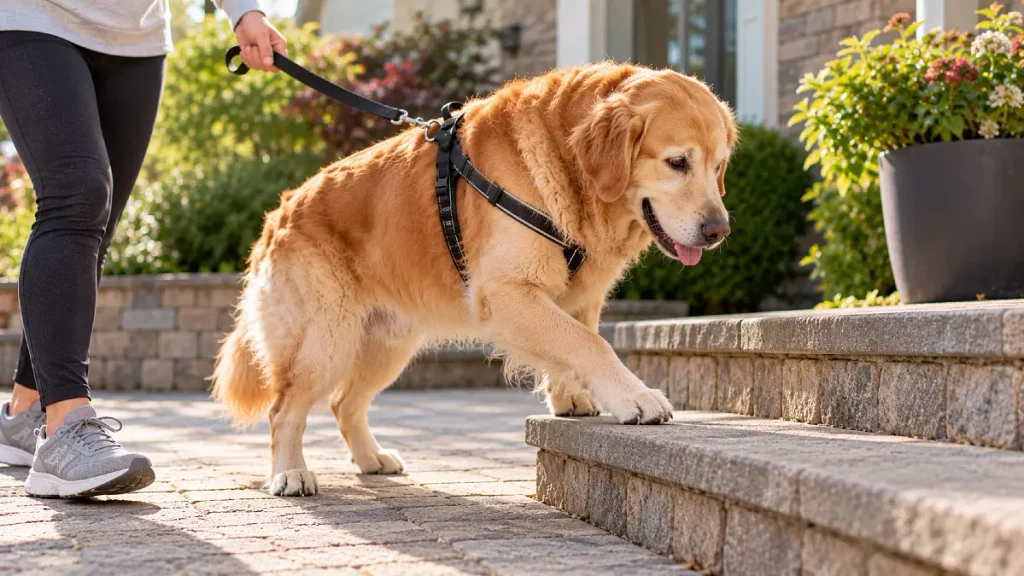
Recovery stage: Advanced strengthening after bone healing assessment
Stepping onto a low curb requires your dog to lift their paws and control their body weight. This exercise can help prepare them for everyday changes in height, such as door thresholds and small outdoor steps.
Curb work appears in MedVet’s TPLO home rehabilitation program. It should begin only when your surgeon confirms that healing and leg function are suitable for this activity.
How to Practice Low Curb Steps
Choose a low, stable step with a nonslip surface and enough space to stand safely. Your rehabilitation therapist can recommend a suitable height based on your dog’s size and strength.
Keep your dog on a short leash and guide them slowly onto the step. Let them pause briefly before stepping down in a controlled manner.
Do not allow jumping or fast movements. If your dog struggles to lift the operated leg, leans heavily on the front legs, or appears uncomfortable, stop.
Start with only a few repetitions if your veterinarian approves. Gradual, controlled movement is more important than completing a large number of steps.
When to Ask a Rehabilitation Specialist for Help
If your dog still struggles with basic movements after the expected recovery period, further assessment may be useful. A specialist can look at muscle weakness, balance, joint motion, and the way your dog walks.
Our guide to choosing a dog rehab clinic explains which professional credentials to look for and what questions to ask. It can also help you find a clinic that provides a written home exercise plan.
Professional rehabilitation may add to your overall recovery expenses, so it is worth planning ahead. Our 2026 dog hydrotherapy and rehabilitation cost survey shows published prices from US clinics and explains why treatment costs vary.
10. Slow Stair Practice to Prepare for Daily Life After Clearance
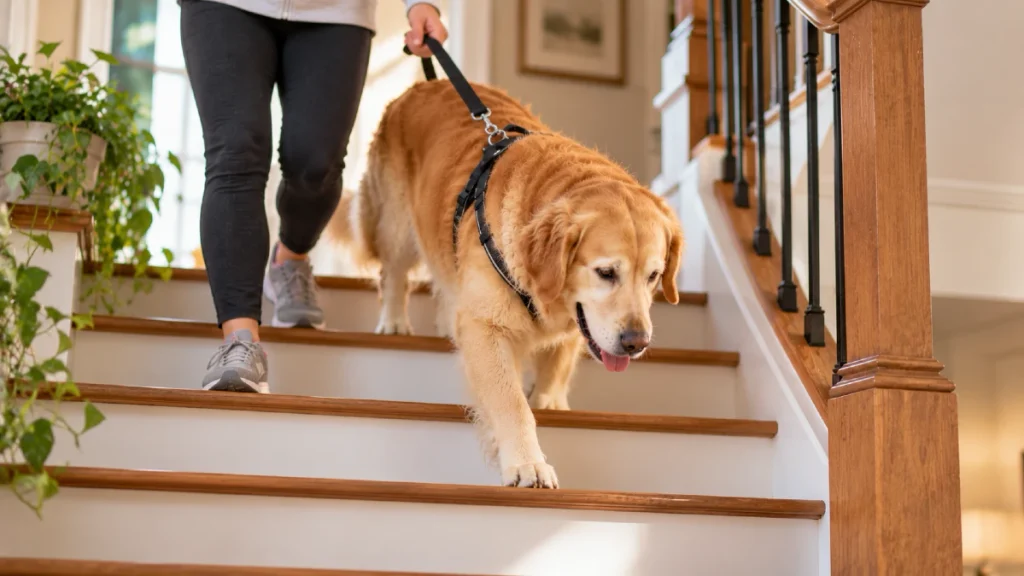
Recovery stage: Later recovery after veterinary clearance
Stairs are a normal part of life for many dogs, but climbing and descending them requires strength and balance. This makes them one of the activities owners need to manage carefully after TPLO surgery.
Most early recovery plans restrict unnecessary stair use because a slip or sudden movement could damage the healing repair. Stair exercise should begin only when your veterinarian has confirmed that it is appropriate.
How to Practice Stairs Safely
Start with a small number of steps that have a secure, nonslip surface. Keep your dog on a short leash and use a support harness if your veterinarian recommends one.
Allow your dog to climb slowly without pulling or rushing. When descending, provide steady support and give them enough time to place their paws carefully.
Do not allow your dog to run up or down stairs during rehabilitation. Even after healing has been confirmed, returning to normal stair use should be gradual.
Important: Being able to climb stairs does not mean your dog is ready to jump onto furniture, chase toys, or run freely. These activities have different physical demands and should be introduced only after approval.
TPLO Recovery Warning Signs You Should Never Ignore
As your dog becomes more active, watch for changes that could suggest pain or a healing problem. The following signs should help you decide when to stop exercising and seek veterinary care.
| Warning sign | Immediate action | Next step |
|---|---|---|
| Sudden severe limping | Stop activity | Contact surgeon promptly |
| Increasing swelling | Stop exercises | Arrange veterinary advice |
| Incision opens or drains | Prevent licking | Prompt veterinary check |
| Crying or clear pain | Stop movement | Contact your vet |
| Marked fatigue after exercise | Rest | Review activity plan |
Some mild swelling and uneven leg use may occur early in recovery, but worsening symptoms should not be ignored. Our guide to TPLO complications and warning signs explains what may be expected at different stages and when veterinary attention is needed.
If your dog suddenly cannot use the operated leg, collapses, or appears severely distressed, seek urgent veterinary care. Do not attempt additional exercises to see whether the problem improves.
Help Your Dog Recover Safely With the Right TPLO Rehab Exercises
TPLO recovery takes patience, and your dog may improve at a different pace than another dog. Gentle movements, controlled walking, and carefully planned strengthening exercises can help restore mobility without rushing the healing process.
Start with the activities your surgeon approves and introduce new challenges only when your dog is ready. Watch for changes in comfort, walking ability, and strength rather than focusing only on the number of weeks since surgery.
Once your dog has completed surgical rehabilitation, a regular activity plan may help maintain muscle strength and joint comfort. For older dogs with joint disease, our guide to gentle home exercises for dogs with arthritis offers ideas to discuss with your veterinarian.