Training a puppy is an adventure—equal parts joy, chaos, and the occasional “why is there a slipper in your water bowl?” moment.
I’ve been there, standing in the pet aisle, staring at rows of treats, wondering which ones will actually work. Some are too big. Some crumble into oblivion. And some? Well, let’s just say my pup looked at them like I’d personally offended him.
You don’t need just any treat. You need the kind that makes your pup’s ears perk up, tail go wild, and focus laser-sharp.
Lucky for you (and your soon-to-be well-trained pup), I’ve rounded up five chicken-based training treats that’ll turn “sit” into second nature. Let’s dig in!
Save this Post for Later! ⬇️
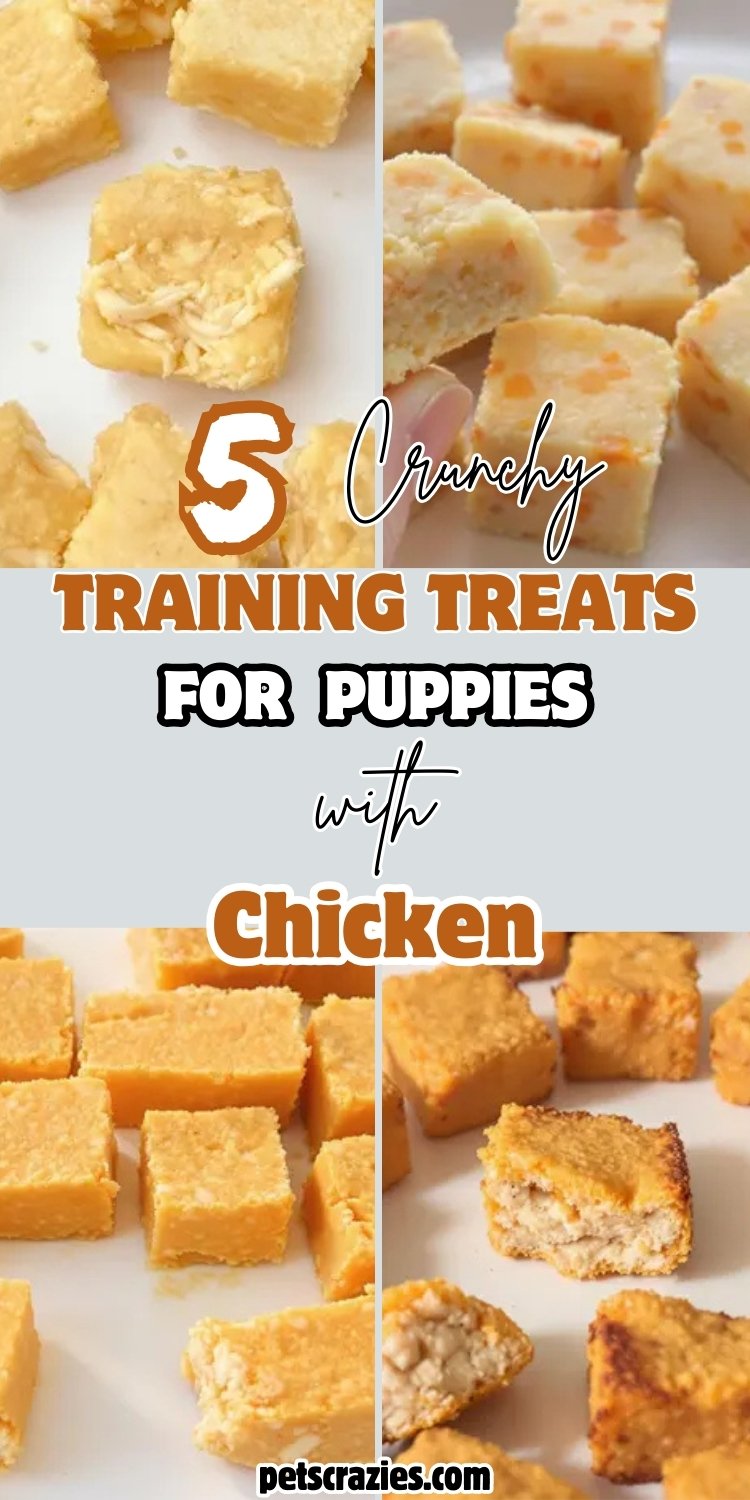
#1. The Ultimate Homemade Chicken Dog Training Treats Recipe
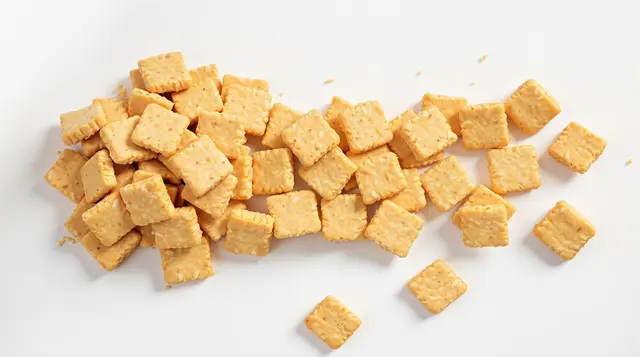
There’s nothing quite as rewarding as seeing your dog’s tail wag with excitement when you bring out a tasty homemade treat. If you’re like me, you want to provide your pup with the best nutrition possible while ensuring that every bite is safe, healthy, and absolutely delicious.
That’s why I created this simple and nutritious homemade chicken dog training treat recipe. Whether you’re working on obedience training, rewarding good behavior, or just want to spoil your furry friend, these bite-sized snacks are perfect!
Why These Chicken Training Treats Are Perfect for Your Dog
Finding the right training treat can be tricky. You want something small enough to use repeatedly during a training session but also flavorful enough to keep your pup motivated.
These treats check all the boxes! Made with real chicken, they are packed with protein, making them not only irresistible but also highly nutritious.
The soft texture is easy to chew, making them great for puppies and senior dogs alike. They are also made with simple, wholesome ingredients, so you’ll know exactly what’s going into your dog’s diet—no artificial preservatives or unnecessary fillers.
Training can be frustrating when you don’t have the right rewards, but these treats make it easier by being both enticing and easy to digest.
Plus, they’re easy to make in batches, so you’ll always have a healthy supply on hand for training sessions or quick rewards throughout the day.
Why You’ll Love This Recipe
- Cost-effective: Making your own dog treats is much cheaper than buying premium store-bought brands.
- Ingredient control: You decide what goes into your dog’s treats, ensuring no artificial flavors, preservatives, or unhealthy fillers.
- Storage convenience: These treats store well at room temperature, in the fridge, or even in the freezer for long-term use.
- Perfect for training: Small, flavorful, and easy to break into smaller pieces if needed.
- Portion control: Ideal for managing your dog’s calorie intake while reinforcing positive behavior.
- Great for multi-dog households: If you have more than one pup, you can easily make a large batch and store them for extended use.
Essential Information Before You Start
- Prep Time: 15 minutes
- Cook Time: 15 minutes
- Total Time: 30 minutes
- Yield: About 50 small training treats (depending on size)
- Size per Treat: ~½-inch square (adjust as needed)
- Shelf Life: 1 week at room temperature, 2 weeks refrigerated, 3 months frozen
- Storage Requirements: Airtight container at room temperature or in the fridge/freezer
What You’ll Need
Making these treats doesn’t require fancy equipment, just a few basic kitchen tools:
- Mixing bowl
- Measuring cups
- Rolling pin
- Sharp knife or small cookie cutter
- Baking sheet
- Parchment paper
- Wire rack for cooling
If you don’t have a rolling pin, you can use a clean glass bottle. For shaping, a knife works fine, but if you want fun shapes, small cookie cutters are a great alternative!
Ingredients

- 1 cup (140g) cooked chicken, shredded
- ½ cup (60g) whole wheat flour (or oat flour for a grain-free option)
- ¼ cup (60ml) vegetable oil (such as coconut oil or olive oil)
- ¼ cup (60ml) water
For added flavor and nutrition, you can mix in a teaspoon of chopped parsley or a tablespoon of grated cheese. If your dog has specific dietary needs, you can also swap out the flour for a gluten-free alternative like chickpea flour.
Expert Tips for Success
- Use freshly cooked chicken – It should be plain and unseasoned to avoid harmful ingredients like garlic or onion.
- Adjust flour quantity as needed – If the dough is too sticky, add a little more flour; if too dry, add a bit of water.
- Keep treats bite-sized – Small treats are better for training and portion control.
- Don’t overbake – These should be firm but not rock hard, especially for puppies or older dogs with sensitive teeth.
Step-by-Step Instructions
- Preheat the Oven: Set your oven to 375°F (190°C) and line a baking sheet with parchment paper.
- Prepare the Dough: In a medium bowl, combine shredded chicken, flour, vegetable oil, and water. Stir until a dough forms.
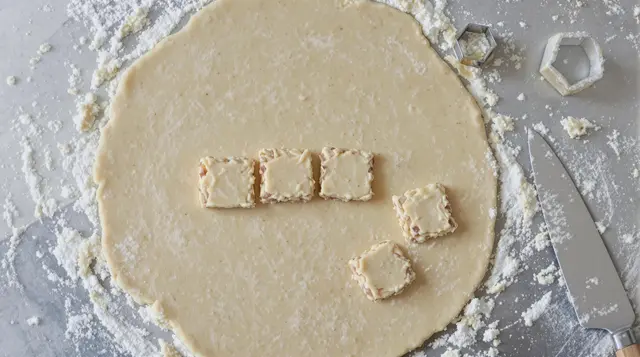
- Roll It Out: Lightly flour a surface and roll out the dough to about ¼-inch (0.6 cm) thickness.
- Cut into Treats: Use a knife or small cookie cutter to cut out bite-sized pieces.
- Bake the Treats: Place the pieces on the prepared baking sheet and bake for about 15 minutes or until firm and golden.
- Cool Completely: Allow the treats to cool on a wire rack before serving or storing.
Dietary Adaptations & Substitutions
If your dog has special dietary needs, this recipe is easy to modify. For a grain-free version, swap whole wheat flour for coconut or chickpea flour.
If your dog needs extra protein, you can mix in a tablespoon of finely ground flaxseed. For senior dogs or puppies with sensitive teeth, you can make softer treats by adding an extra tablespoon of water to the dough and baking for a slightly shorter time.
How to Store & Serve These Treats
For the freshest treats, store them in an airtight container at room temperature for up to a week. If you make a big batch, refrigerate them for up to two weeks or freeze them for up to three months. When frozen, let them thaw for a few minutes before serving.
Serving Recommendations
Since these treats are small and protein-rich, they’re great for training rewards. For small dogs, offer 1-2 treats per session; for medium dogs, 3-5; and for large breeds, 5-7. Always ensure treats make up no more than 10% of your dog’s daily calorie intake.
Common Questions & Troubleshooting
1. Can I use raw chicken instead of cooked? No, always use fully cooked chicken to avoid potential bacteria that can be harmful to dogs.
2. My treats turned out too hard. What went wrong? You may have overbaked them. Try reducing the bake time or adding an extra splash of water to the dough for a softer texture.
3. Can I use a dehydrator instead of an oven? Yes! You can dehydrate these treats at 150°F (65°C) for a few hours for a crunchy alternative.
#2. Soft & Savory Chicken Training Treats for Puppies
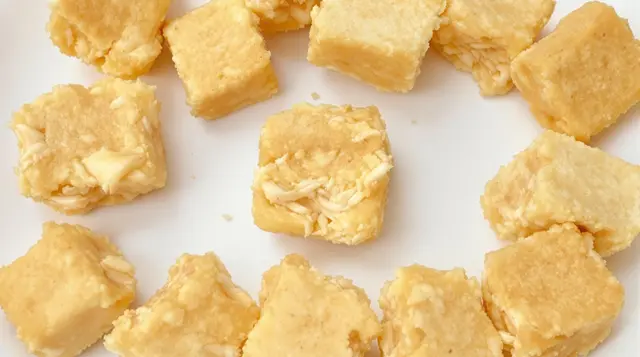
When you’re training a new puppy, the right treat can make all the difference. Puppies need something that’s soft, easy to chew, and packed with flavor to keep them motivated.
That’s why I developed this Soft & Savory Chicken Training Treats recipe—perfectly bite-sized, nutritious, and absolutely irresistible to your furry little friend.
These treats are made with real chicken, a great source of lean protein, and other dog-friendly ingredients that promote overall health. They are small enough to be given repeatedly during training sessions without overfeeding your pup.
Why These Chicken Training Treats Are Perfect for Puppies
Puppies have delicate teeth and sensitive digestive systems, so hard or overly processed treats may not be the best option.
This recipe is designed to be soft and gentle on their little mouths while still providing a delicious taste they’ll love.
The combination of real chicken and healthy ingredients ensures your puppy gets the nutrition they need while learning important commands and behaviors.
If you’re working on house training, leash training, or basic obedience, you’ll love how these treats grab your pup’s attention.
Plus, since they’re homemade, you can control the ingredients, avoiding harmful additives and preservatives found in many store-bought treats.
Why You’ll Love This Recipe
- Soft and chewy: Perfect for young puppies and small breeds.
- High in protein: Made with real chicken for muscle growth and energy.
- Easy to digest: No artificial additives or unnecessary fillers.
- Quick and simple: Takes only 30 minutes from start to finish.
- Perfect for training: Small size means you can use multiple treats per session.
- Customizable: Can be made grain-free or with additional supplements for extra benefits.
Essential Information Before You Start
- Prep Time: 10 minutes
- Cook Time: 15 minutes
- Total Time: 25 minutes
- Yield: About 40 small training treats
- Size per Treat: ~½-inch cube (adjust as needed)
- Shelf Life: 5 days refrigerated, 3 months frozen
- Storage Requirements: Airtight container in fridge/freezer
What You’ll Need
To prepare these puppy-friendly treats, you don’t need any fancy tools. Just grab the essentials:
- Food processor or blender
- Baking sheet
- Parchment paper
- Mixing bowl
- Measuring cups
- Sharp knife or small cookie cutter
If you don’t have a food processor, finely chop or mash the chicken with a fork. A small cookie cutter can be used for fun shapes, but a simple knife will work just as well for quick prep.
Ingredients
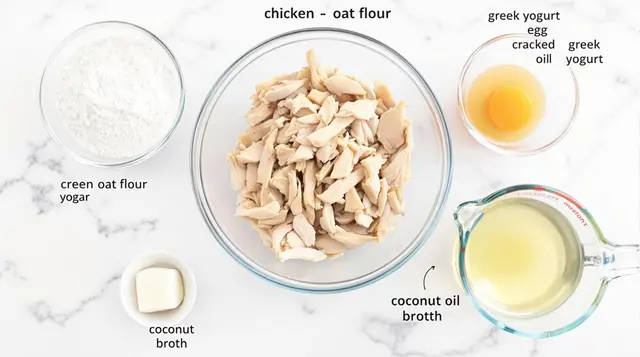
- 1 cup (140g) cooked chicken, shredded
- ½ cup (60g) oat flour (or rice flour for a grain-free option)
- 1 egg
- 2 tbsp (30ml) plain Greek yogurt (for probiotics and creaminess)
- 1 tbsp (15ml) coconut oil (healthy fats for coat health)
- ¼ cup (60ml) low-sodium chicken broth (to soften the dough)
For extra nutrition, you can mix in a teaspoon of ground flaxseed or a pinch of turmeric for anti-inflammatory benefits. If your puppy has dietary sensitivities, substitute oat flour with chickpea flour for a grain-free option.
Expert Tips for Success
- Use high-quality chicken – Cooked, unseasoned chicken is best. Avoid garlic, onion, or excessive salt.
- Adjust the consistency – If the dough is too sticky, add a little more flour; if too dry, add an extra teaspoon of broth.
- Keep treats bite-sized – Small treats ensure your puppy doesn’t fill up too fast during training.
- Bake at low heat – This prevents the treats from getting too crunchy, keeping them soft and chewy.
Step-by-Step Instructions
- Preheat the Oven: Set your oven to 325°F (163°C) and line a baking sheet with parchment paper.
- Blend the Ingredients: In a food processor, combine cooked chicken, oat flour, egg, yogurt, coconut oil, and chicken broth. Blend until a smooth dough forms.
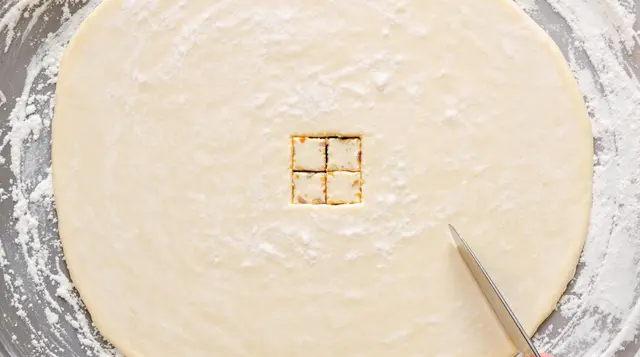
- Shape the Treats: Transfer the dough to a floured surface and roll it out to about ¼-inch (0.6 cm) thickness. Cut into small squares or use a cookie cutter.
- Bake the Treats: Arrange the treats on the prepared baking sheet and bake for about 15 minutes until they are firm but still soft.
- Cool Completely: Let the treats cool on a wire rack before serving or storing.
Dietary Adaptations & Substitutions
If your puppy has specific dietary needs, this recipe is easy to modify. For a grain-free version, use coconut or chickpea flour instead of oat flour.
If your puppy needs extra protein, you can mix in a tablespoon of finely ground flaxseed. For extra softness, you can add an additional tablespoon of chicken broth to keep the treats moist.
How to Store & Serve These Treats
Since these treats are free of preservatives, proper storage is key to keeping them fresh. Store them in an airtight container in the refrigerator for up to 5 days.
If making a big batch, freeze them for up to 3 months. To serve from frozen, let them thaw at room temperature for a few minutes.
Serving Recommendations
These treats are designed for training, so portion control is important. For small puppies, offer 1-2 treats per training session; for medium breeds, 3-5; and for larger puppies, 5-7. Always monitor your pup to ensure they don’t overindulge.
Common Questions & Troubleshooting
1. Can I use raw chicken instead of cooked? No, always use fully cooked chicken to avoid bacterial risks.
2. My treats are too dry. What should I do? Add a bit more chicken broth or yogurt to moisten the dough.
3. Can I use a dehydrator instead of baking? Yes! You can dehydrate these treats at 150°F (65°C) for a chewy alternative.
#3. Crunchy Chicken & Sweet Potato Training Treats for Puppies
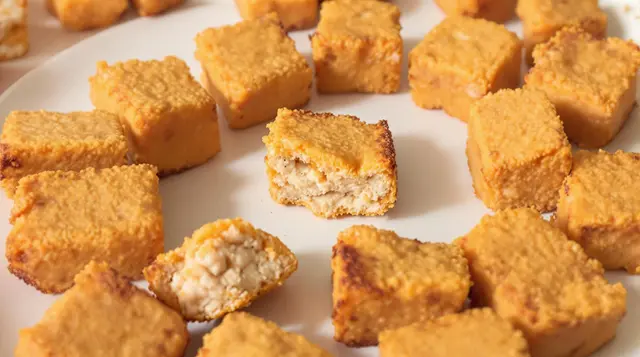
Training your puppy requires patience, consistency, and the perfect motivation—delicious treats! These Crunchy Chicken & Sweet Potato Training Treats are packed with protein, fiber, and irresistible flavors that will keep your puppy focused and eager to learn.
Unlike store-bought options, these treats contain only natural, dog-safe ingredients, making them a healthy choice for rewarding good behavior.
Why These Training Treats Stand Out
Puppies love a good crunch, and these treats offer just the right texture—crispy on the outside but still easy to chew for young teeth.
The combination of real chicken and sweet potato provides a balance of lean protein and complex carbohydrates, ensuring your puppy stays energized without unnecessary fillers. Plus, the homemade nature of these treats means you can control every ingredient, ensuring your pup gets nothing but the best.
If you’re looking for a longer-lasting training treat, these can also be made into mini biscuit-style chews, perfect for keeping your puppy occupied after a successful training session.
Why You’ll Love This Recipe
- Crunchy yet chewable: Ideal for puppies still developing their teeth.
- Nutrient-packed: Chicken provides protein, while sweet potato adds vitamins and fiber.
- Simple ingredients: No preservatives or artificial additives.
- Great for training: Small, bite-sized pieces for quick rewards.
- Easily customizable: Adapt the recipe for grain-free or softer treats.
- Cost-effective: Save money compared to premium pet store treats.
Essential Information Before You Start
- Prep Time: 10 minutes
- Cook Time: 30 minutes
- Total Time: 40 minutes
- Yield: About 50 small treats
- Size per Treat: ~½-inch cube (adjust as needed)
- Shelf Life: 7 days refrigerated, 3 months frozen
- Storage Requirements: Airtight container in fridge/freezer
What You’ll Need
These treats require just a few basic tools:
- Baking sheet
- Parchment paper
- Mixing bowl
- Food processor or blender
- Rolling pin (optional)
- Small cookie cutter or knife
Ingredients

- 1 cup (140g) cooked chicken, finely chopped or blended
- ½ cup (120g) mashed sweet potato
- 1 cup (120g) whole wheat flour (or coconut flour for a grain-free option)
- 1 egg
- 1 tbsp (15ml) olive oil (for a crispy texture)
- ¼ cup (60ml) low-sodium chicken broth
Optional add-ins for extra nutrition: a teaspoon of flaxseed for Omega-3s or a pinch of cinnamon for flavor and digestion support.
Expert Tips for Success
- Use freshly cooked chicken – Avoid seasoned or pre-packaged meats.
- For extra crunch, bake longer – An additional 5 minutes will create a crispier texture.
- If the dough is sticky, add more flour – A small amount at a time to prevent over-drying.
- Portion treats appropriately – Small, bite-sized pieces are best for training.
- Let them cool completely – This allows them to firm up properly before storing.
Step-by-Step Instructions
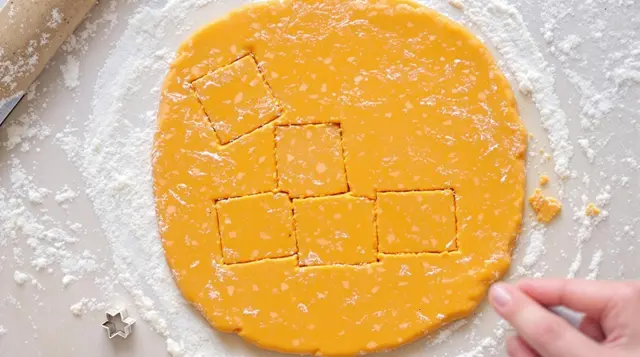
- Preheat the Oven: Set your oven to 350°F (175°C) and line a baking sheet with parchment paper.
- Prepare the Dough: In a mixing bowl, combine chicken, mashed sweet potato, flour, egg, olive oil, and chicken broth. Stir until a dough forms.
- Roll and Cut: Transfer the dough to a floured surface and roll it out to about ¼-inch (0.6 cm) thickness. Cut into small squares or use a mini cookie cutter.
- Bake the Treats: Place the treats on the baking sheet and bake for 25-30 minutes until golden brown and crisp.
- Cool and Store: Allow the treats to cool completely before storing them in an airtight container.
Dietary Adaptations & Substitutions
For grain-free treats, swap out the whole wheat flour with coconut or almond flour. If your puppy prefers a softer texture, bake for only 20 minutes and store in the fridge.
How to Store & Serve These Treats
Keep these treats in an airtight container in the fridge for up to a week. If making a large batch, freeze them for up to 3 months and thaw before use.
Serving Recommendations
Since these are training treats, moderation is key. For small puppies, limit to 3-5 treats per training session; for medium breeds, 5-7; and for larger puppies, 7-10. Always adjust based on your puppy’s activity level and diet.
Common Questions & Troubleshooting
1. Can I use raw chicken instead of cooked? No, always use cooked chicken to avoid bacterial risks.
2. My treats are too hard. What should I do? Reduce the baking time or add an extra tablespoon of broth for a softer texture.
3. Can I make these without an oven? Yes! Use a dehydrator at 150°F (65°C) for a crunchy alternative.
#4. Soft & Chewy Chicken and Carrot Training Treats for Puppies
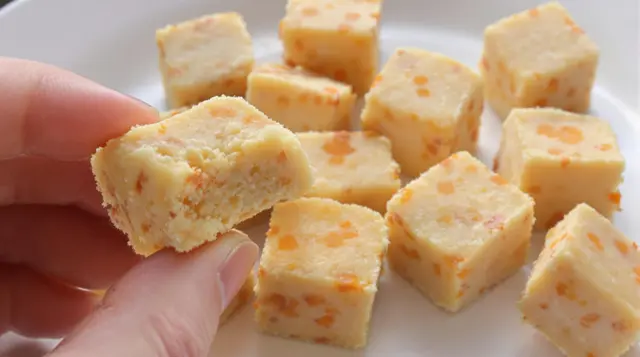
Training your puppy is one of the most rewarding experiences, and having the perfect treat can make all the difference.
These Soft & Chewy Chicken and Carrot Training Treats are designed to be easy to chew, digestible, and packed with flavor to keep your pup engaged and eager to learn.
Unlike many store-bought treats, these are free from artificial additives and made with wholesome, dog-safe ingredients that support your puppy’s health.
Why These Training Treats Are Perfect for Puppies
Puppies have sensitive teeth and developing digestive systems, which is why a soft, chewy treat is ideal for training.
The natural sweetness of carrots pairs perfectly with protein-rich chicken to create a nutrient-dense, delicious reward. These treats are small, making them great for positive reinforcement without overfeeding.
If you’re looking for a high-value training reward, these bite-sized treats will hold your puppy’s attention without crumbling in your pocket or treat pouch!
Why You’ll Love This Recipe
- Soft and chewy texture – Easy for puppies to eat.
- Protein-packed and nutrient-rich – Chicken for lean protein, carrots for vitamins.
- Simple, natural ingredients – No fillers or artificial preservatives.
- Perfect for training – Small, easy-to-handle pieces for quick rewards.
- Customizable – Adjust the texture or ingredients based on dietary needs.
- Cost-effective – More affordable than premium store-bought treats.
Essential Information Before You Start
- Prep Time: 10 minutes
- Cook Time: 20 minutes
- Total Time: 30 minutes
- Yield: About 60 small treats
- Size per Treat: ~½-inch cube
- Shelf Life: 5 days refrigerated, 2 months frozen
- Storage Requirements: Airtight container in fridge/freezer
What You’ll Need
These treats are simple to make with common kitchen tools:
- Baking sheet
- Parchment paper
- Mixing bowl
- Food processor or blender
- Silicone mold (optional)
- Sharp knife or mini cookie cutter
Ingredients
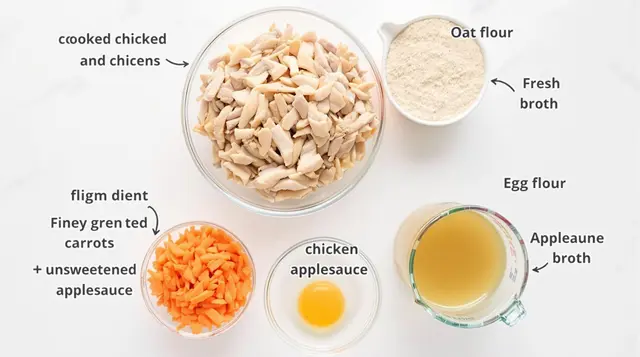
- 1 cup (140g) cooked, shredded chicken
- ½ cup (60g) finely grated carrot
- 1 cup (120g) oat flour (or coconut flour for grain-free option)
- 1 egg
- 2 tbsp (30ml) unsweetened applesauce
- ¼ cup (60ml) low-sodium chicken broth
Optional add-ins: A teaspoon of ground flaxseed for extra fiber or a pinch of turmeric for anti-inflammatory benefits.
Expert Tips for Success
- Use finely grated carrot – This ensures an even texture in the dough.
- If the dough is too sticky, add more oat flour – A tablespoon at a time.
- For softer treats, bake for less time – Around 15 minutes.
- Let them cool before serving – This helps the texture firm up slightly.
- Portion appropriately for training – Tiny pieces work best.
Step-by-Step Instructions

- Preheat the Oven: Set your oven to 325°F (165°C) and line a baking sheet with parchment paper.
- Prepare the Dough: In a mixing bowl, combine shredded chicken, grated carrot, oat flour, egg, applesauce, and chicken broth. Stir until a sticky dough forms.
- Shape the Treats: Roll out the dough on a lightly floured surface to about ¼-inch thickness. Cut into small squares or use a mini cookie cutter.
- Bake the Treats: Place the treats on the baking sheet and bake for 18-20 minutes until set but still soft.
- Cool and Store: Let the treats cool completely before storing them in an airtight container.
Dietary Adaptations & Substitutions
For grain-free treats, swap out oat flour with coconut or almond flour. If your puppy prefers a crunchier treat, bake for an extra 5 minutes.
How to Store & Serve These Treats
Store these treats in the refrigerator for up to 5 days, or freeze them for up to 2 months. Thaw frozen treats before serving.
Serving Recommendations
Since these are training treats, moderation is key. For small puppies, limit to 3-5 treats per training session; for medium breeds, 5-7; and for larger puppies, 7-10. Always adjust based on your puppy’s activity level and diet.
Common Questions & Troubleshooting
1. Can I use raw chicken instead of cooked? No, always use cooked chicken to avoid bacterial risks.
2. My treats are too dry. What should I do? Add a bit more applesauce or broth to soften the texture.
3. Can I make these treats without an oven? Yes! You can use a dehydrator at 150°F (65°C) for a chewier alternative.
#5. Chicken & Pumpkin Bite-Sized Training Treats for Puppies
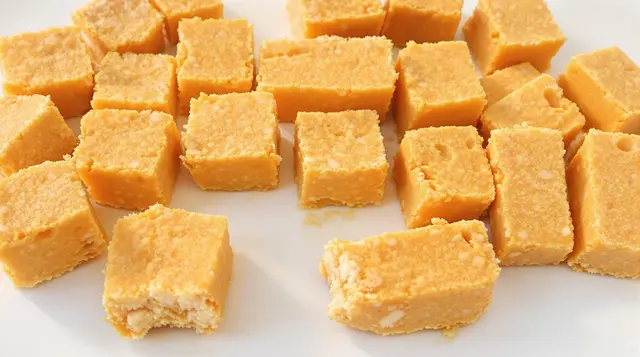
Training your puppy requires patience, consistency, and the right treats to keep them engaged and motivated.
These Chicken & Pumpkin Bite-Sized Training Treats are the perfect reward—small, nutritious, and packed with flavor. They’re designed to be soft enough for young puppies, yet firm enough to handle multiple training sessions without crumbling in your hand or pocket.
Why These Training Treats Are Ideal for Puppies
These treats are specially formulated with high-protein chicken and gut-friendly pumpkin, which is gentle on your puppy’s developing digestive system.
The combination of lean protein and fiber makes these treats both satisfying and easy to digest. Plus, they’re free from artificial preservatives and fillers, making them a healthy alternative to store-bought options.
Perfect for puppy training, these treats are bite-sized and low in calories, so you can reward frequently without worrying about overfeeding.
Why You’ll Love This Recipe
- Small, bite-sized treats – Perfect for training rewards.
- Rich in protein & fiber – Supports digestion and growth.
- All-natural ingredients – No artificial additives or preservatives.
- Quick & easy to make – Simple preparation with minimal ingredients.
- Customizable – Adapt for grain-free or soft texture needs.
- Affordable & healthier – Cheaper than store-bought treats.
Essential Information Before You Start
- Prep Time: 10 minutes
- Cook Time: 20 minutes
- Total Time: 30 minutes
- Yield: Around 75 small treats
- Size per Treat: ~½-inch piece
- Shelf Life: 5 days refrigerated, 2 months frozen
- Storage Requirements: Airtight container in fridge/freezer
What You’ll Need
To make these treats, you’ll need some basic kitchen tools:
- Mixing bowl
- Baking sheet
- Parchment paper
- Food processor or blender
- Sharp knife or mini cookie cutter
Ingredients
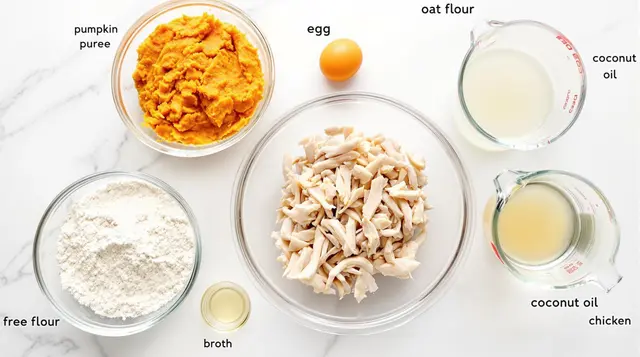
- 1 cup (140g) cooked, shredded chicken
- ½ cup (120g) pure pumpkin puree (unsweetened, no spices)
- 1 cup (120g) oat flour (or coconut flour for grain-free option)
- 1 egg
- 1 tbsp (15ml) coconut oil (melted)
- ¼ cup (60ml) low-sodium chicken broth
Optional add-ins: A pinch of cinnamon for extra flavor or a teaspoon of ground flaxseed for additional fiber.
Expert Tips for Success
- Use plain pumpkin puree – Avoid spiced or sweetened versions.
- If the dough is too sticky, add more oat flour – A tablespoon at a time.
- For softer treats, bake for 15 minutes instead of 20.
- Cool completely before serving – This helps set the texture properly.
- Portion appropriately for training – Small treats work best.
Step-by-Step Instructions
- Preheat the Oven: Set your oven to 325°F (165°C) and line a baking sheet with parchment paper.
- Prepare the Dough: In a food processor, blend shredded chicken, pumpkin puree, oat flour, egg, coconut oil, and chicken broth until smooth.
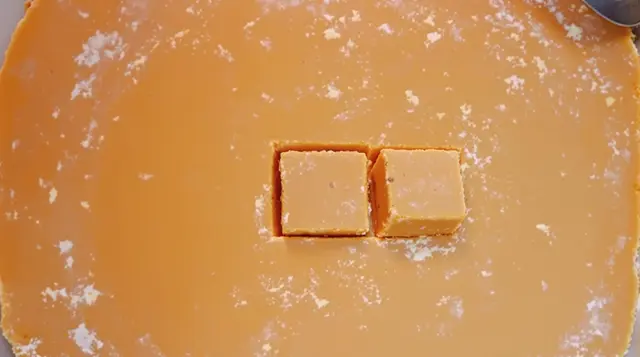
- Shape the Treats: Roll out the dough on a lightly floured surface to about ¼-inch thickness. Cut into tiny squares or use a mini cookie cutter.
- Bake the Treats: Place the treats on the baking sheet and bake for 18-20 minutes until set but still soft.
- Cool and Store: Allow the treats to cool completely before transferring them to an airtight container.
Dietary Adaptations & Substitutions
For grain-free treats, swap out oat flour with coconut or almond flour. If your puppy prefers a softer texture, reduce baking time to 15 minutes.
How to Store & Serve These Treats
Store these treats in the refrigerator for up to 5 days or freeze them for up to 2 months. Thaw frozen treats before serving.
Serving Recommendations
Since these are training treats, moderation is key. Small puppies should have 3-5 treats per session, while medium breeds can have 5-7 treats, and larger puppies can have 7-10 treats. Adjust based on your puppy’s weight and activity level.
Common Questions & Troubleshooting
1. Can I use raw chicken instead of cooked? No, always use cooked chicken to avoid bacterial risks.
2. My treats are too soft. What should I do? Bake them for an extra 5 minutes for a firmer texture.
3. Can I make these treats without an oven? Yes! Use a dehydrator at 150°F (65°C) for a chewier version.


