Travel-friendly homemade cat food recipes make trips stress-free by keeping your feline well-fed and happy on the go.
These nutritious, portable meals are easy to prep, mess-free, and packed with ingredients that support digestion and energy levels.
From protein-rich bites to hydrating options, each recipe ensures your cat stays healthy and satisfied during every adventure.
No more worrying about finding safe food while traveling—just wholesome, homemade goodness ready to serve anytime, anywhere! 🐾
Save this Post for Later!

#1. Homemade Lickable Cat Food: A Travel-Friendly Meal for Your Feline

Cats can be picky eaters, especially when they’re out of their usual environment.
If you’ve ever struggled with feeding your cat during a trip, this homemade lickable cat food might just be your new best friend.
I developed this recipe after a road trip where my cat refused to eat anything store-bought.
He needed hydration and nutrition, but nothing seemed to appeal to him—until I made this smooth, protein-packed, travel-friendly cat food.
This recipe is not only easy to prepare but also ensures that your cat gets essential nutrients while traveling.
It’s grain-free, gentle on sensitive stomachs, and can be stored conveniently in squeezable pouches or small containers.
Whether you’re going on a weekend getaway or a long trip, this homemade meal provides a stress-free feeding solution that keeps your feline happy and nourished.
Why You’ll Love This Recipe
- Cost-Effective: Making your own cat food is significantly cheaper than store-bought lickable treats.
- Healthier Ingredients: No fillers, artificial flavors, or preservatives—just wholesome, cat-friendly ingredients.
- Hydration Boosting: Helps cats stay hydrated, especially during travel when they may drink less water.
- Easy to Store and Carry: Can be refrigerated for a few days and packed in travel-friendly portions.
- Customizable: You can switch up the protein source to suit your cat’s preferences.
Essential Information
- Prep Time: 10 minutes
- Cook Time: 5-6 minutes
- Total Time: 15-20 minutes
- Yield: About 4 ounces (enough for 1-2 meals)
- Shelf Life: Refrigerate for up to 3 days
- Storage: Keep in an airtight container or squeezable pouch
Equipment Needed
To make this lickable cat food, you’ll need a few basic kitchen tools.
A small pot for boiling the protein, a cutting board and knife for chopping, and a blender or food processor to achieve that smooth, lickable texture.
If you don’t have a blender, an immersion blender or even a fork (for a slightly chunkier version) can work in a pinch.
Make sure your storage containers are airtight to maintain freshness and prevent spoilage.
Ingredients
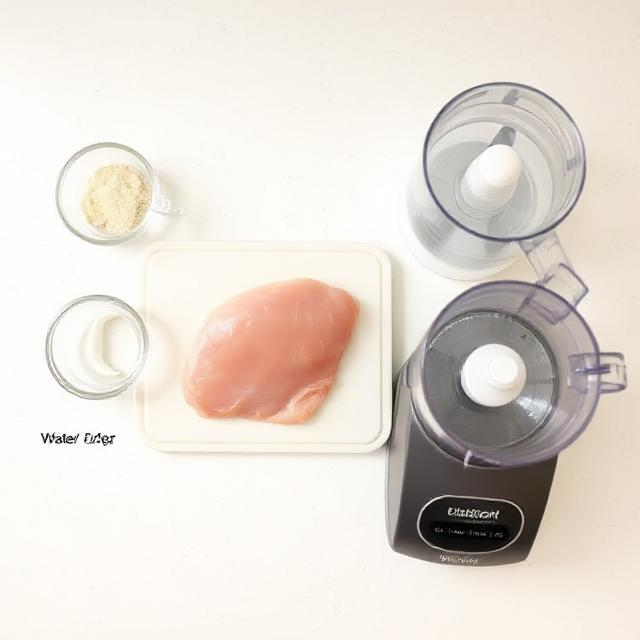
- 4 oz (113g) chicken breast (or turkey/fish as alternatives)
- 4 tbsp (60ml) water
Ingredient Notes: Chicken is a lean, easily digestible protein that cats love. If your cat prefers fish, opt for cooked salmon or tuna (in water, not oil).
Avoid adding any seasoning, as ingredients like salt, garlic, and onion are toxic to cats.
If using turkey, make sure it’s cooked thoroughly and free from added fats or seasonings.
Expert Tips Before You Start
- Use fresh, high-quality protein: Your cat’s food should be as fresh as possible to ensure safety and appeal.
- Ensure proper texture: The goal is a smooth, pudding-like consistency that’s easy for your cat to lick up.
- Don’t add extra ingredients: Cats have sensitive digestive systems; keep it simple.
- Make small batches: Since homemade cat food lacks preservatives, making fresh portions ensures better taste and nutrition.
Step-by-Step Instructions

- Fill a small pot with enough water to cover the chicken and bring it to a boil.
- Add the chicken breast and let it cook for 5-6 minutes until fully cooked (no pink in the center).
- Remove the chicken from the pot and chop it into small pieces.
- Transfer the chicken to a food processor or blender.
- Add 4 tablespoons of water and blend until the mixture becomes smooth and creamy.
- If the mixture is too thick, add small amounts of water until the desired consistency is reached.
- Transfer to an airtight container or squeeze pouch and refrigerate.
- Serve fresh and watch your cat enjoy!
Variations & Substitutions
If your cat has dietary restrictions or preferences, you can easily adjust this recipe. For grain-free adaptations, stick to pure protein sources like turkey or salmon.
For cats with allergies, consider switching to rabbit or duck, which are excellent hypoallergenic proteins.
If your cat needs a softer texture for dental issues, blend the mixture with a bit more water until it’s ultra-smooth.
Pro Tips for Success
- Batch Preparation: Make multiple servings and store them in individual travel-friendly containers.
- Freezing Instructions: If you want to prepare ahead, freeze in small portions and thaw in the refrigerator before serving.
- Serving Suggestions: This recipe is best served at room temperature. Cold food may not be as appealing to your cat.
Serving Guidelines
The amount you serve depends on your cat’s size and daily diet. This treat should not replace your cat’s regular meals but can be a supplementary snack.
For an average-sized adult cat, a couple of tablespoons per serving should be sufficient.
Always ensure your cat has access to fresh water alongside their meal.
Storage & Freshness
Homemade cat food doesn’t last as long as commercial varieties due to the lack of preservatives. Store in an airtight container in the refrigerator and use within three days. If freezing, portion out into small servings and thaw as needed.
Common Questions & Troubleshooting
Q: Can I use raw chicken instead of cooked?
A: It’s not recommended for travel purposes, as raw food can spoil quickly and carries a risk of bacterial contamination.
Q: What if my cat doesn’t like it?
A: Some cats are picky about new textures. Try adding a small amount to their regular food to help them adjust.
Q: Can I add vegetables?
A: Cats are obligate carnivores, so they don’t require vegetables in their diet. Stick to pure protein and water for this recipe.
#2. Salmon & Pumpkin Pâté: A Travel-Ready Feast for Your Feline

Traveling with your cat can be a challenge, especially when it comes to keeping their diet consistent and nutritious.
If you’ve ever found yourself struggling to feed your cat during trips, this Salmon & Pumpkin Pâté is the perfect solution.
Inspired by my own experience with a finicky eater on a road trip, I created this recipe to be both nutrient-rich and easy to pack.
It’s creamy, hydrating, and packed with essential nutrients that will keep your cat satisfied and stress-free while away from home.
This homemade cat food is grain-free, rich in omega-3s, and gentle on sensitive stomachs.
The addition of pumpkin supports digestive health, making it ideal for travel when your cat’s routine is disrupted.
You can store it in small, resealable pouches or airtight containers for convenience, ensuring your cat gets a fresh and delicious meal no matter where you go.
Why You’ll Love This Recipe
- Easy to prepare and store: Simple ingredients with a quick blend-and-serve method.
- Hydration boost: The creamy texture ensures your cat gets extra moisture on the go.
- Digestive support: Pumpkin helps with digestion, reducing the risk of stomach upset.
- Rich in omega-3s: Salmon provides essential fatty acids for a healthy coat and skin.
- Travel-friendly portions: Can be frozen in single servings and thawed as needed.
Essential Information
- Prep Time: 5 minutes
- Cook Time: 10 minutes
- Total Time: 15 minutes
- Yield: About 5 ounces (2-3 small servings)
- Shelf Life: 3 days refrigerated, up to 1 month frozen
- Storage: Airtight containers or silicone squeeze pouches
Equipment Needed
For this recipe, you’ll need a small pot to cook the salmon, a food processor or blender for a smooth texture, and storage containers to keep it fresh.
If you don’t have a blender, a fork can work for a chunkier texture, but blending will create a more appealing pâté.
Silicone baby food pouches or small mason jars make excellent travel storage options.
Ingredients
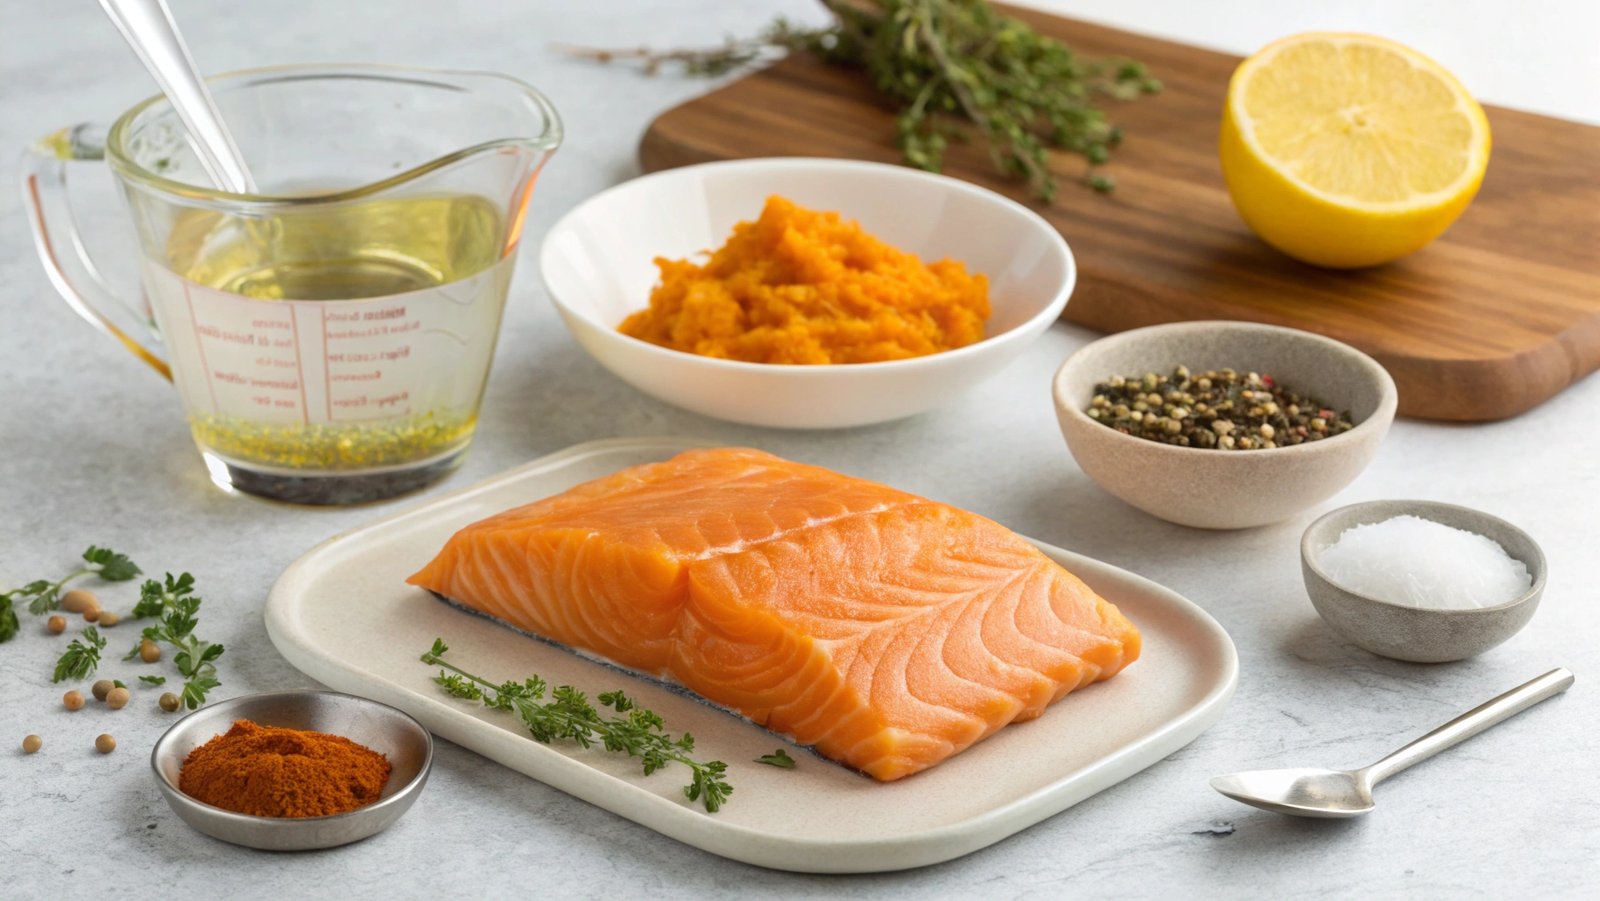
- 4 oz (113g) fresh salmon (or canned in water, drained)
- 1 tbsp (15g) pure pumpkin puree (unsweetened, no spices)
- 2 tbsp (30ml) water or low-sodium bone broth
Ingredient Notes: Salmon is an excellent source of omega-3 fatty acids that support skin, coat, and joint health. Pumpkin is a natural digestive aid that can prevent constipation or diarrhea.
Be sure to use plain, unsweetened pumpkin puree, not pumpkin pie filling, which contains spices and sugar that are harmful to cats.
If using canned salmon, ensure it’s packed in water, not oil or salt.
Expert Tips Before You Start
- Choose high-quality salmon: Opt for wild-caught salmon to avoid excess fat and contaminants.
- Blend to a smooth consistency: The softer texture makes it easier for cats to lap up, especially older cats.
- Avoid additives: No salt, seasoning, or added fats—cats don’t need them, and some can be harmful.
- Portion in travel-sized servings: This makes feeding easy and reduces waste.
Step-by-Step Instructions

- If using fresh salmon, place it in a small pot with enough water to cover and simmer for 8-10 minutes until fully cooked.
- Remove the salmon from the pot and let it cool slightly.
- Transfer the salmon to a blender or food processor.
- Add the pumpkin puree and 2 tablespoons of water or bone broth.
- Blend until smooth. If the mixture is too thick, add a little more liquid until it reaches a creamy, pâté-like consistency.
- Transfer the mixture to airtight storage containers or travel-friendly squeeze pouches.
- Serve fresh or refrigerate for later use.
Variations & Substitutions
If your cat has specific dietary needs, you can easily modify this recipe. For a protein swap, use cooked turkey or chicken in place of salmon.
If your cat requires extra hydration, add more water or bone broth to make a thinner puree. For senior cats or those with dental issues, ensure the pâté is ultra-smooth for easy licking.
Pro Tips for Success
- Batch Preparation: Make a double batch and freeze in small portions for easy defrosting.
- Freezing Instructions: Freeze in individual portions and thaw overnight in the fridge before serving.
- Serving Suggestions: Serve at room temperature, as cold food may be less appealing to cats.
Serving Guidelines
The right portion depends on your cat’s size and dietary needs.
A small cat may only need 1-2 tablespoons per meal, while larger cats may require a bit more.
This recipe is a supplemental meal, so ensure your cat’s daily diet is balanced.
Storage & Freshness
Refrigerate leftovers in an airtight container for up to 3 days. If freezing, store in portioned containers for up to 1 month.
Always thaw in the refrigerator and never leave homemade cat food at room temperature for more than an hour.
Common Questions & Troubleshooting
Q: Can I use raw salmon instead of cooked?
A: Cooking salmon helps eliminate bacteria and parasites, making it safer for travel-friendly meals.
Q: My cat doesn’t like pumpkin—can I skip it?
A: Yes! You can replace it with a bit of mashed sweet potato or simply omit it if your cat prefers a pure protein mix.
Q: Can I use store-bought bone broth?
A: Only if it’s low-sodium and free from onions, garlic, and other harmful ingredients. Homemade bone broth is best.
#3. Chicken & Carrot Mousse: A Lightweight, Nutritious Travel Meal for Cats

Traveling with your cat can be stressful, especially when it comes to maintaining their diet.
That’s why I developed this Chicken & Carrot Mousse—a lightweight, portable, and nutritious homemade cat food that’s easy to prepare and store.
Whether you’re going on a road trip or flying with your feline friend, this recipe ensures they get a protein-packed, vitamin-rich meal without the hassle of refrigeration for short trips.
The combination of lean chicken and vitamin-rich carrots creates a balanced, easy-to-digest meal that supports overall feline health.
Carrots add natural fiber and beta-carotene, which promote good vision and a healthy immune system.
This meal can be stored in small travel-friendly containers or silicone pouches, making feeding simple and stress-free while on the go.
Why You’ll Love This Recipe
- Easy to prepare and store: Requires minimal cooking and blends into a smooth mousse.
- Lightweight & portable: Can be frozen in small portions for longer trips.
- Hydration boost: The mousse-like consistency keeps cats hydrated while traveling.
- Packed with nutrients: Lean protein for muscle health and carrots for immune support.
- Gentle on digestion: Ideal for cats with sensitive stomachs.
Essential Information
- Prep Time: 5 minutes
- Cook Time: 10 minutes
- Total Time: 15 minutes
- Yield: About 5 ounces (2-3 small servings)
- Shelf Life: 3 days refrigerated, up to 1 month frozen
- Storage: Airtight containers or silicone squeeze pouches
Equipment Needed
For this recipe, you’ll need a small pot for boiling, a blender or food processor for a smooth consistency, and airtight storage containers.
If you don’t have a blender, mashing with a fork works for a chunkier texture. Small glass jars or silicone baby food pouches are great travel storage options.
Ingredients

- 4 oz (113g) boneless, skinless chicken breast
- 1 tbsp (15g) cooked carrot, mashed
- 2 tbsp (30ml) water or low-sodium bone broth
Ingredient Notes: Chicken is a great source of lean protein, essential for maintaining strong muscles. Carrots provide natural fiber and antioxidants, supporting digestion and immune health. Always use plain, cooked carrots without added seasonings. If using broth, ensure it is low-sodium and free from onions or garlic.
Expert Tips Before You Start
- Choose high-quality chicken: Opt for fresh, boneless chicken breast for easy digestion.
- Blend for a smooth consistency: A soft mousse-like texture is best for easy lapping.
- Portion in travel-sized servings: Small airtight containers or pouches prevent waste.
- Avoid additives: No salt, seasoning, or added fats—cats don’t need them and they can be harmful.
Step-by-Step Instructions

- Bring a small pot of water to a boil and add the chicken breast.
- Cook for about 10 minutes until fully cooked through.
- Remove the chicken from the pot and allow it to cool slightly.
- In a blender or food processor, add the cooked chicken, mashed carrot, and water or broth.
- Blend until smooth, adding more liquid if needed to reach a soft, mousse-like consistency.
- Transfer the mixture to airtight containers or squeeze pouches for easy storage.
- Serve fresh or refrigerate for later use.
Variations & Substitutions
If your cat has specific dietary needs, this recipe is easily adaptable. For a different protein source, try turkey or duck.
If your cat needs extra hydration, add more broth or water to make a thinner puree. For senior cats or those with dental issues, ensure the mousse is extra smooth.
Pro Tips for Success
- Batch Preparation: Make a double batch and freeze in small portions for easy defrosting.
- Freezing Instructions: Freeze in single servings and thaw overnight in the fridge before serving.
- Serving Suggestions: Serve at room temperature, as cold food may be less appealing to cats.
Serving Guidelines
The right portion depends on your cat’s size and dietary needs.
A small cat may only need 1-2 tablespoons per meal, while larger cats may require a bit more.
This recipe is a supplemental meal, so ensure your cat’s daily diet is balanced.
Storage & Freshness
Refrigerate leftovers in an airtight container for up to 3 days. If freezing, store in portioned containers for up to 1 month. Always thaw in the refrigerator and never leave homemade cat food at room temperature for more than an hour.
Common Questions & Troubleshooting
Q: Can I use raw chicken instead of cooked?
A: Cooking chicken helps eliminate bacteria and parasites, making it safer for travel-friendly meals.
Q: My cat doesn’t like carrots—can I skip them?
A: Yes! You can replace them with mashed pumpkin or simply omit them if your cat prefers a pure protein mix.
Q: Can I use store-bought bone broth?
A: Only if it’s low-sodium and free from onions, garlic, and other harmful ingredients. Homemade bone broth is best.
#4. Chicken & Quinoa Power Bites: A Protein-Packed Travel Meal for Cats

When traveling with your cat, you need a nutritious, easy-to-pack meal that provides lasting energy. These Chicken & Quinoa Power Bites are the perfect solution!
Made with lean chicken, digestible quinoa, and hydrating bone broth, these bite-sized portions offer high-quality protein, essential amino acids, and a soft texture that’s easy for cats to eat.
They store well, travel easily, and are free from artificial additives, making them a wholesome alternative to commercial wet food pouches.
Why You’ll Love This Recipe
- High in lean protein: Supports muscle maintenance and overall health.
- Gentle on digestion: Quinoa is an easily digestible grain alternative.
- Soft and chewy texture: Ideal for all ages, including senior cats.
- Great for travel: Compact, mess-free, and easy to portion.
- Preservative-free: No artificial additives or fillers.
Essential Information
- Prep Time: 10 minutes
- Cook Time: 15 minutes
- Total Time: 25 minutes
- Yield: About 10 small bites
- Shelf Life: 3 days refrigerated, up to 1 month frozen
- Storage: Airtight container or resealable silicone pouches
Equipment Needed
To prepare these bites, you’ll need a small pot for cooking the quinoa, a baking sheet or silicone mold for shaping the bites, and an oven or dehydrator to firm them up.
If you prefer a softer consistency, you can simply refrigerate them instead of baking.
Ingredients

- 4 oz (113g) cooked, shredded chicken breast (no seasoning)
- ¼ cup (43g) cooked quinoa
- 1 tbsp (15ml) unsalted bone broth (or water)
- ½ tsp (2.5g) fish oil (optional, for omega-3 boost)
Ingredient Notes: Chicken is a lean, easily digestible protein that’s ideal for cats. Quinoa is a gluten-free, fiber-rich grain substitute that provides extra nutrients without irritating sensitive stomachs. Fish oil adds an omega-3 boost for skin and coat health, but it’s optional if your cat prefers a simpler flavor.
Expert Tips Before You Start
- Use unseasoned, plain chicken: Avoid any salt, garlic, or onion, which are toxic to cats.
- Ensure quinoa is well-cooked: Rinse before cooking to remove natural bitterness.
- Adjust texture for picky eaters: Blend for a smoother consistency or leave slightly chunky for a more satisfying bite.
- Test storage options: Freeze in small portions for easy travel access.
Step-by-Step Instructions
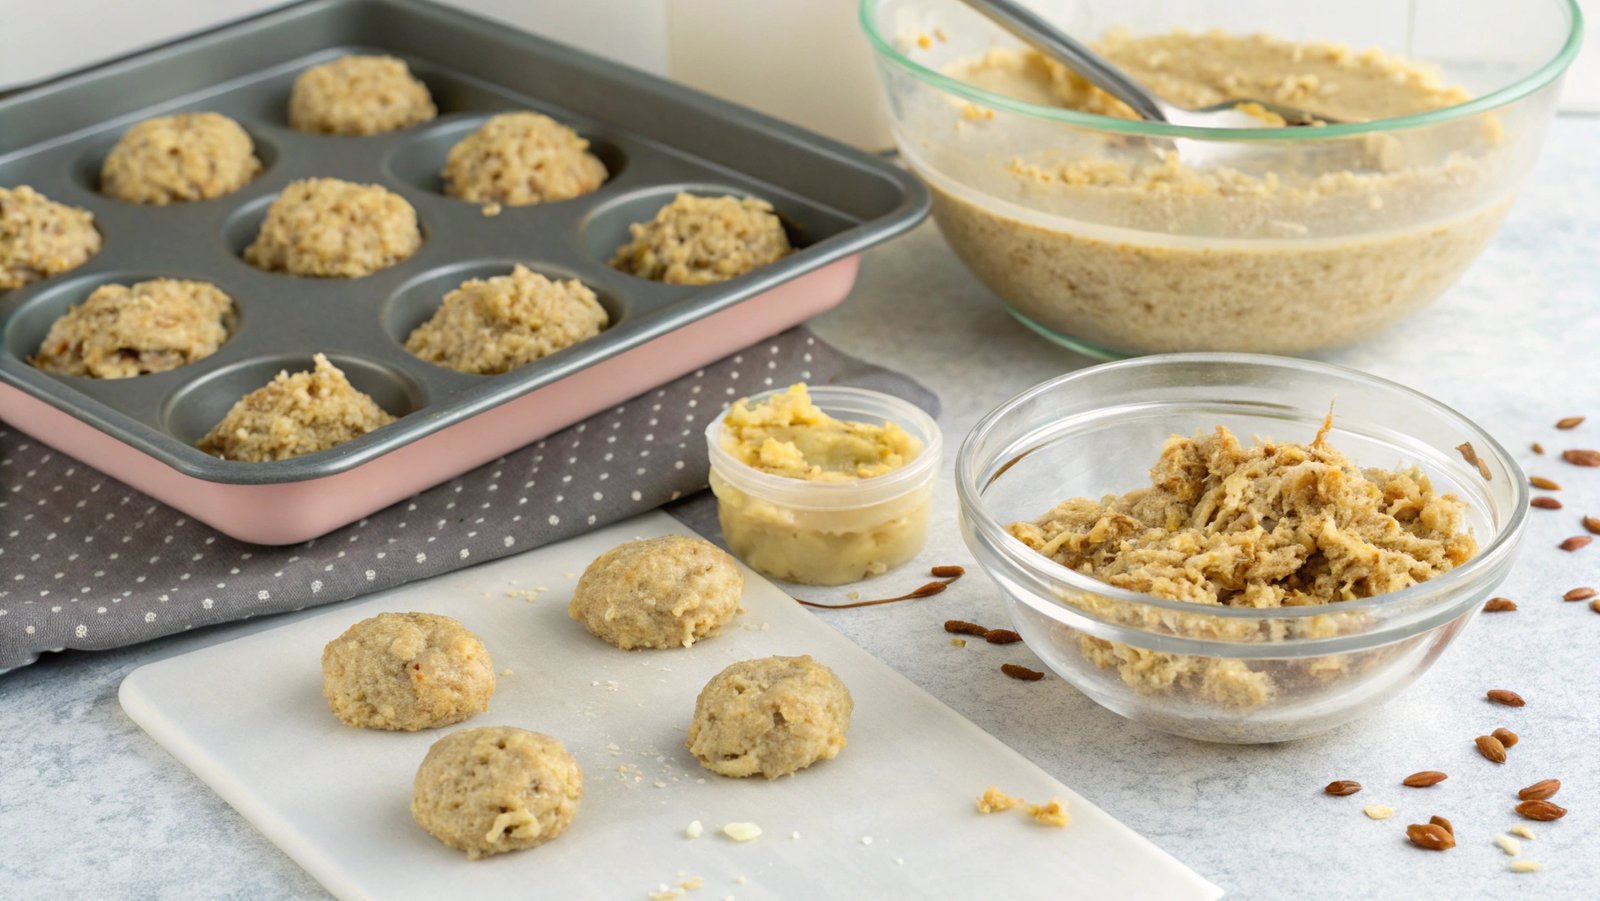
- Cook the quinoa according to package instructions and let it cool completely.
- Shred the cooked chicken into fine pieces.
- In a small bowl, mix the shredded chicken, quinoa, and bone broth until well combined.
- Form into small, bite-sized portions using your hands or a silicone mold.
- If you prefer a firmer texture, bake at 300°F (150°C) for 10 minutes or use a dehydrator on low for 2 hours.
- Let cool completely before storing in an airtight container.
Variations & Substitutions
If your cat prefers a different protein source, you can swap the chicken for turkey or duck. For an extra hydration boost, add more bone broth and serve as a soft mash instead of bites. If you need a grain-free option, replace quinoa with mashed pumpkin or green peas.
Pro Tips for Success
- Batch Preparation: Make multiple servings and freeze in small portions.
- Freezing Instructions: Freeze in single-serving bags and thaw in the fridge before serving.
- Serving Suggestions: Serve at room temperature for best palatability.
Serving Guidelines
Each bite is roughly the size of a teaspoon, making it easy to portion. A small cat may need 2-3 bites per meal, while larger cats may require 4-5 bites. These are intended as a supplemental meal, so ensure your cat’s diet is well-balanced.
Storage & Freshness
Store refrigerated for up to 3 days in an airtight container. For long-term storage, freeze and thaw as needed. Avoid leaving the bites at room temperature for more than an hour to prevent spoilage.
Common Questions & Troubleshooting
Q: Can I use canned chicken instead of fresh?
A: Yes, but choose a low-sodium, water-packed variety with no added seasonings.
Q: What if my cat doesn’t like quinoa?
A: You can replace it with mashed pumpkin or cooked lentils for a similar texture.
Q: Can I add supplements to this recipe?
A: Absolutely! Taurine powder or a vet-recommended multivitamin can be mixed in for added nutrition
#5. Tuna & Sweet Potato Travel Bars: A Nourishing, Easy-to-Pack Meal for Cats
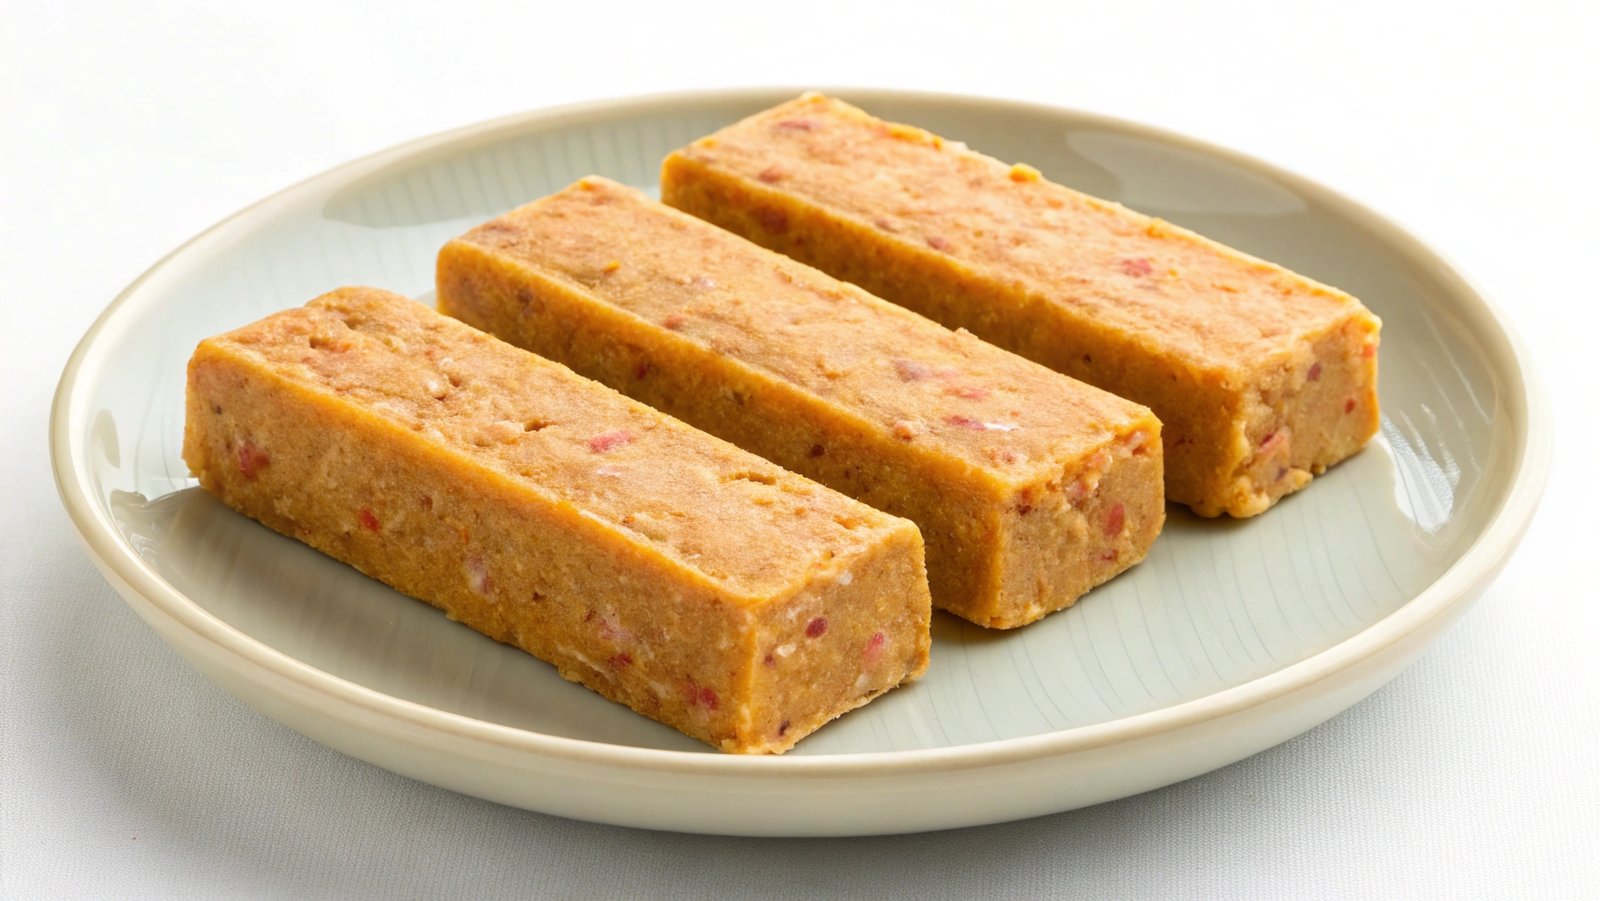
Traveling with a cat can be challenging, especially when it comes to providing nutritious, easy-to-serve meals. That’s why these Tuna & Sweet Potato Travel Bars are a game changer!
They’re soft, portable, and packed with protein and fiber, making them a mess-free alternative to wet food.
The combination of tuna and sweet potato provides essential amino acids, vitamins, and healthy carbohydrates, keeping your cat energized and satisfied during your journey.
Why You’ll Love This Recipe
- High in lean protein: Tuna supports muscle maintenance and overall health.
- Rich in fiber: Sweet potatoes promote digestive health.
- Easy to transport: Compact bars make for a no-mess meal.
- Soft texture: Suitable for kittens, adults, and senior cats.
- No artificial preservatives: Fresh and wholesome ingredients only.
Essential Information
- Prep Time: 10 minutes
- Cook Time: 15 minutes
- Total Time: 25 minutes
- Yield: 6 small bars
- Shelf Life: 3 days refrigerated, 1 month frozen
- Storage: Airtight container or resealable silicone bags
Equipment Needed
To make these bars, you’ll need a mixing bowl, a small baking dish, parchment paper, and a fork for mashing. If you prefer a firmer texture, a food processor can be used to blend everything smoothly.
Ingredients

- 1 can (5 oz/140g) tuna in water, drained
- ¼ cup (50g) cooked sweet potato, mashed
- 1 tbsp (15ml) unsalted bone broth (or water)
- ½ tsp (2.5g) fish oil (optional, for omega-3 boost)
Ingredient Notes: Tuna provides high-quality protein and omega-3 fatty acids, which promote skin, coat, and brain health. Sweet potatoes are a digestible source of fiber and vitamins, aiding in gut health. Fish oil is an optional nutrient booster, enhancing coat shine and joint support.
Expert Tips Before You Start
- Use tuna in water, not oil: Oil-packed tuna is too rich for cats and may cause digestive upset.
- Ensure sweet potatoes are fully cooked: Raw sweet potatoes can be difficult for cats to digest.
- Mash or blend for texture preference: Some cats prefer smooth, while others enjoy a bit of chunkiness.
- Freeze individual portions: This makes it easier to defrost just what you need.
Step-by-Step Instructions
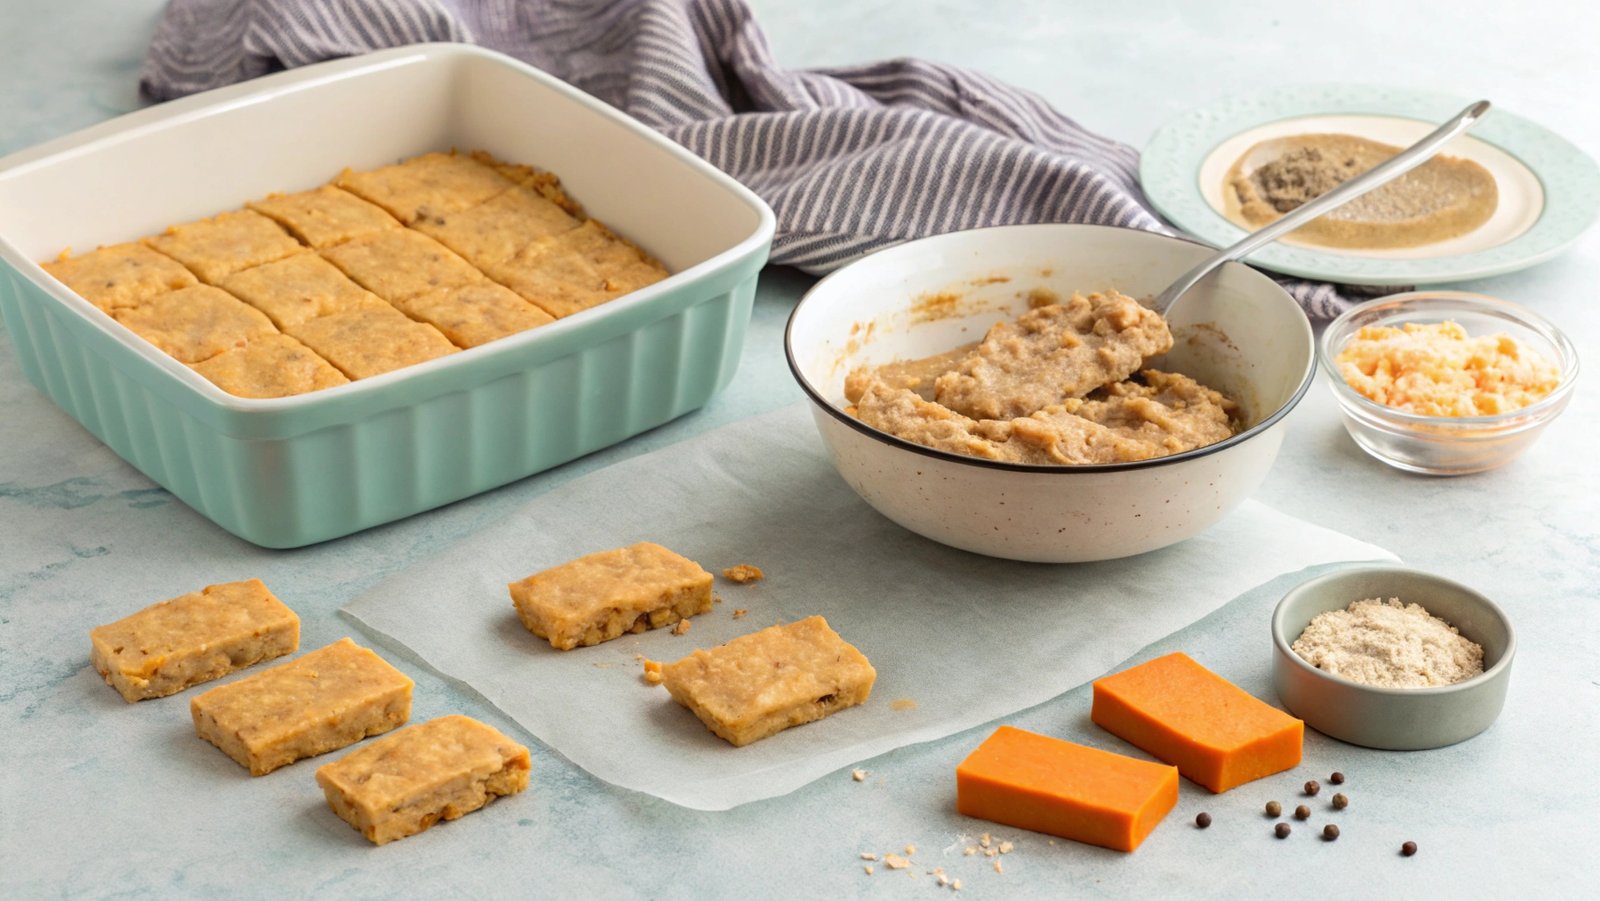
- Preheat the oven to 325°F (165°C) and line a small baking dish with parchment paper.
- In a bowl, mash the drained tuna and cooked sweet potato together until well combined.
- Stir in the bone broth and fish oil (if using) to create a smooth, slightly moist mixture.
- Press the mixture firmly into the baking dish, smoothing the top.
- Bake for 15 minutes, then let cool completely before slicing into small bars.
- Store in the fridge or freeze for later use.
Variations & Substitutions
For a grain-free alternative, swap sweet potato for mashed pumpkin. If your cat prefers a softer consistency, skip baking and serve as a chilled mash. You can also replace tuna with cooked salmon or chicken for a different protein option.
Pro Tips for Success
- Batch Preparation: Make extra bars and freeze for later use.
- Freezing Instructions: Wrap individual bars in wax paper and store in a freezer-safe bag.
- Serving Suggestions: Let bars sit at room temperature for a few minutes before feeding for best taste and texture.
Serving Guidelines
Each bar is a small snack-sized portion. A small cat may need half a bar per meal, while a larger cat may require a full bar. These bars are supplemental meals, so be sure to provide a balanced diet alongside them.
Storage & Freshness
Keep refrigerated for up to 3 days in an airtight container. Freeze for up to 1 month, thawing in the fridge as needed. Avoid leaving bars at room temperature for long periods to prevent spoilage.
Common Questions & Troubleshooting
Q: Can I use fresh tuna instead of canned?
A: Yes! Cook and flake fresh tuna, ensuring there are no bones before using it in the recipe.
Q: What if my cat doesn’t like sweet potato?
A: You can replace it with pumpkin or mashed green peas for similar texture and benefits.
Q: Can I add supplements to this recipe?
A: Absolutely! A small amount of taurine powder or a vet-approved multivitamin can be added.


