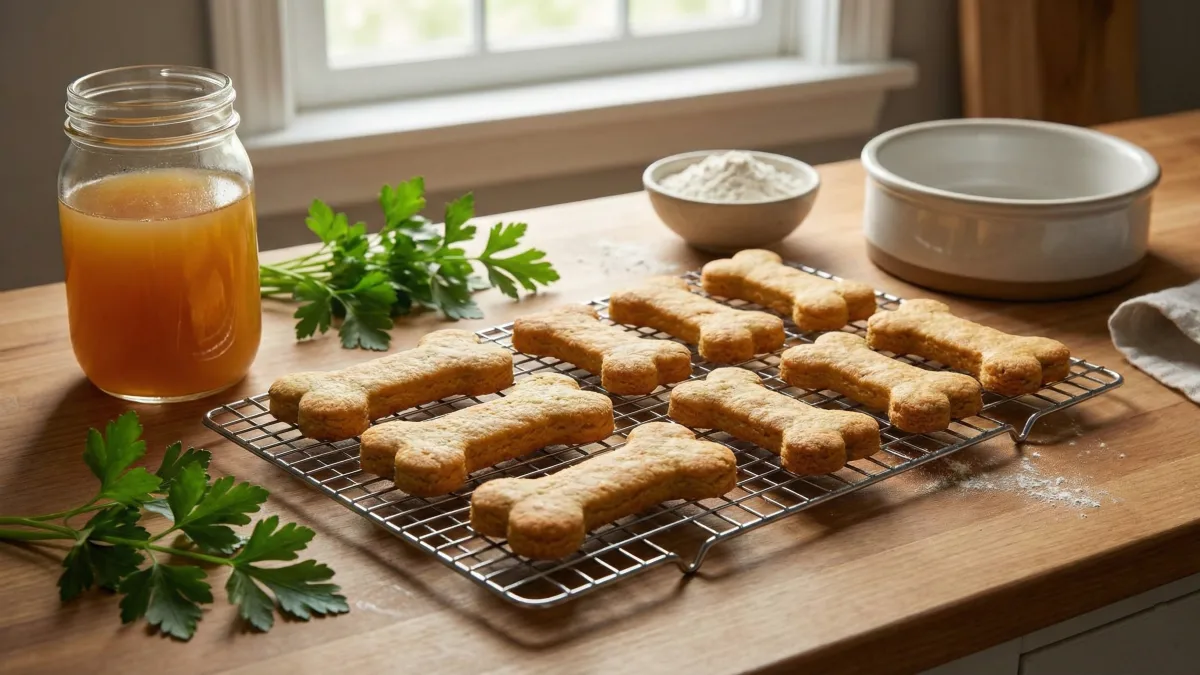
My dog taught me something about bones—he loves them, but they don’t always love him back.
There was a time I thought the kibble I was feeding had everything he needed. Strong bones? Check. Healthy joints? Check. Except… not quite.
A routine vet visit turned into a wake-up call—his calcium levels weren’t where they should be. No, he wasn’t sick, but the vet’s words stuck with me: “Prevention is easier than treatment.”
So, I did what any devoted dog parent would do. I hit the kitchen. Turns out, getting the right calcium balance isn’t just about throwing your pup a bone—it’s about real, wholesome, dog-approved food. Ready to cook up some tail-wagging, bone-boosting meals? Let’s do this.
Save this Post for Later! ⬇️

#1. Homemade High-Calcium Turkey & Veggie Dog Food for Bone Health

When I first started making homemade meals for my dog, I wanted to ensure that every ingredient was not just delicious but packed with nutrients.
One thing that always concerned me was calcium—so essential for strong bones and teeth, yet often overlooked in homemade diets.
After much research and trial and error, I created this Calcium-Enriched Turkey & Vegetable Medley, a meal rich in calcium, protein, and essential nutrients to support healthy bones and joints.
My dog, who usually turns his nose up at vegetables, gobbles this up without hesitation!
If you’ve ever wondered whether homemade food can truly provide balanced nutrition, rest assured. This recipe is designed to be both safe and beneficial for adult dogs, ensuring they get a proper dose of calcium from natural sources.
Whether you have an active dog who needs strong bones or a senior pup needing extra joint support, this meal is a game-changer.
What Makes This Recipe Special?
Dogs deserve food that nourishes them from the inside out, and this homemade recipe does just that. Unlike many store-bought dog foods that rely on synthetic supplements, this meal naturally boosts calcium levels through ground eggshell powder, an excellent and highly absorbable calcium source.
Combined with lean ground turkey, nutrient-dense vegetables, and healthy fats, it provides a balanced meal that is both tasty and beneficial.
This recipe is perfect for pet parents who want control over their dog’s diet. It’s grain-free, easy to make in batches, and can be frozen for convenience.
The soft texture makes it suitable even for dogs with dental sensitivities or those who prefer moist meals.
Whether you’re transitioning to homemade food or just looking for a special meal to boost your dog’s nutrition, this is an excellent choice.
Why You’ll Love This Recipe
- Cost-Effective – Making this in batches is far more affordable than premium store-bought options.
- Ingredient Control – No fillers, artificial preservatives, or low-quality meat—only real, wholesome ingredients.
- Storage Convenience – Can be refrigerated for up to three days or frozen for three months.
- Bone Health Support – Packed with natural calcium, protein, and healthy fats.
- Perfect for Multi-Dog Households – Adjust portion sizes easily for different breeds and ages.
- Great for Sensitive Stomachs – Free from grains and unnecessary additives, making it gentle on digestion.
Recipe Overview
- Prep Time: 15 minutes
- Cook Time: 30 minutes
- Total Time: 45 minutes
- Yield: About 8 cups (4 medium-sized dog meals)
- Shelf Life: 3 days (refrigerated), 3 months (frozen)
- Suitable For: Adult dogs
What You’ll Need
Making homemade meals for your dog doesn’t require fancy equipment, but having the right tools makes the process smoother.
To prepare this meal, you’ll need a large stockpot or Dutch oven for cooking, a wooden spoon for stirring, and measuring cups to ensure accuracy in ingredient portions.
If you don’t have a grinder for eggshells, a mortar and pestle or a strong food processor will work. When storing, use airtight containers to maintain freshness.
Ingredients

Main Components
- 2 pounds (900g) ground turkey – A lean protein source to support muscle development.
- 1 tablespoon (15ml) olive oil – Provides healthy fats and helps with nutrient absorption.
- 1 cup (130g) chopped broccoli – High in fiber, vitamins, and minerals.
- 1 cup (100g) chopped green beans – A great source of vitamins and low in calories.
- 1 cup (120g) chopped carrots – Supports eye health and provides natural sweetness.
- 1 cup (30g) chopped spinach – Rich in iron and beneficial for overall health.
- 1 teaspoon (5g) ground eggshell powder – A natural calcium booster to strengthen bones.
Optional Add-ins
- ½ cup (75g) blueberries – A powerful antioxidant that fights inflammation.
- 1 tablespoon (15ml) fish oil – Provides omega-3s for joint and skin health.
Expert Tips Before You Start
One of the most common mistakes when making homemade dog food is overcooking vegetables, which can deplete their nutritional value.
Aim for a texture where they’re tender but not mushy. Another crucial step is grinding eggshells into a fine powder—larger pieces may be difficult for dogs to digest. Finally, always let the food cool completely before serving or storing to prevent bacteria growth.
Step-by-Step Instructions
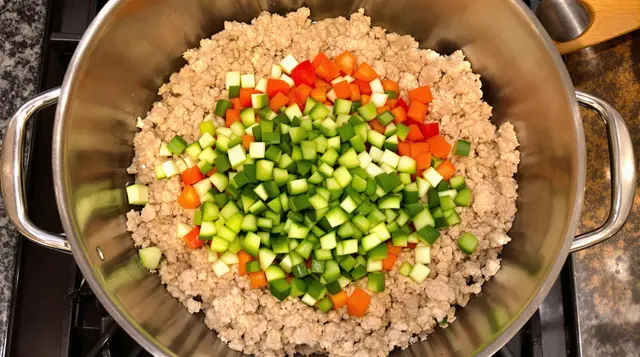
- Prepare Your Ingredients: Wash and chop all vegetables into small, bite-sized pieces to make digestion easier for your pup.
- Cook the Turkey: Heat olive oil in a large pot over medium heat. Add the ground turkey, breaking it apart as it cooks, and stir until browned.
- Add Vegetables: Stir in the broccoli, green beans, carrots, and spinach. Pour in 4 cups (1 liter) of water, ensuring all ingredients are submerged.
- Simmer the Mixture: Reduce the heat and let it simmer for 20 minutes until the vegetables are soft.
- Add the Calcium Boost: Once cooked, remove the pot from heat and stir in the ground eggshell powder to evenly distribute calcium throughout the meal.
- Cool & Serve: Allow the mixture to cool completely before serving or storing.
Variations & Substitutions
This recipe is flexible, making it easy to adapt based on your dog’s dietary needs. If your dog has allergies to turkey, you can substitute it with lean ground chicken or beef.
For a grain-inclusive option, consider adding cooked quinoa or brown rice. If your pup has trouble chewing, blend the mixture into a soft purée before serving.
Serving & Storage Guidelines
The portion size will vary based on your dog’s weight and activity level. As a general guideline:
- Small dogs: ½ cup per meal
- Medium dogs: 1 to 1.5 cups per meal
- Large dogs: 2 to 2.5 cups per meal
Store the meal in an airtight container in the fridge for up to three days or freeze portions for up to three months. When serving frozen portions, thaw them overnight in the fridge.
Common Questions & Troubleshooting
Can I Use Store-Bought Eggshell Powder Instead?
Yes! If you don’t want to grind eggshells at home, look for a vet-approved calcium supplement.
Why Is My Dog Not Eating It?
Some dogs take time to adjust to new foods. Try warming the meal slightly or adding a small amount of low-sodium bone broth for extra flavor.
Can I Make a Large Batch?
Absolutely! This meal is perfect for batch cooking. Just divide it into portions before freezing to make thawing easier.
#2. Salmon & Cottage Cheese Superfood Bowl for Strong Bones

If your pup loves fish, this Salmon & Cottage Cheese Superfood Bowl is the perfect high-calcium meal to support bone health and overall vitality.
I first developed this recipe when my senior dog started slowing down. I wanted to create something delicious, packed with joint-supporting nutrients, and easy on his stomach.
This meal quickly became one of his favorites, and I love knowing it gives him the calcium and omega-3s he needs to stay strong and active.
This recipe is perfect for puppies, adult dogs, and seniors alike. It’s rich in calcium, protein, and healthy fats, all essential for strong bones, teeth, and joints. Cottage cheese provides a highly digestible form of calcium, while salmon is packed with omega-3 fatty acids that help reduce inflammation and promote a shiny coat. Plus, the addition of superfoods like kale and pumpkin makes this meal a powerhouse of nutrition.
What Makes This Recipe Special?
This meal is soft, easy to digest, and full of natural calcium sources—ideal for dogs of all life stages. Unlike many store-bought foods that rely on artificial calcium fortification, this bowl gets its bone-strengthening benefits from real, whole ingredients like cottage cheese, salmon, and ground flaxseeds.
It’s also a quick meal to prepare, requiring only light cooking, making it a great choice for busy pet parents who want something homemade but convenient.
The texture is perfect for dogs who prefer moist meals, and it’s a fantastic option for senior dogs who need joint support and softer foods.
Why You’ll Love This Recipe
- Nutrient-Rich & High in Calcium – Supports bone strength, joint health, and overall well-being.
- Easy to Make & Digest – Great for dogs with sensitive stomachs or dental issues.
- Packed with Omega-3s – Helps reduce inflammation and promotes a healthy coat.
- Balanced & Wholesome – No fillers, preservatives, or unnecessary additives.
- Quick to Prepare – Takes less than 20 minutes, perfect for busy pet parents.
- Batch-Friendly – Can be stored in the fridge for a few days or frozen for later use.
Recipe Overview
- Prep Time: 10 minutes
- Cook Time: 8-10 minutes
- Total Time: 20 minutes
- Yield: About 4 cups (2-3 medium-sized dog meals)
- Shelf Life: 3 days (refrigerated), 2 months (frozen)
- Suitable For: Puppies, adults, and senior dogs
What You’ll Need
This meal is incredibly simple to make, requiring only a small saucepan, a mixing bowl, and a fork or potato masher to blend ingredients smoothly.
If you’re storing portions for later, use airtight containers or freezer-safe silicone molds for easy thawing. A food scale is helpful for accurate measurements, especially if portioning for different-sized dogs.
Ingredients
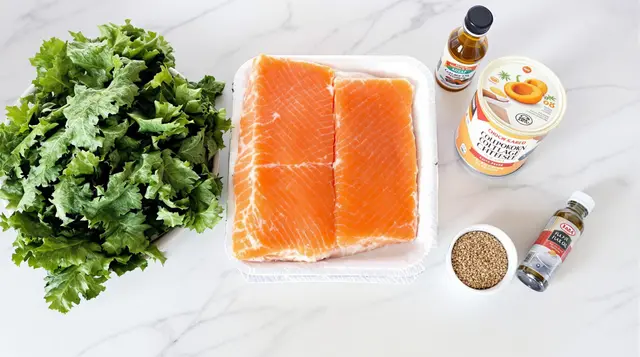
Main Components
- 1 cup (170g) cooked salmon (boneless & skinless) – A great source of protein and omega-3s.
- ½ cup (120g) low-fat cottage cheese – Provides easily digestible calcium and protein.
- 1 tablespoon (7g) ground flaxseeds – Supports digestion and adds a nutritional boost.
- ½ cup (80g) steamed kale (finely chopped) – A superfood packed with vitamins and minerals.
- ¼ cup (60g) pumpkin puree (plain, unsweetened) – Helps digestion and adds natural sweetness.
- 1 teaspoon (5g) ground eggshell powder – A natural source of calcium for strong bones.
- 1 tablespoon (15ml) fish oil – Provides joint-supporting omega-3 fatty acids.
Optional Add-ins
- 1 boiled egg (mashed) – Extra protein and healthy fats.
- ½ teaspoon (2g) turmeric – Natural anti-inflammatory benefits.
Expert Tips Before You Start
Using fresh, boneless salmon is best, but if using canned, opt for low-sodium, water-packed salmon with no added oils or seasonings.
When introducing cottage cheese, start with a small amount if your dog has never had dairy before. If your pup isn’t a fan of kale, lightly steaming it softens the texture and removes bitterness, making it more palatable. Always allow the food to cool before serving to prevent burns.
Step-by-Step Instructions

- Cook the Salmon: If using fresh salmon, lightly steam or bake it at 350°F (175°C) for 8-10 minutes until fully cooked. Let it cool slightly before flaking it into small pieces.
- Prepare the Vegetables: Steam the chopped kale for 2-3 minutes to soften and bring out its natural nutrients.
- Mix the Ingredients: In a large bowl, combine the cooked salmon, cottage cheese, steamed kale, pumpkin puree, ground flaxseeds, and eggshell powder. Stir well until fully blended.
- Add Healthy Fats: Pour in the fish oil and mix thoroughly to distribute the nutrients evenly.
- Serve or Store: Serve immediately, or divide into portions and store in the fridge or freezer for later use.
Variations & Substitutions
If your dog has dietary restrictions, this recipe can easily be adjusted. Instead of salmon, you can use cooked chicken or turkey for a different protein source.
If your dog is lactose-sensitive, swap cottage cheese for plain Greek yogurt or omit dairy entirely. For a grain-inclusive option, mix in cooked quinoa or rolled oats for added fiber.
Serving & Storage Guidelines
To ensure proper nutrition without overfeeding, follow these general portioning guidelines:
- Small dogs: ¼ to ½ cup per meal
- Medium dogs: ¾ to 1 cup per meal
- Large dogs: 1.5 to 2 cups per meal
Store leftovers in an airtight container in the fridge for up to 3 days or freeze individual portions for up to 2 months. When serving from frozen, thaw overnight in the fridge or let sit at room temperature for 30 minutes before feeding.
Common Questions & Troubleshooting
Can I Use Raw Salmon Instead?
It’s best to cook salmon before serving it to your dog to eliminate any potential parasites or harmful bacteria.
My Dog Won’t Eat Kale – What Can I Do?
Try blending the kale into smaller pieces or swapping it for steamed spinach or finely grated zucchini.
Can I Make This Ahead of Time?
Yes! This meal is perfect for batch-prepping. Just portion it into freezer-safe containers for easy meals throughout the week.
#3. Crunchy Sardine & Oatmeal Biscuits for Strong Bones

When I first made these Crunchy Sardine & Oatmeal Biscuits, I was looking for a way to support my dog’s bone health and joint strength while still giving him something crunchy and satisfying to chew.
Store-bought treats often have artificial calcium additives, but I wanted something made from wholesome, real ingredients that naturally support strong bones.
These homemade biscuits quickly became a favorite in my household, and I love knowing that every bite is packed with natural calcium, omega-3s, and joint-loving nutrients.
These biscuits are crunchy, delicious, and nutrient-dense, making them ideal for adult dogs and seniors who need extra bone support.
They’re also a great training reward or snack between meals. The sardines provide a powerhouse of calcium, protein, and omega-3s, while the oats and eggshell powder add extra minerals that promote strong bones and teeth. Plus, they have a satisfying crunch that can help with dental health by reducing plaque buildup.
Why This Recipe Is Special
Unlike soft treats or homemade meals, these biscuits are baked to a crisp, making them perfect for dogs who love crunchy snacks.
Sardines provide a natural source of calcium from their tiny, edible bones, while eggshell powder boosts calcium levels without artificial additives.
These treats are also easy to make, budget-friendly, and perfect for batch baking, so you can always have a supply on hand.
They store well at room temperature and make an excellent on-the-go snack for hikes, training, or just an afternoon treat.
Why You’ll Love This Recipe
- Naturally High in Calcium – Supports strong bones, teeth, and joint health.
- Crunchy for Dental Benefits – Helps reduce plaque and tartar buildup.
- No Artificial Ingredients – Made with whole, pet-safe foods.
- Rich in Omega-3s – Supports a healthy coat, skin, and inflammation reduction.
- Budget-Friendly – Uses affordable, nutrient-rich ingredients.
- Easy to Make in Batches – Perfect for meal prepping and storing for later.
Recipe Overview
- Prep Time: 10 minutes
- Cook Time: 25 minutes
- Total Time: 35 minutes
- Yield: About 20 small biscuits
- Shelf Life: 1 week (room temperature), 2 months (frozen)
- Suitable For: Adult dogs, senior dogs
What You’ll Need
These biscuits are easy to make with a few basic kitchen tools. You’ll need a food processor or blender to mix the ingredients smoothly, a mixing bowl, a rolling pin, and cookie cutters or a knife to shape the biscuits.
If you don’t have a rolling pin, you can simply press the dough flat with your hands. For storage, use an airtight container to keep them fresh.
Ingredients

Main Components
- 1 can (3.75 oz/106g) sardines in water (undrained, no added salt) – Rich in calcium and omega-3s.
- 1 ½ cups (135g) oat flour – Provides fiber and supports digestion.
- 1 large egg – Adds protein and helps bind the dough.
- 1 tablespoon (5g) eggshell powder – Natural calcium boost for bones and teeth.
- ¼ cup (60g) plain Greek yogurt – Supports digestion and adds moisture.
- 1 teaspoon (5g) turmeric powder – Anti-inflammatory for joint support.
- ¼ cup (60ml) water (as needed) – Helps with dough consistency.
Optional Add-ins
- 1 teaspoon (5g) ground flaxseeds – Extra fiber and omega-3s.
- ½ teaspoon (2g) dried parsley – Freshens breath naturally.
Expert Tips Before You Start
If your dog is new to sardines, start with a small amount to ensure they tolerate the strong fishy flavor. Sardines naturally contain soft, edible bones, which add a fantastic source of calcium.
Eggshell powder is an excellent way to supplement calcium, but make sure it’s finely ground to avoid sharp edges. If you don’t have oat flour, simply blend rolled oats into a fine powder using a food processor.
Step-by-Step Instructions
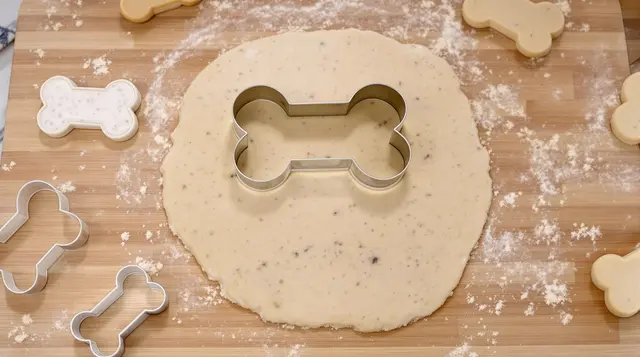
- Preheat the Oven: Set your oven to 325°F (163°C) and line a baking sheet with parchment paper.
- Blend the Sardines: In a food processor, blend the sardines (with their water), Greek yogurt, egg, and turmeric until smooth.
- Mix the Dry Ingredients: In a large mixing bowl, combine the oat flour and eggshell powder. Stir in the sardine mixture until a dough forms. If the dough is too dry, add a tablespoon of water at a time until it comes together.
- Roll & Cut the Dough: Lightly flour a surface with oat flour and roll out the dough to about ¼-inch thickness. Use cookie cutters or a knife to cut out shapes.
- Bake the Biscuits: Place the biscuits on the baking sheet and bake for 25 minutes or until golden brown and crunchy.
- Cool & Store: Let the biscuits cool completely before serving. Store in an airtight container at room temperature for up to a week.
Variations & Substitutions
If your dog doesn’t tolerate fish well, swap sardines for cooked chicken or turkey, though you may need to add a little fish oil for the same omega-3 benefits.
For a grain-free version, substitute oat flour with coconut flour, but reduce the amount to ¾ cup since coconut flour absorbs more moisture.
Want a chewier version? Reduce the bake time by 5 minutes to keep them slightly softer. This works well for older dogs who need a gentler texture.
Serving & Storage Guidelines
- Small dogs: ½ to 1 biscuit per day
- Medium dogs: 1 to 2 biscuits per day
- Large dogs: 2 to 3 biscuits per day
Store the biscuits in an airtight container at room temperature for up to a week or freeze them for up to 2 months. If freezing, thaw at room temperature for 15 minutes before serving.
Common Questions & Troubleshooting
Can I Use Fresh Sardines Instead of Canned?
Yes! Just cook and debone them before blending to ensure a smooth consistency.
How Do I Make These Crunchier?
Bake at a lower temperature (300°F/150°C) for 10 extra minutes for a super crispy texture.
Can I Make These Ahead of Time?
Absolutely! These are perfect for batch-making. Freeze extras and thaw as needed.
#4. Cheesy Sweet Potato & Sesame Bone-Boosting Bites

When I first started making homemade treats, I was on a mission to find a high-calcium recipe that my picky pup would actually eat.
While many calcium-rich foods have a strong taste (hello, sardines!), I wanted something a little milder, cheesy, and naturally delicious.
That’s how these Cheesy Sweet Potato & Sesame Bites were born! They combine nutrient-dense ingredients like sweet potato, sesame seeds, and cottage cheese to create a soft, chewy, and ultra-nutritious snack that’s easy on digestion while supporting strong bones and teeth.
These treats are particularly great for puppies, senior dogs, and dogs who prefer softer snacks over crunchy biscuits.
The combination of cheese, eggs, and sesame seeds packs in plenty of calcium, protein, and healthy fats while keeping the flavor mild and dog-approved.
Plus, sweet potatoes add gut-friendly fiber and beta-carotene, making these bites as nutritious as they are delicious!
What Makes These Treats Special?
These soft-baked, cheesy bites are packed with natural, whole-food sources of calcium that support your dog’s bone health without the need for artificial supplements.
Sesame seeds are one of nature’s richest plant-based sources of calcium, while cottage cheese and eggs boost protein and strengthen teeth and bones.
The soft texture makes them perfect for all ages, including puppies with developing bones and senior dogs who need extra joint support.
If your dog loves cheesy flavors, these will become an instant favorite! They also make a fantastic training treat since they’re small, non-crumbly, and easy to break into smaller pieces.
Why You’ll Love This Recipe
- High in Natural Calcium – Supports bone, teeth, and joint health.
- Soft & Chewy Texture – Great for puppies, senior dogs, and dogs with sensitive teeth.
- Packed with Protein & Healthy Fats – Keeps dogs full and supports muscle maintenance.
- Mild, Cheesy Flavor – Appealing to picky eaters.
- Great for Training – Small, non-crumbly, and easy to break into pieces.
- Easy to Make & Store – Simple ingredients and minimal prep time.
Recipe Overview
- Prep Time: 10 minutes
- Cook Time: 18 minutes
- Total Time: 28 minutes
- Yield: About 24 small bites
- Shelf Life: 5 days (refrigerated), 2 months (frozen)
- Suitable For: Puppies, adult dogs, senior dogs
What You’ll Need
This recipe requires basic kitchen tools, including a mixing bowl, baking sheet, and parchment paper. If you have a food processor, it makes mixing easier, but a fork and spoon work just as well.
A small cookie scoop or spoon helps portion the bites evenly. For storage, an airtight container will keep them fresh longer.
Ingredients
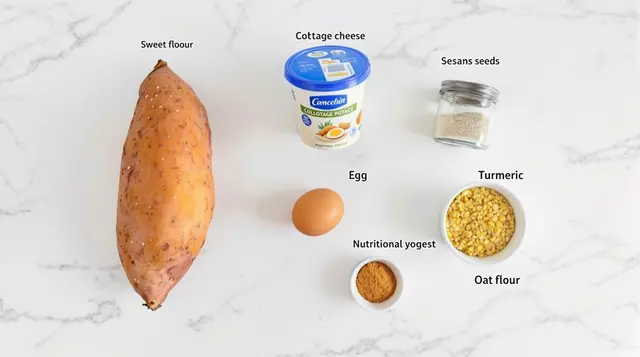
Main Components
- ½ cup (120g) mashed cooked sweet potato – Adds fiber, beta-carotene, and a natural hint of sweetness.
- ½ cup (120g) low-fat cottage cheese – High in calcium and protein for strong bones.
- 1 large egg – Helps bind the ingredients and adds extra protein.
- ¼ cup (30g) finely ground sesame seeds – A natural plant-based source of calcium.
- ¼ cup (30g) oat flour – Provides structure and keeps the bites soft.
- 1 teaspoon (5g) ground flaxseeds (optional) – Extra fiber and omega-3s.
- 1 teaspoon (5g) turmeric powder (optional) – Supports joint health and reduces inflammation.
Optional Add-ins
- 1 tablespoon (10g) nutritional yeast – Boosts cheesy flavor and B vitamins.
- ½ teaspoon (2g) dried parsley – Naturally freshens breath.
Expert Tips Before You Start
Sweet potatoes should be fully cooked and mashed until smooth to help bind the treats properly. Sesame seeds are best ground into a fine powder for better calcium absorption—use a spice grinder or food processor if needed.
Cottage cheese should be low-fat and plain, without added salt or flavorings. If your dog is sensitive to dairy, swap it for plain Greek yogurt or a mashed banana.
Step-by-Step Instructions

- Preheat the Oven: Set your oven to 350°F (175°C) and line a baking sheet with parchment paper.
- Mix the Wet Ingredients: In a bowl, combine the mashed sweet potato, cottage cheese, and egg. Stir until smooth.
- Add the Dry Ingredients: Stir in the ground sesame seeds, oat flour, and any optional add-ins like flaxseeds or turmeric. Mix until a thick, sticky dough forms.
- Scoop & Shape: Use a small cookie scoop or spoon to drop bite-sized portions onto the baking sheet. Flatten slightly with the back of a spoon.
- Bake: Bake for 18 minutes, or until the bites are set and slightly golden.
- Cool & Store: Let them cool completely before serving. Store in an airtight container in the refrigerator for up to 5 days, or freeze for up to 2 months.
Variations & Substitutions
If your dog is grain-free, replace oat flour with coconut flour (use only 2 tablespoons, as it absorbs more moisture).
For a dairy-free version, swap cottage cheese for mashed banana or pumpkin puree. Want a crunchier texture? Bake for an additional 5 minutes at a slightly lower temperature (325°F/163°C).
Serving & Storage Guidelines
- Small dogs: 1 bite per day
- Medium dogs: 2 bites per day
- Large dogs: 3-4 bites per day
Since these treats contain dairy, they should be stored in the refrigerator and consumed within 5 days. To freeze, store in an airtight container and thaw in the fridge before serving.
Common Questions & Troubleshooting
Can I Use Whole Sesame Seeds Instead of Ground?
Whole sesame seeds don’t break down easily in a dog’s digestive system, so it’s best to grind them for better calcium absorption.
How Do I Make These Even Softer?
Add an extra tablespoon of cottage cheese or a splash of water to keep the bites extra moist.
Can I Use Other Calcium-Rich Seeds?
Yes! Chia seeds or ground sunflower seeds can be used as an alternative to sesame.
#5. Crunchy Sardine & Eggshell Calcium Biscuits

As a pet parent, I always want the best nutrition for my furry friend, and strong bones are a big part of that.
But when I looked at store-bought treats, I noticed that many didn’t provide enough natural calcium—or worse, they were loaded with artificial additives.
That’s why I developed these Crunchy Sardine & Eggshell Calcium Biscuits! They’re packed with whole-food sources of calcium like ground eggshells and sardines, ensuring your pup gets a healthy dose of bone-strengthening minerals in a delicious, crunchy treat.
These biscuits are great for all life stages but are especially beneficial for puppies developing strong bones and senior dogs needing extra joint support.
The crispy texture makes them perfect for a little dental cleaning, and the sardines add omega-3s for healthy skin and coat. Plus, they’re easy to store and make in big batches!
What Makes These Treats Special?
If you’ve never used ground eggshells in dog treats before, you’re in for a surprise! Eggshell powder is one of the most bioavailable sources of calcium, making it a fantastic (and free!) ingredient for boosting bone health.
When paired with sardines, which are naturally rich in calcium, protein, and omega-3 fatty acids, you get a treat that’s both nutritious and irresistibly tasty.
These biscuits are crunchy but not rock-hard, making them a good option for most dogs. They store well, travel easily, and are perfect for training or as a daily snack. If you’ve been looking for a homemade alternative to high-calcium store treats, this is it!
Why You’ll Love This Recipe
- Natural Calcium Boost – Eggshells and sardines provide highly absorbable calcium.
- Crispy & Crunchy – Helps clean teeth and satisfies dogs who love crunchy snacks.
- Omega-3 Rich – Supports joint health, brain function, and a shiny coat.
- Long Shelf Life – Stays fresh for weeks without refrigeration.
- Easy to Make & Store – Perfect for batch baking and storing for later.
- Great for Picky Eaters – Sardines add natural umami flavor that dogs go crazy for!
Recipe Overview
- Prep Time: 10 minutes
- Cook Time: 30 minutes
- Total Time: 40 minutes
- Yield: About 25 biscuits
- Shelf Life: 2 weeks (room temperature), 3 months (frozen)
- Suitable For: Puppies, adult dogs, senior dogs
What You’ll Need
For this recipe, you’ll need a food processor (or a fork for mashing), a rolling pin, and cookie cutters or a knife to shape the biscuits.
A baking sheet lined with parchment paper is also essential for even baking. For storage, use an airtight container to keep them fresh.
Ingredients

Main Components
- ½ cup (60g) ground eggshell powder – A natural and highly absorbable calcium source.
- 1 can (3.75 oz / 106g) sardines in water, drained – Rich in calcium, protein, and omega-3s.
- 1 large egg – Helps bind the ingredients while adding extra protein.
- 1 cup (120g) whole wheat flour – Provides structure and a crunchy texture. (Substitutions below.)
- ¼ cup (30g) oat flour – Adds fiber and makes the biscuits easier to digest.
- 1 tablespoon (15g) unsweetened applesauce – Adds natural moisture and slight sweetness.
- ¼ cup (60ml) water – Adjust as needed to form the dough.
Optional Add-ins
- 1 teaspoon (5g) turmeric powder – For anti-inflammatory benefits.
- 1 teaspoon (5g) dried parsley – Naturally freshens breath.
Expert Tips Before You Start
Making Eggshell Powder: If you’ve never made eggshell powder before, it’s easy! Rinse used eggshells, dry them completely, and grind them into a fine powder using a coffee grinder or blender. Store in an airtight container and use as needed.
Choosing Sardines: Always pick sardines packed in water, NOT oil or salt. If they come whole, mash them thoroughly to avoid any large bones (though the bones in sardines are already soft and safe for dogs).
Flour Alternatives: If your dog is grain-sensitive, swap whole wheat flour for chickpea or coconut flour (adjust water accordingly, as coconut flour absorbs more liquid).
Step-by-Step Instructions
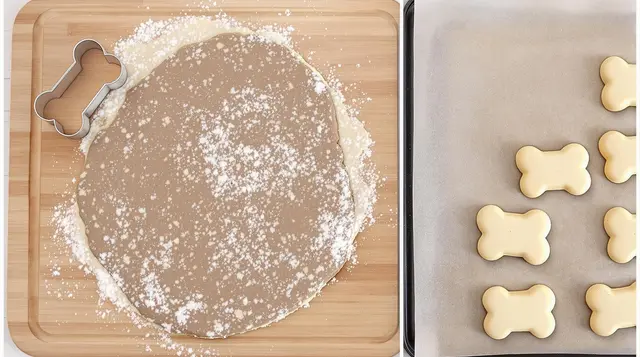
- Preheat the Oven: Set to 325°F (163°C) and line a baking sheet with parchment paper.
- Prepare the Sardines: Drain and mash the sardines into a smooth paste.
- Mix the Wet Ingredients: In a bowl, combine the mashed sardines, egg, and applesauce. Stir well.
- Add the Dry Ingredients: Mix in the eggshell powder, whole wheat flour, oat flour, and any optional add-ins. Slowly add water as needed to form a firm, rollable dough.
- Roll & Cut: On a lightly floured surface, roll out the dough to about ¼-inch thickness. Use a knife or cookie cutters to cut shapes.
- Bake: Arrange the biscuits on the baking sheet and bake for 30 minutes, flipping halfway for even crispiness.
- Cool Completely: Let them cool on a wire rack before storing.
Variations & Substitutions
- Grain-Free Version: Replace wheat flour with chickpea flour or almond flour.
- Softer Treat Option: Add 2 tablespoons of pumpkin puree and bake for 5-10 minutes less.
- Extra Crunch: Leave biscuits in the turned-off oven for 1 hour to dry them further.
Serving & Storage Guidelines
- Small dogs: 1-2 biscuits per day
- Medium dogs: 2-3 biscuits per day
- Large dogs: 3-4 biscuits per day
Since these biscuits are fully baked and low in moisture, they last up to 2 weeks in an airtight container at room temperature. For longer storage, keep them in the freezer for up to 3 months.
Common Questions & Troubleshooting
Can I Use Store-Bought Eggshell Powder?
Yes! If you prefer, you can buy pre-ground eggshell powder, but making it at home is free and easy.
Are Sardine Bones Safe for Dogs?
Yes, canned sardines have soft, fully edible bones that are safe for dogs and provide extra calcium.
Why Are My Biscuits Too Hard?
If they turned out extra hard, reduce baking time by 5 minutes or add a little extra applesauce to soften them.

