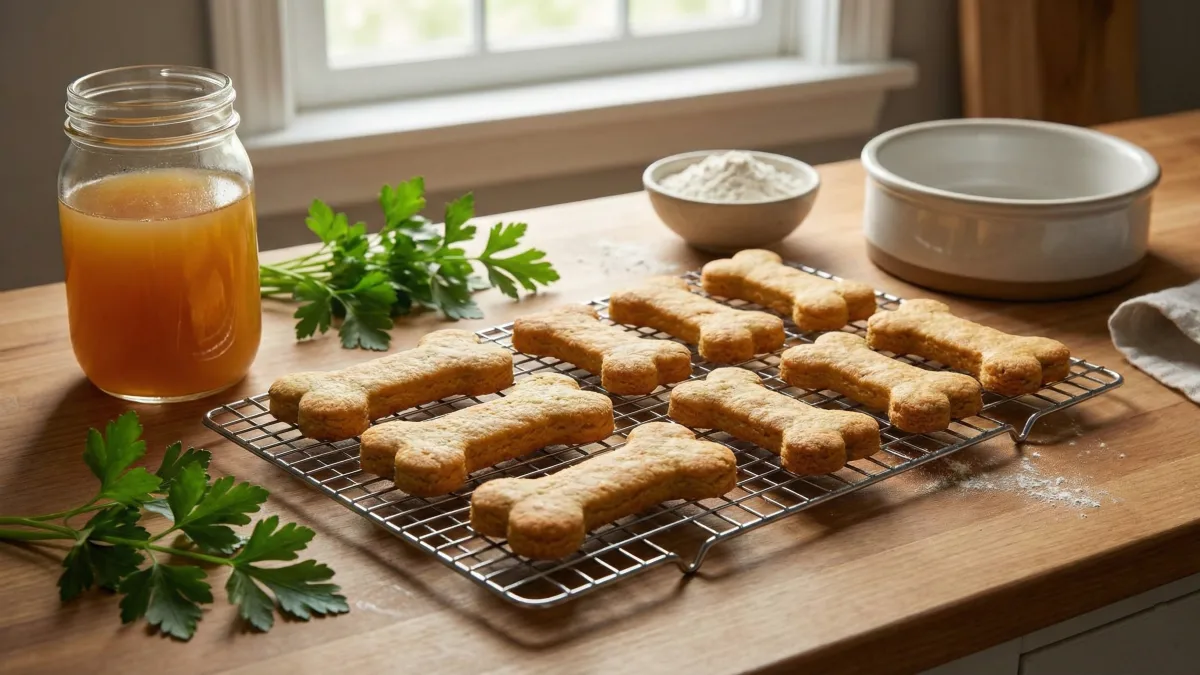
I used to pack my dog’s hiking bag like a rookie—some kibble in a plastic bag, maybe a store-bought treat or two. Seemed fine… until we hit mile three. That’s when the pitiful side-eye started. The kind that says, You expect me to keep going on this?
Lesson learned. Just like us, dogs need real fuel for real adventures—not dry, flavorless bites that crumble before they hit the trail. That’s why I started making DIY adventure meals—packed with protein, healthy fats, and slow-burning carbs to keep energy high and tails wagging.
No fillers, no mystery ingredients—just real, homemade fuel for the ultimate trail buddy. If your dog loves the wild, they deserve food that keeps up. Let’s get cooking.

#1. Steamed Chicken with Carrots & Sweet Potatoes: A Nutritious DIY Dog Food Recipe for Hiking & Active Adventures
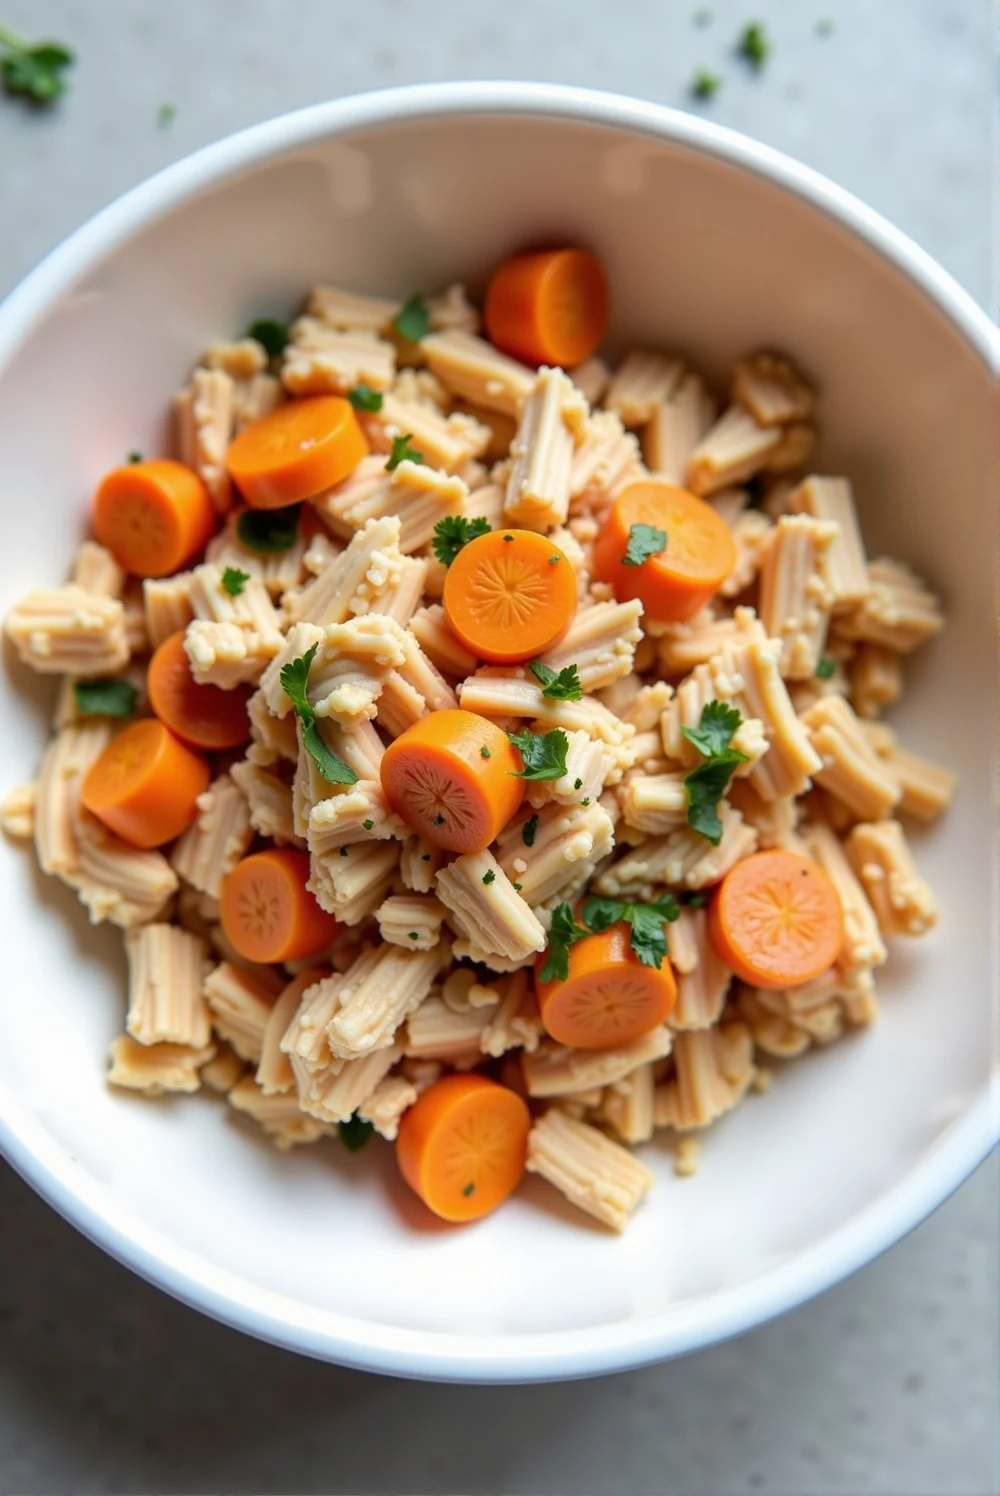
If you’re like me, you want the best for your dog—especially when you’re out on the trails or enjoying an active lifestyle together. Finding the right food that keeps your pup fueled while ensuring it’s healthy and safe can be a challenge. That’s why I started making my own dog food, particularly for those high-energy days. This Steamed Chicken with Carrots & Sweet Potatoes recipe is packed with protein, vitamins, and just the right balance of nutrients to keep your dog energized on hikes, long walks, and outdoor adventures.
I first created this recipe for my own dog, who loves hiking but struggles with digestion when eating commercial treats. Store-bought dog food can sometimes have hidden additives or unnecessary fillers that don’t sit well with sensitive stomachs. This homemade meal not only provides a clean and wholesome option but also ensures your dog gets the right balance of protein, fiber, and healthy fats for sustained energy. Plus, it’s incredibly easy to make, and you can prepare it in bulk for convenience. Whether you have an active pup that joins you on every adventure or just want to feed your dog a wholesome, homemade diet, this recipe is a game-changer.
Why This Recipe is Perfect for Your Active Pup
Dogs need the right balance of nutrients, especially when they’re burning extra energy during outdoor adventures. This homemade dog food recipe is special because it’s grain-free, protein-rich, and packed with natural vitamins. Chicken provides high-quality protein that supports muscle recovery, while carrots and sweet potatoes add fiber, antioxidants, and essential nutrients for overall health. The combination of these ingredients ensures your dog stays full, satisfied, and energized throughout the day.
One of the best things about this recipe is its soft texture, making it easy to eat for dogs of all ages—from puppies to seniors. It’s also gentle on the stomach, perfect for dogs with sensitivities to grain or processed foods. You can even adjust portion sizes to suit your dog’s needs, whether you have a tiny pup or a large, adventurous breed. This meal is also an excellent alternative to commercial kibble because it avoids artificial preservatives, mystery ingredients, and fillers.
Why You’ll Love This Recipe
- Cost-effective: Homemade dog food is much cheaper than premium store-bought options.
- Ingredient control: You know exactly what goes into your dog’s bowl—no fillers, no artificial additives.
- Storage-friendly: Make a batch ahead of time and store it for quick meals.
- Great for training & portion control: Easily measure out servings based on your dog’s size and activity level.
- Multi-dog households: Works well for families with multiple pups, with easy portion adjustments.
- Time-saving: Simple, one-pot meal that can be made in bulk for the week ahead.
Essential Information You Need
- Prep Time: 5 minutes
- Cook Time: 60 minutes
- Total Time: 1 hour 5 minutes
- Yield: Makes approximately 4-5 servings for a medium-sized dog (45-50 lbs)
- Treat Size: Adjustable to dog size
- Shelf Life: 3-4 days in the fridge; up to 2 months if frozen
- Storage Requirements: Keep refrigerated in an airtight container or freeze in portions for later use
What You’ll Need
For this recipe, all you need is a large stockpot with a lid and a sharp knife for chopping vegetables. If you don’t have a stockpot, you can use a Dutch oven or slow cooker to get similar results. Airtight storage containers are essential to keep the food fresh, and freezer-safe containers work best for long-term storage. Always sanitize your tools and work area before and after preparation to ensure food safety.
Ingredients for This Nutritious Dog Meal
Main Ingredients
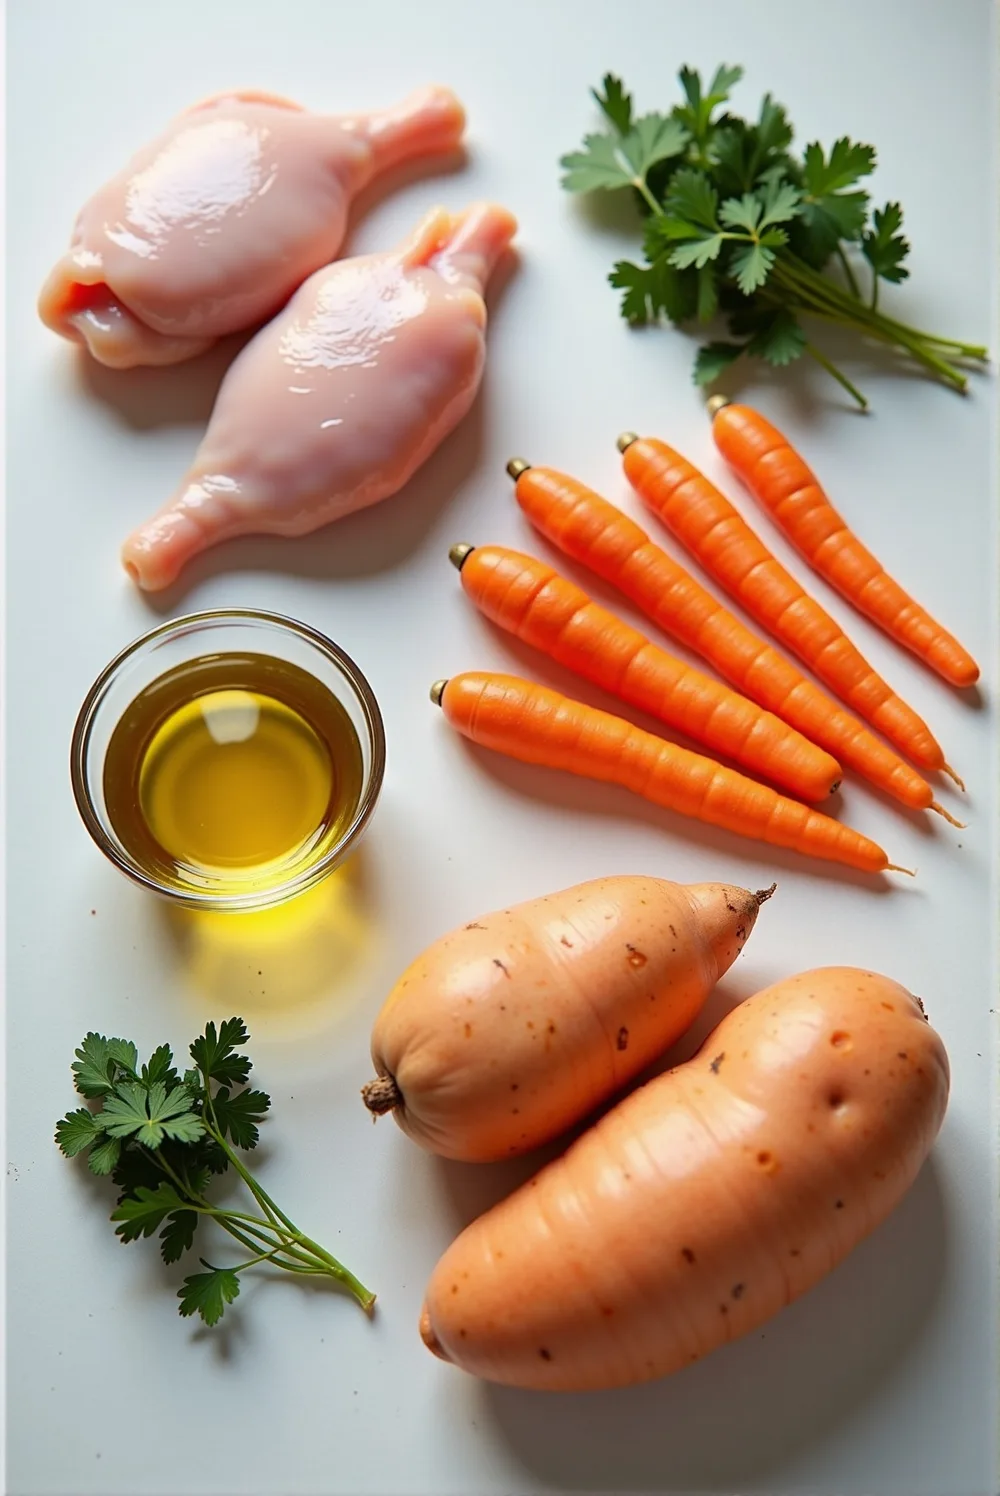
- 2-3 lbs (900g – 1.36kg) chicken thighs (bone-in and skin-on preferred)
- 1 lb (450g) baby carrots, whole or chopped
- 3 large sweet potatoes, cut into 3-inch (7.6 cm) cubes
- 3 tbsp (45 ml) olive oil
- Pinch of sea salt (optional, but enhances flavor and mineral content in small amounts)
- Handful of fresh parsley, roughly chopped (optional, great for fresh breath and digestion)
Ingredient Notes
Chicken provides high-quality protein, while sweet potatoes offer slow-burning carbohydrates for sustained energy. Carrots are excellent for eye health and digestion, and olive oil adds healthy fats for skin and coat health. Always use fresh, high-quality ingredients and avoid processed seasonings or artificial additives.
Expert Tips Before You Start
- Remove all bones before serving—cooked chicken bones can splinter and pose a choking hazard.
- Chop sweet potatoes into uniform sizes to ensure even cooking.
- Use skin-on chicken for added healthy fats, but if your dog is prone to weight gain, you can remove the skin after cooking.
- If your dog has a sensitive stomach, introduce this meal gradually to avoid digestive upset.
- For extra hydration, serve with a little warm broth from the cooked chicken.
Step-by-Step Instructions

- Prepare the Ingredients: Rinse the chicken and pat it dry. Chop sweet potatoes into 3-inch chunks and set aside.
- Start Cooking: Heat a large stockpot over medium-high heat. Add olive oil and let it warm for one minute before adding the carrots.
- Layer the Chicken & Vegetables: Place chicken thighs skin-side down on top of the carrots, then sprinkle a pinch of sea salt over them. Add the sweet potatoes on top, followed by the chopped parsley (if using).
- Cover & Simmer: Reduce heat to medium, cover the pot, and let cook for 60 minutes until everything is tender.
- Cool & Shred: Once done, let the mixture cool for 15 minutes, remove the chicken thighs, discard all bones, and shred the meat.
- Mix & Serve: Stir the shredded chicken back into the pot, mix with vegetables and broth, then let it cool completely before serving.
Storage & Freezing Tips
Refrigerate leftovers in an airtight container for up to 4 days. For longer storage, freeze portions in sealed containers for up to 2 months. To serve from frozen, thaw overnight in the fridge or reheat gently before serving.
Serving Guidelines & Portioning
The portion size depends on your dog’s weight and activity level. Here’s a general guideline:
- Small dogs (under 20 lbs): ½ cup per meal
- Medium dogs (20-50 lbs): 1-1½ cups per meal
- Large dogs (50+ lbs): 2+ cups per meal
Common Questions
Can I use chicken breast instead of thighs?
Yes, but thighs have more healthy fats and flavor, making them a better choice for active dogs.
Can I add grains like rice?
Yes! Brown rice or quinoa can be added for extra fiber and energy.
Can I feed this to my puppy?
This recipe is safe for puppies, but you should consult your vet for portion adjustments based on their age and breed.
#2. Protein-Packed Turkey & Pumpkin Energy Bites: The Ultimate DIY Dog Food for Hiking & Adventures

When my dog and I started hiking more frequently, I quickly realized that commercial treats weren’t providing enough energy for long outdoor trips. Many store-bought options were either loaded with fillers or didn’t have the right balance of nutrients for sustained activity. That’s when I started experimenting with homemade, protein-rich treats that were easy to carry and packed with energy-boosting ingredients.
These Protein-Packed Turkey & Pumpkin Energy Bites are a game-changer for active dogs. They’re small, soft yet chewy, and packed with lean protein from turkey, healthy fiber from pumpkin, and a boost of omega fatty acids from flaxseeds. Perfect for training, hiking, or just as a daily snack, these treats provide long-lasting energy while being gentle on the stomach. Plus, they’re grain-free and all-natural, making them a fantastic option for dogs with food sensitivities.
Why These Energy Bites Are a Must-Have for Active Dogs
Every pet parent knows how important proper nutrition is, especially for active pups. Unlike store-bought snacks that may contain artificial preservatives, these homemade energy bites are made with simple, high-quality ingredients that support muscle recovery, digestion, and overall well-being.
Turkey is a fantastic lean protein source that helps build and maintain muscles, while pumpkin provides fiber and essential vitamins that promote digestive health. I’ve also added flaxseeds and coconut flour for healthy fats and slow-burning carbohydrates, ensuring your dog stays energized without sugar crashes. The best part? These bites are soft enough for all ages, making them perfect for puppies, adult dogs, and even seniors who might have trouble with hard treats.
Why You’ll Love This Recipe
- Quick & easy to make – Ready in just 30 minutes!
- Soft & chewy texture – Great for dogs of all sizes and ages.
- Energy-boosting – Packed with protein, fiber, and healthy fats.
- Storage-friendly – Freeze for later or keep in an airtight container.
- Great for training – Small and bite-sized, ideal for reinforcing good behavior.
- Grain-free & all-natural – No artificial additives or fillers.
Essential Recipe Information
- Prep Time: 10 minutes
- Cook Time: 20 minutes
- Total Time: 30 minutes
- Yield: 20-25 bite-sized treats
- Size per Treat: About 1-inch balls
- Shelf Life: 5 days in the fridge, up to 3 months if frozen
- Storage Requirements: Keep refrigerated in an airtight container, or freeze for extended freshness.
What You’ll Need
To make these Protein-Packed Turkey & Pumpkin Energy Bites, you’ll need a mixing bowl, baking sheet, parchment paper, and an oven. If you have a silicone baking mat, it’s a great alternative to parchment paper. Since these are no-mess, bake-and-go treats, you won’t need any fancy equipment. A cookie scoop or your hands works well for shaping the bites.
Ingredients for These Nutritious Dog Treats

Main Ingredients
- 1 lb (450g) ground turkey (lean and organic preferred)
- ½ cup (120g) canned pumpkin (pure pumpkin, not pumpkin pie filling!)
- 1 egg (helps bind the ingredients together)
- ¼ cup (30g) coconut flour (grain-free, absorbs moisture well)
- 2 tbsp (30g) ground flaxseeds (adds healthy omega-3s and fiber)
- ½ tsp turmeric (natural anti-inflammatory, great for joint health)
Ingredient Notes & Substitutions
Turkey provides high-quality protein, while pumpkin is great for digestion and gut health. Coconut flour is a safe, grain-free alternative that gives these bites a nice texture without being too dry. If your dog needs an alternative protein, ground chicken or beef can be substituted for turkey.
Pro Tips Before You Start
- Use pure pumpkin, not pie filling—added sugars and spices can be harmful to dogs.
- Coconut flour absorbs moisture quickly, so don’t be alarmed if the dough feels thick.
- For softer treats, add an extra egg to keep them more pliable.
- Shape the bites evenly so they cook at the same rate.
- If your dog prefers crunchier treats, bake them an extra 5 minutes for a firmer texture.
Step-by-Step Instructions
- Preheat the Oven: Set your oven to 350°F (175°C) and line a baking sheet with parchment paper.
- Mix the Ingredients: In a large bowl, combine ground turkey, pumpkin, egg, coconut flour, flaxseeds, and turmeric. Mix thoroughly until a dough-like consistency forms.
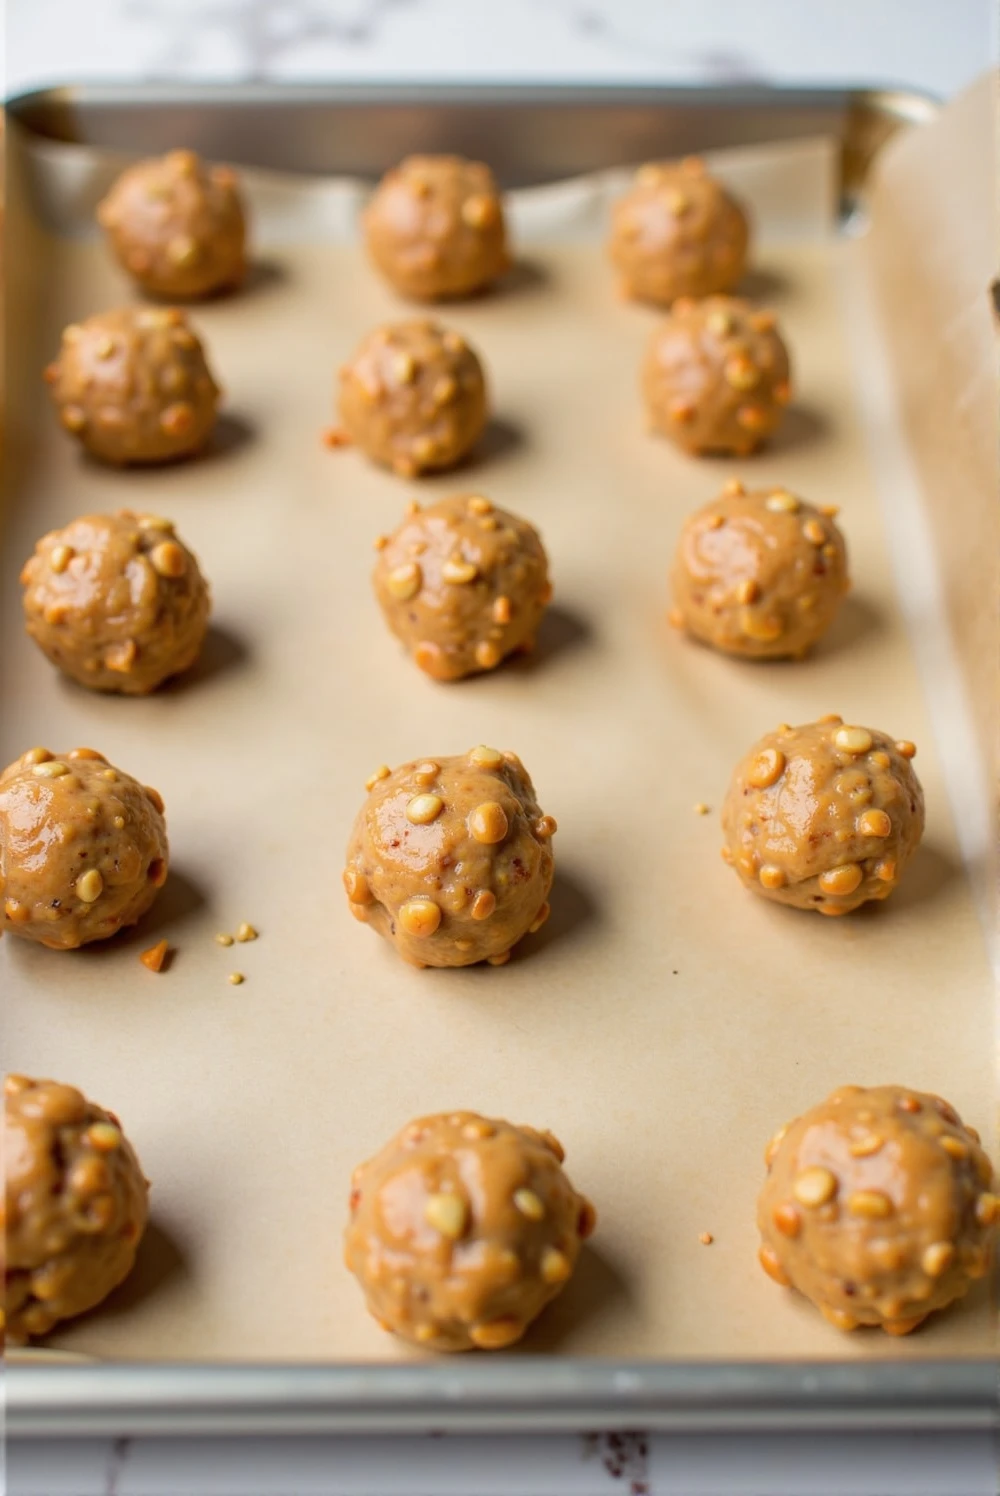
- Shape the Bites: Roll the mixture into 1-inch balls and place them evenly on the baking sheet.
- Bake: Transfer to the oven and bake for 20 minutes, or until the bites are firm but still soft in the center.
- Cool & Store: Allow the bites to cool completely before serving. Store leftovers in an airtight container in the fridge for up to 5 days.
Storage & Freezing Tips
These energy bites store well for both short and long-term use. Keep them in the fridge for up to 5 days in a sealed container. For longer storage, place them in a freezer-safe bag and freeze for up to 3 months. To serve from frozen, simply thaw overnight in the fridge or let them sit at room temperature for a few minutes.
Serving Guidelines & Portioning
These energy bites are great for on-the-go fuel or as a training reward. The portion size depends on your dog’s weight and activity level:
- Small dogs (under 20 lbs): 1-2 bites per day
- Medium dogs (20-50 lbs): 2-3 bites per day
- Large dogs (50+ lbs): 3-5 bites per day
Common Questions
Can I use a different type of meat?
Yes! Ground chicken, beef, or lamb can all be substituted. Just ensure they’re lean cuts with minimal fat.
What if my dog is allergic to eggs?
You can swap the egg with unsweetened applesauce (¼ cup) as a binding agent.
Can I make these into crunchy treats?
Absolutely! Bake for an additional 5-7 minutes for a crispier texture.
Are these good for puppies?
Yes, but portion accordingly—smaller puppies should have half-sized bites.
#3. Salmon & Sweet Potato Training Treats: A High-Protein DIY Snack for Active Dogs
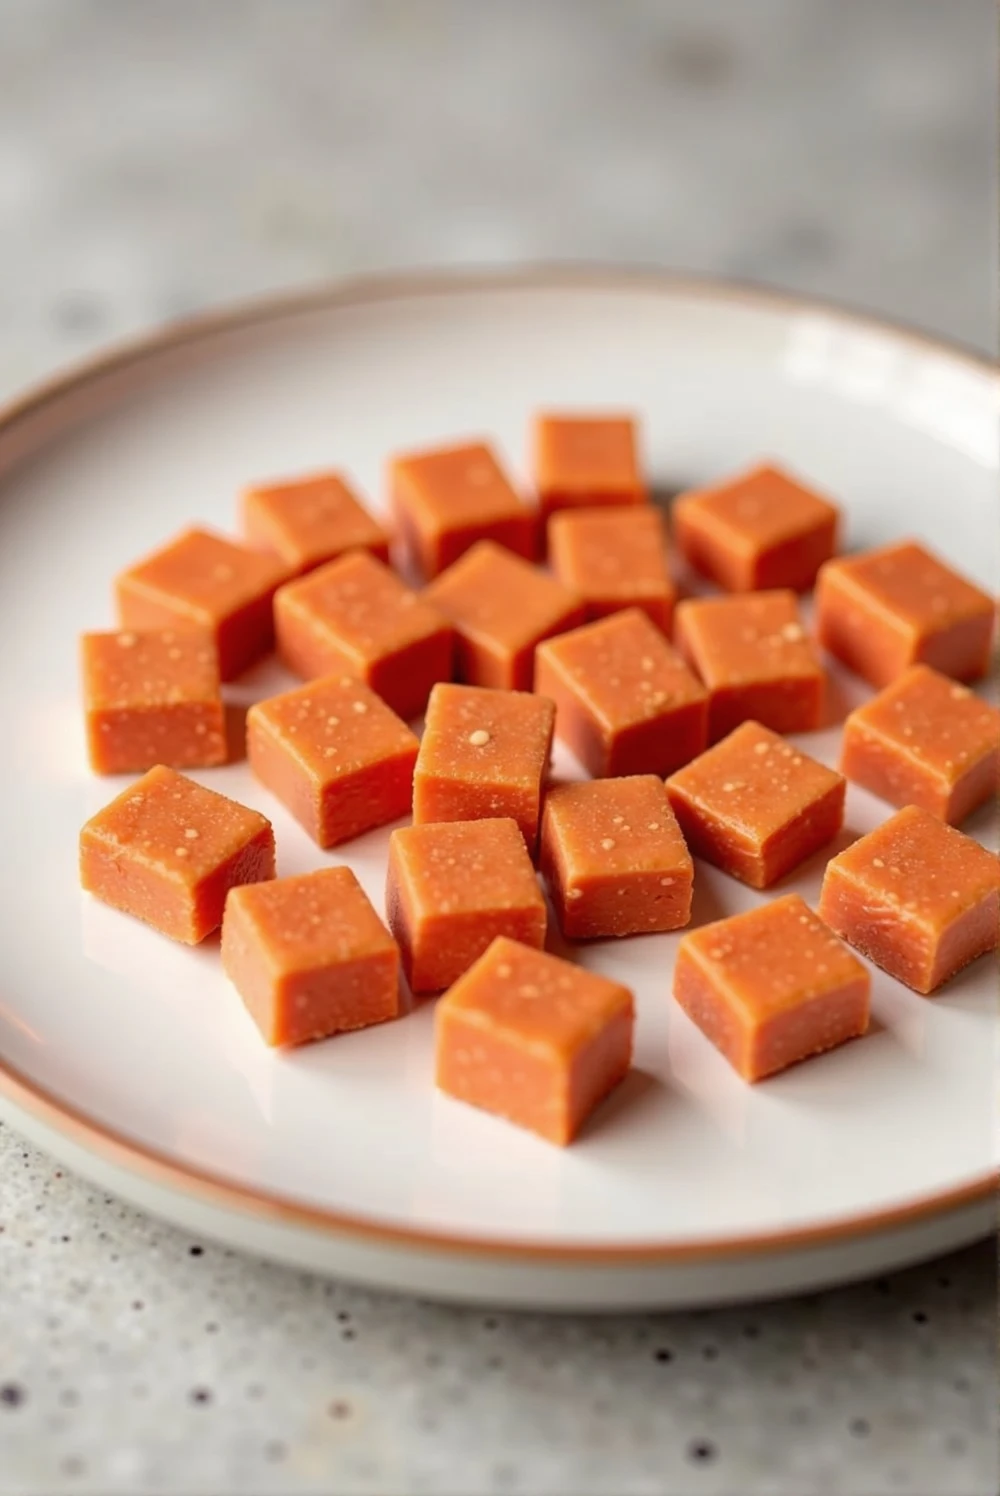
Every active dog needs the right fuel, whether they’re hiking the trails, running in the park, or just staying sharp with regular training. When I was searching for the perfect balance of protein, omega-3s, and healthy carbs, I realized that many store-bought options contained artificial additives and unnecessary fillers. That’s when I decided to create my own high-protein, brain-boosting training treats using real salmon and sweet potatoes.
These Salmon & Sweet Potato Training Treats are soft, bite-sized, and packed with essential nutrients for dogs who love to stay active. They are grain-free, rich in omega-3s, and easy to digest, making them perfect for puppies, adult dogs, and seniors alike. Since they’re small and chewy, they’re ideal for training sessions or quick energy boosts during outdoor adventures. If your dog has dry skin, a dull coat, or joint concerns, these treats will be a game-changer thanks to the anti-inflammatory benefits of salmon and flaxseeds.
Why These Treats Are Perfect for Active & Training Dogs
Training treats should be nutritionally beneficial, not just empty-calorie fillers. These soft and chewy treats are packed with real salmon, an excellent source of protein and omega fatty acids that support brain function, skin health, and muscle recovery. Sweet potatoes add slow-burning carbohydrates, keeping your dog full and energized without sugar spikes.
The small, bite-sized texture makes them perfect for reward-based training, and they won’t crumble in your pocket or treat pouch. Unlike many store-bought options, these treats contain no artificial preservatives or excessive sodium, ensuring your pup gets only the best ingredients. Whether you’re training a young puppy or keeping an older dog engaged, these nutrient-packed bites make every session more rewarding.
Why You’ll Love This Recipe
- High in omega-3s – Supports brain function, skin, and coat health.
- Perfect for training – Small, soft, and easy to chew.
- Packed with protein – Helps maintain muscle strength and energy levels.
- Gentle on digestion – Sweet potatoes provide fiber for gut health.
- Grain-free & allergy-friendly – No wheat, corn, or soy.
- Freezer-friendly – Make in bulk and store for future use.
Essential Recipe Information
- Prep Time: 10 minutes
- Cook Time: 25 minutes
- Total Time: 35 minutes
- Yield: 50-60 small training treats
- Size per Treat: About ½-inch squares
- Shelf Life: 1 week in the fridge, up to 3 months if frozen
- Storage Requirements: Keep in an airtight container, refrigerate or freeze for longer storage.
What You’ll Need
To make these Salmon & Sweet Potato Training Treats, you’ll need a food processor, baking sheet, parchment paper, and an oven. If you don’t have a food processor, a blender or hand-mashing technique can work too. For portioning, a sharp knife or pizza cutter is helpful to create even, bite-sized squares. Silicone baking mats are a great alternative to parchment paper to prevent sticking.
Ingredients for These Nutrient-Packed Treats
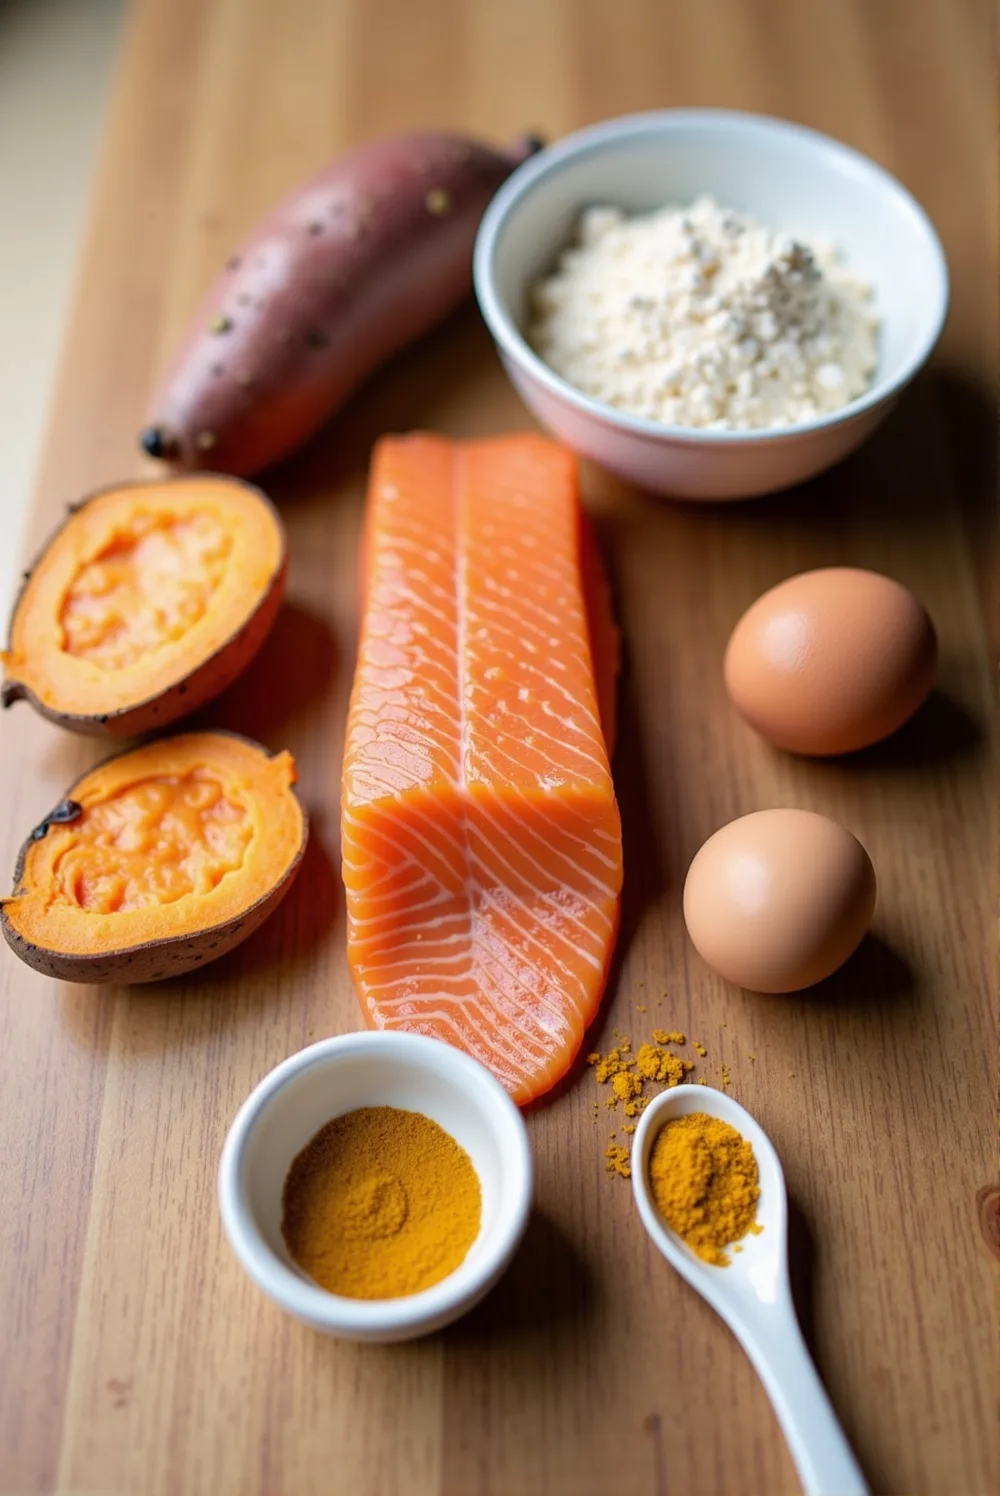
Main Ingredients
- 1 cup (140g) cooked salmon (boneless, skinless, wild-caught preferred)
- ½ cup (120g) mashed sweet potatoes (cooked and cooled)
- 1 egg (binds the mixture together)
- ¼ cup (30g) coconut flour (grain-free alternative, absorbs moisture well)
- 1 tbsp (15g) ground flaxseeds (adds fiber and healthy fats)
- ½ tsp turmeric (natural anti-inflammatory, great for joints and brain health)
Ingredient Notes & Substitutions
Salmon provides high-quality protein and omega fatty acids, while sweet potatoes offer fiber, vitamins, and natural sweetness. If salmon isn’t available, cooked tuna or sardines are great substitutes. For extra crunch, add finely chopped carrots or pumpkin seeds.
Pro Tips Before You Start
- Use wild-caught salmon when possible—it’s lower in toxins and higher in nutrients.
- Make sure the sweet potatoes are fully mashed—chunks can affect the consistency of the dough.
- If the mixture feels too dry, add a tablespoon of water for a smoother texture.
- For extra flavor, add a pinch of parsley or rosemary—both are safe and great for digestion.
- If you want a firmer treat, bake them a little longer to get a drier texture.
Step-by-Step Instructions
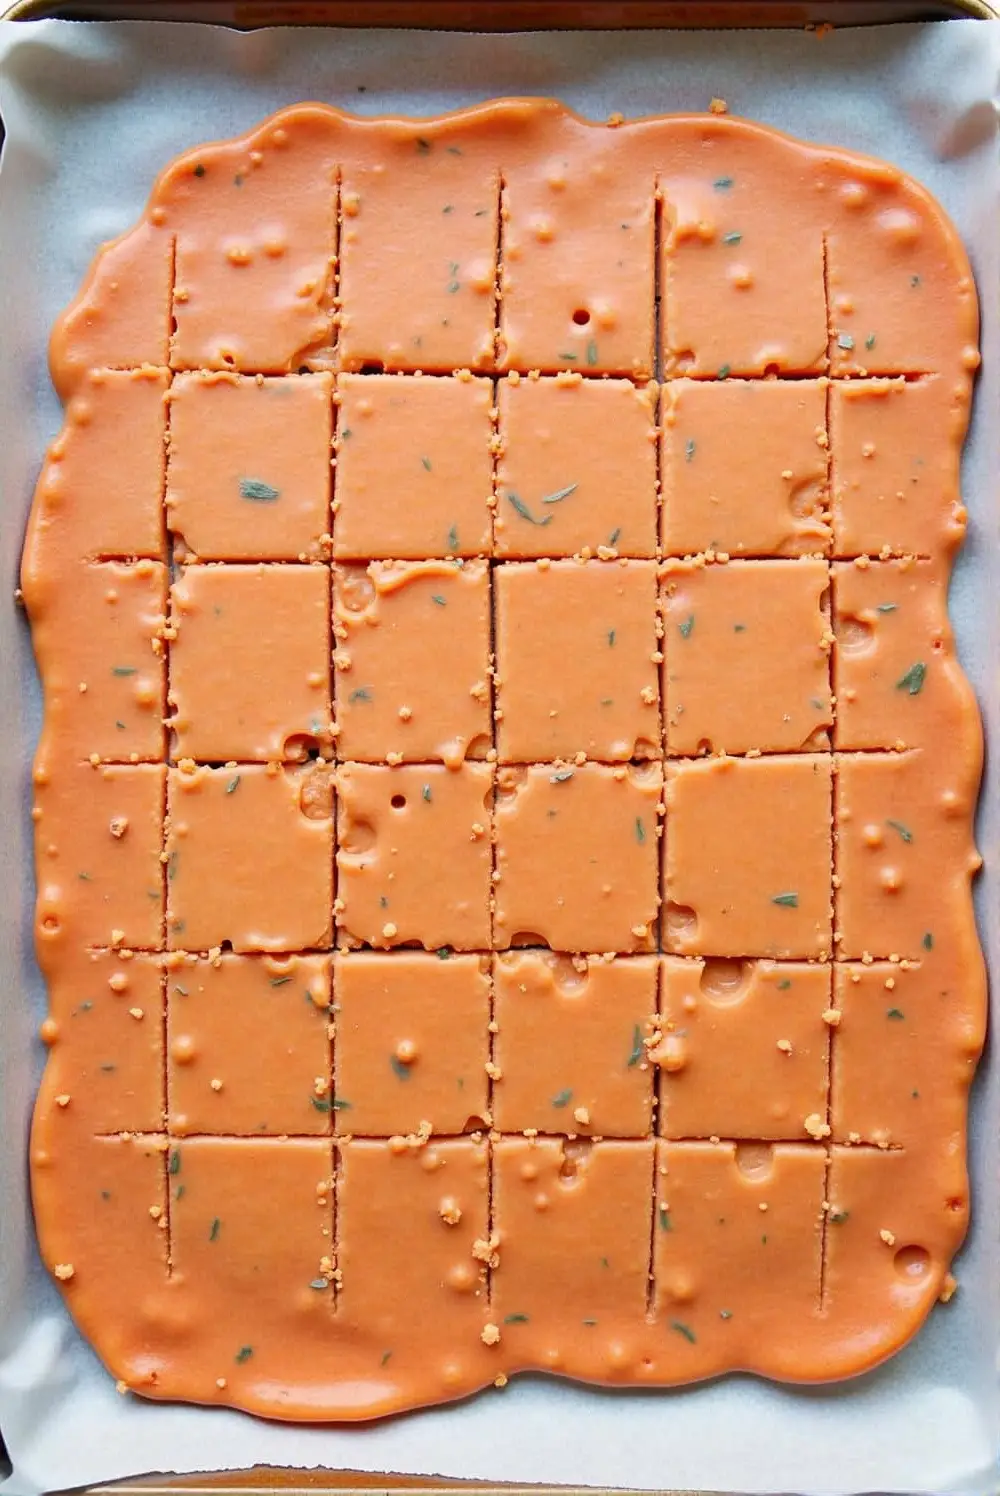
- Preheat the Oven: Set your oven to 325°F (160°C) and line a baking sheet with parchment paper.
- Prepare the Mixture: In a food processor, blend together salmon, mashed sweet potatoes, egg, coconut flour, flaxseeds, and turmeric until it forms a thick dough.
- Shape the Dough: Transfer the dough onto a lined baking sheet and press it into a flat, ½-inch thick rectangle.
- Cut Into Bite-Sized Pieces: Use a knife or pizza cutter to score the dough into small squares (about ½ inch each).
- Bake: Place in the oven and bake for 25 minutes, or until firm but still chewy.
- Cool & Store: Let the treats cool completely before breaking them apart and storing them.
Storage & Freezing Tips
These treats can be stored in the fridge for up to 1 week in an airtight container. For long-term storage, freeze in small batches for up to 3 months. To serve from frozen, let them thaw at room temperature or microwave for a few seconds to soften.
Serving Guidelines & Portioning
Since these are small, high-protein training treats, you can adjust portions based on your dog’s weight and activity level:
- Small dogs (under 20 lbs): 3-5 treats per session
- Medium dogs (20-50 lbs): 5-8 treats per session
- Large dogs (50+ lbs): 8-12 treats per session
These treats are low-calorie and nutrient-dense, so they won’t interfere with your dog’s regular meals.
Common Questions
Can I use canned salmon instead of fresh?
Yes! Just make sure it’s boneless, skinless, and packed in water (not oil or brine).
Can I use an air fryer instead of an oven?
Absolutely! Cook at 300°F (150°C) for 12-15 minutes, checking for doneness.
Are these safe for puppies?
Yes, but make sure to break them into even smaller pieces for young puppies.
Can I make a crunchier version?
Yes! Bake for an extra 5-10 minutes, or let them dehydrate in the oven after baking.
#4. Beef & Blueberry Power Bars: The Ultimate Energy-Boosting Dog Treat for Active Adventures
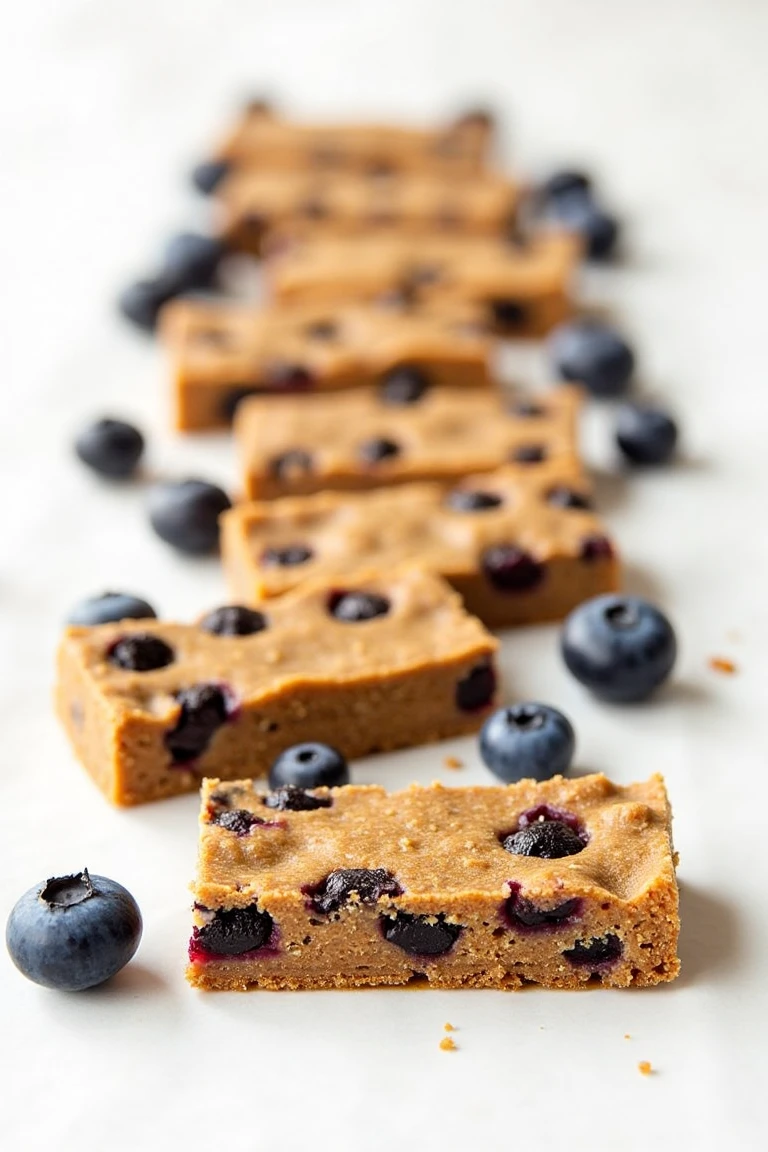
If you and your dog love exploring the outdoors, you know how important it is to keep them fueled with nutrient-dense, long-lasting energy. While store-bought treats are convenient, they often lack the right balance of protein, healthy fats, and natural energy sources that active dogs need. That’s why I created these Beef & Blueberry Power Bars—a high-protein, antioxidant-rich, and naturally sweetened snack that’s perfect for hikes, training sessions, or everyday nutrition.
This recipe is inspired by energy bars for humans, but designed specifically for dogs. The lean beef provides essential protein, while blueberries offer antioxidants to support brain function and heart health. Sweet potatoes add slow-burning carbohydrates for sustained energy, and a touch of coconut oil keeps their coat shiny and skin healthy. These bars are chewy, portable, and easy to break into pieces, making them the perfect adventure snack for dogs on the go.
Why These Power Bars Are Perfect for Active Dogs
Dogs burn a lot of energy when they’re hiking, running, or engaging in high-energy activities. Unlike traditional dog treats, these homemade power bars are designed to provide a balanced mix of protein, fats, and fiber to keep energy levels steady. The beef offers lean protein to support muscle recovery and endurance, while blueberries help fight oxidative stress, keeping your dog’s immune system strong.
One of the best things about this recipe is that these bars don’t crumble easily, so they’re great for carrying in a treat pouch or backpack. They’re also grain-free and all-natural, making them an excellent choice for dogs with food sensitivities or allergies. Whether you’re heading out for a long hike or just want a healthy, high-energy treat for your pup, these bars are a must-try!
Why You’ll Love This Recipe
- High in protein & energy – Perfect for hiking, training, and active play.
- Antioxidant-rich – Blueberries provide brain and heart health benefits.
- No artificial ingredients – Just wholesome, natural foods.
- Soft & chewy texture – Easy to eat for dogs of all ages.
- Long shelf life – Can be frozen for months for convenience.
- Portable & non-crumbly – Great for on-the-go snacking.
Essential Recipe Information
- Prep Time: 10 minutes
- Cook Time: 35 minutes
- Total Time: 45 minutes
- Yield: 10-12 bars (can be cut into smaller bites)
- Size per Bar: Approx. 2 x 1 inches
- Shelf Life: 5 days in the fridge, up to 3 months if frozen
- Storage Requirements: Airtight container in fridge or freezer
What You’ll Need
To make these Beef & Blueberry Power Bars, you’ll need a mixing bowl, a baking sheet, parchment paper, and an oven. If you prefer a firmer, jerky-like bar, a dehydrator can be used instead of baking. A food processor is helpful but not required—hand-mixing works well too.
Ingredients for These High-Energy Dog Bars
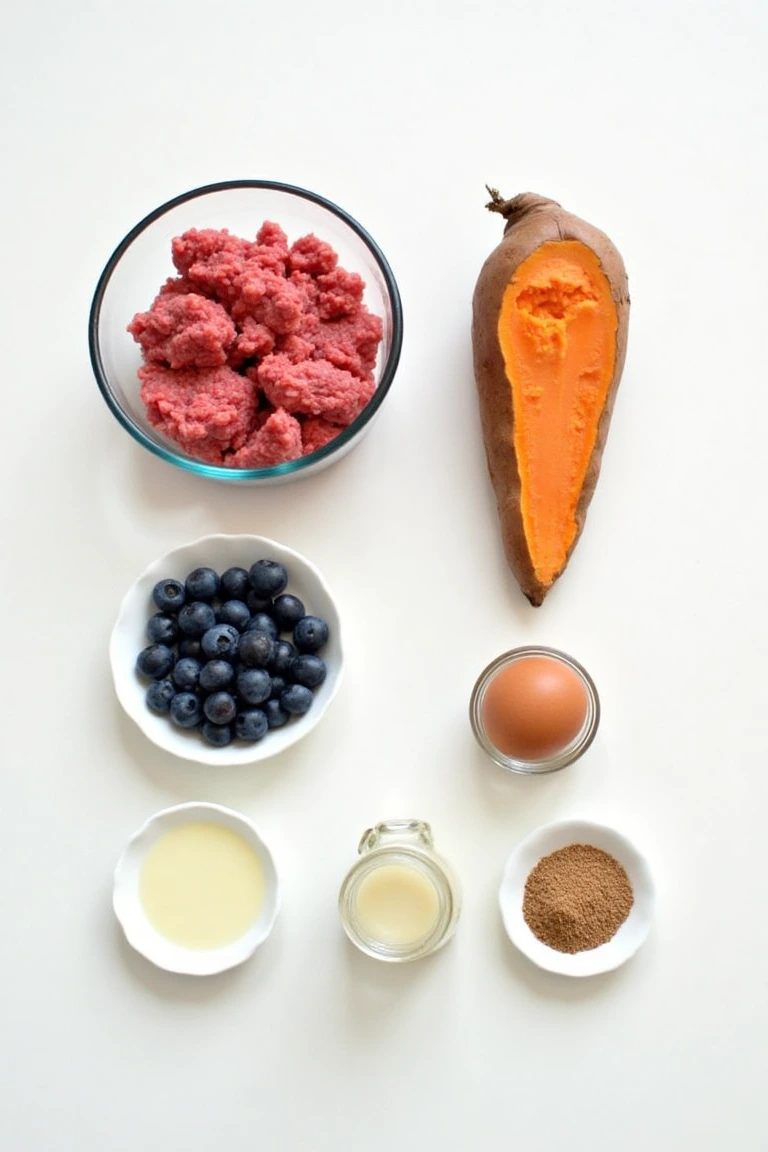
Main Ingredients
- 1 lb (450g) lean ground beef (grass-fed preferred for higher nutrients)
- ½ cup (120g) mashed sweet potatoes (cooked and cooled)
- ¼ cup (40g) fresh or frozen blueberries (rich in antioxidants & vitamin C)
- 1 tbsp (15ml) coconut oil (supports skin and coat health)
- 2 tbsp (30g) ground flaxseeds (adds fiber and omega-3s for joint health)
- 1 egg (helps bind the ingredients together)
- ¼ tsp cinnamon (anti-inflammatory, but optional if your dog dislikes it)
Ingredient Notes & Substitutions
Beef is an excellent protein source that supports muscle maintenance and recovery. Blueberries are packed with vitamins and antioxidants, while flaxseeds add fiber and healthy fats. If your dog is allergic to beef, you can substitute turkey or chicken. For a crunchier texture, reduce sweet potato and bake longer.
Pro Tips Before You Start
- Use lean beef to prevent excess grease, which can make the bars too soft.
- Mash blueberries slightly before mixing to distribute their flavor.
- For firmer bars, bake longer or use a dehydrator for a jerky-like texture.
- Coconut oil helps keep bars moist and adds beneficial fatty acids for coat health.
- If your dog needs more protein, add 1 extra egg for a firmer texture.
Step-by-Step Instructions

- Preheat the Oven: Set your oven to 350°F (175°C) and line a baking sheet with parchment paper.
- Mix the Ingredients: In a large bowl, combine ground beef, mashed sweet potatoes, blueberries, coconut oil, flaxseeds, egg, and cinnamon. Mix thoroughly until everything is evenly distributed.
- Shape the Bars: Press the mixture into a ¼-inch thick rectangle on the lined baking sheet.
- Bake: Bake for 35 minutes, or until firm but slightly soft in the center.
- Cool & Cut: Let the bars cool completely before cutting into 2 x 1-inch bars or smaller bite-sized pieces.
- Store & Serve: Keep bars in an airtight container in the fridge for up to 5 days or freeze for up to 3 months.
Storage & Freezing Tips
For short-term storage, keep these bars refrigerated for up to 5 days in an airtight container. If you’re making them in bulk, store them in the freezer for up to 3 months. To serve from frozen, thaw overnight in the fridge or let them sit at room temperature for a few minutes.
Serving Guidelines & Portioning
These nutrient-dense power bars are best served as an energy booster or training reward. Suggested portions:
- Small dogs (under 20 lbs): ½ bar per serving
- Medium dogs (20-50 lbs): 1 bar per serving
- Large dogs (50+ lbs): 1-2 bars per serving
These treats should be given in moderation, especially if your dog is on a controlled diet.
Common Questions
Can I use a different fruit instead of blueberries?
Yes! Cranberries or raspberries are great alternatives, but avoid grapes—they are toxic to dogs.
Can I make these in a dehydrator instead of an oven?
Yes! Dehydrate at 150°F (65°C) for 6-8 hours for a chewier, jerky-like texture.
Are these safe for puppies?
Yes, but cut them into smaller pieces for young puppies.
Can I make a crunchier version?
Yes! Bake for an additional 10 minutes for a firmer texture.
#5. Peanut Butter & Banana Trail Bites: The Ultimate Hiking Snack for Dogs
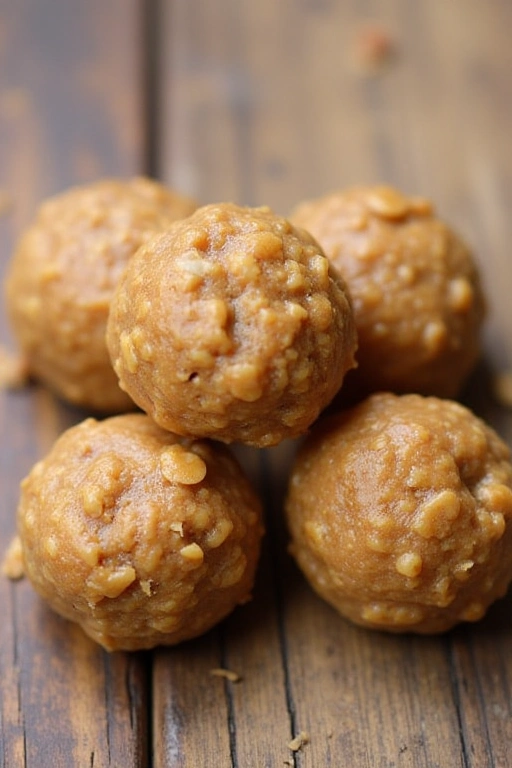
When you’re out on the trails with your dog, you want to make sure they have a snack that keeps them energized and happy. I used to bring regular store-bought treats, but I found that most of them crumbled in my pocket or didn’t provide lasting energy for my dog’s adventures. That’s when I came up with these Peanut Butter & Banana Trail Bites—a protein-packed, easy-to-carry, and naturally sweet treat that’s perfect for hikes, walks, and training sessions.
These soft, bite-sized energy bites combine the rich taste of peanut butter, the natural energy of bananas, and the fiber from oats to create the perfect portable dog treat. They’re no-bake, grain-free, and full of healthy fats and proteins to keep your pup fueled on long outdoor trips. Plus, they hold their shape well, so you won’t have to worry about messy crumbs in your bag!
Why These Trail Bites Are Perfect for Active Dogs
Dogs need quick-digesting, energy-boosting snacks when they’re burning calories on hikes or long walks. Unlike traditional treats that may have added sugars or artificial fillers, these homemade trail bites provide a natural source of protein, fiber, and healthy fats.
Bananas offer a natural energy boost, while peanut butter provides healthy fats and protein for sustained energy. Oats support digestion and heart health, and chia seeds add a boost of omega-3s for joint support. Because these bites don’t require baking, they’re quick to make and store well in the freezer, making them a convenient grab-and-go option.
Why You’ll Love This Recipe
- No-bake & easy to make – Just mix, roll, and chill!
- High-energy ingredients – Perfect for hiking, running, and training.
- Packed with healthy fats & protein – Peanut butter and chia seeds provide long-lasting energy.
- Soft & chewy texture – Gentle on teeth, great for all ages.
- Mess-free & portable – No crumbling in pockets or treat bags.
- Grain-free & all-natural – No wheat, corn, or artificial preservatives.
Essential Recipe Information
- Prep Time: 10 minutes
- Chill Time: 1 hour
- Total Time: 1 hour 10 minutes
- Yield: 20-25 bite-sized treats
- Size per Treat: 1-inch round balls
- Shelf Life: 1 week in the fridge, up to 3 months if frozen
- Storage Requirements: Keep in an airtight container, refrigerate or freeze for extended freshness.
What You’ll Need
These Peanut Butter & Banana Trail Bites require a mixing bowl, a spoon, and a fridge—no cooking necessary! A cookie scoop or your hands work well for shaping the bites. If you prefer uniform shapes, you can use silicone molds, but rolling them by hand is just as easy.
Ingredients for These Energy-Packed Trail Bites
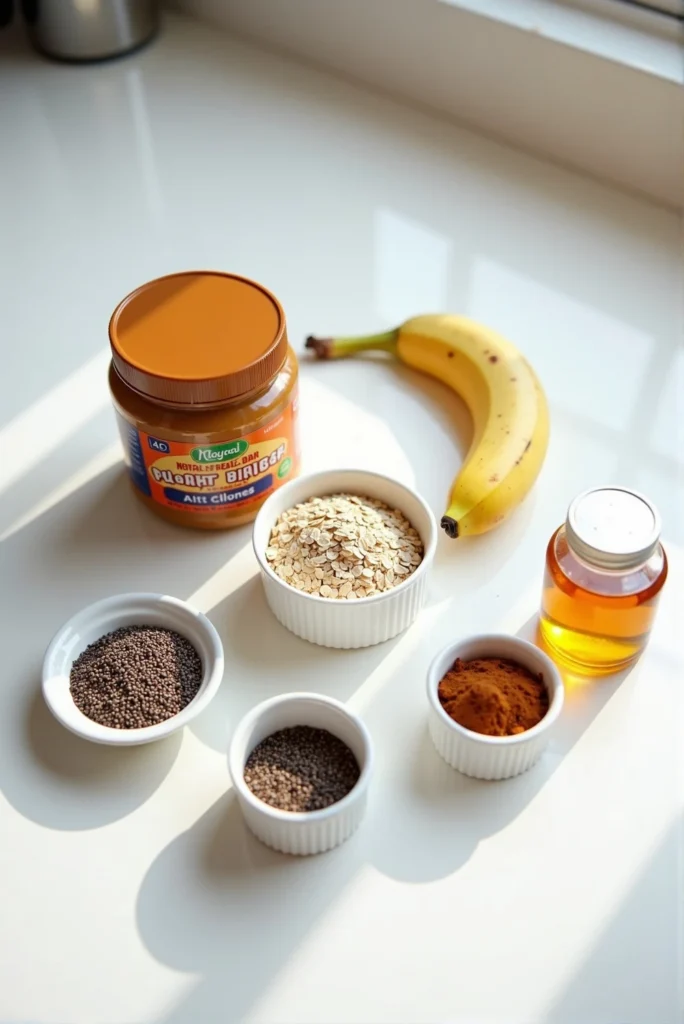
Main Ingredients
- ½ cup (120g) natural peanut butter (unsalted, no xylitol)
- 1 medium ripe banana (mashed until smooth)
- ¾ cup (90g) oat flour (or finely ground oats)
- 1 tbsp (15g) ground chia seeds (boosts fiber & omega-3s)
- 1 tbsp (15ml) honey (optional, adds natural sweetness & energy boost)
- 1 tsp cinnamon (natural anti-inflammatory, optional but recommended)
Ingredient Notes & Substitutions
Peanut butter offers protein and healthy fats, bananas provide natural sweetness and potassium, and oats support digestive health. If your dog is sensitive to grains, you can swap the oats for coconut flour or almond flour. Chia seeds help with hydration by absorbing water, making them a great addition for active dogs.
Pro Tips Before You Start
- Use unsalted, xylitol-free peanut butter—some brands contain xylitol, which is toxic to dogs.
- Mash the banana thoroughly to create a smooth, easy-to-mix texture.
- If the dough is too sticky, add a little extra oat flour for a firmer consistency.
- For a crunchier version, roll the bites in crushed freeze-dried bananas or oats before chilling.
- Chill for at least an hour—this helps firm them up and makes them easier to store.
Step-by-Step Instructions
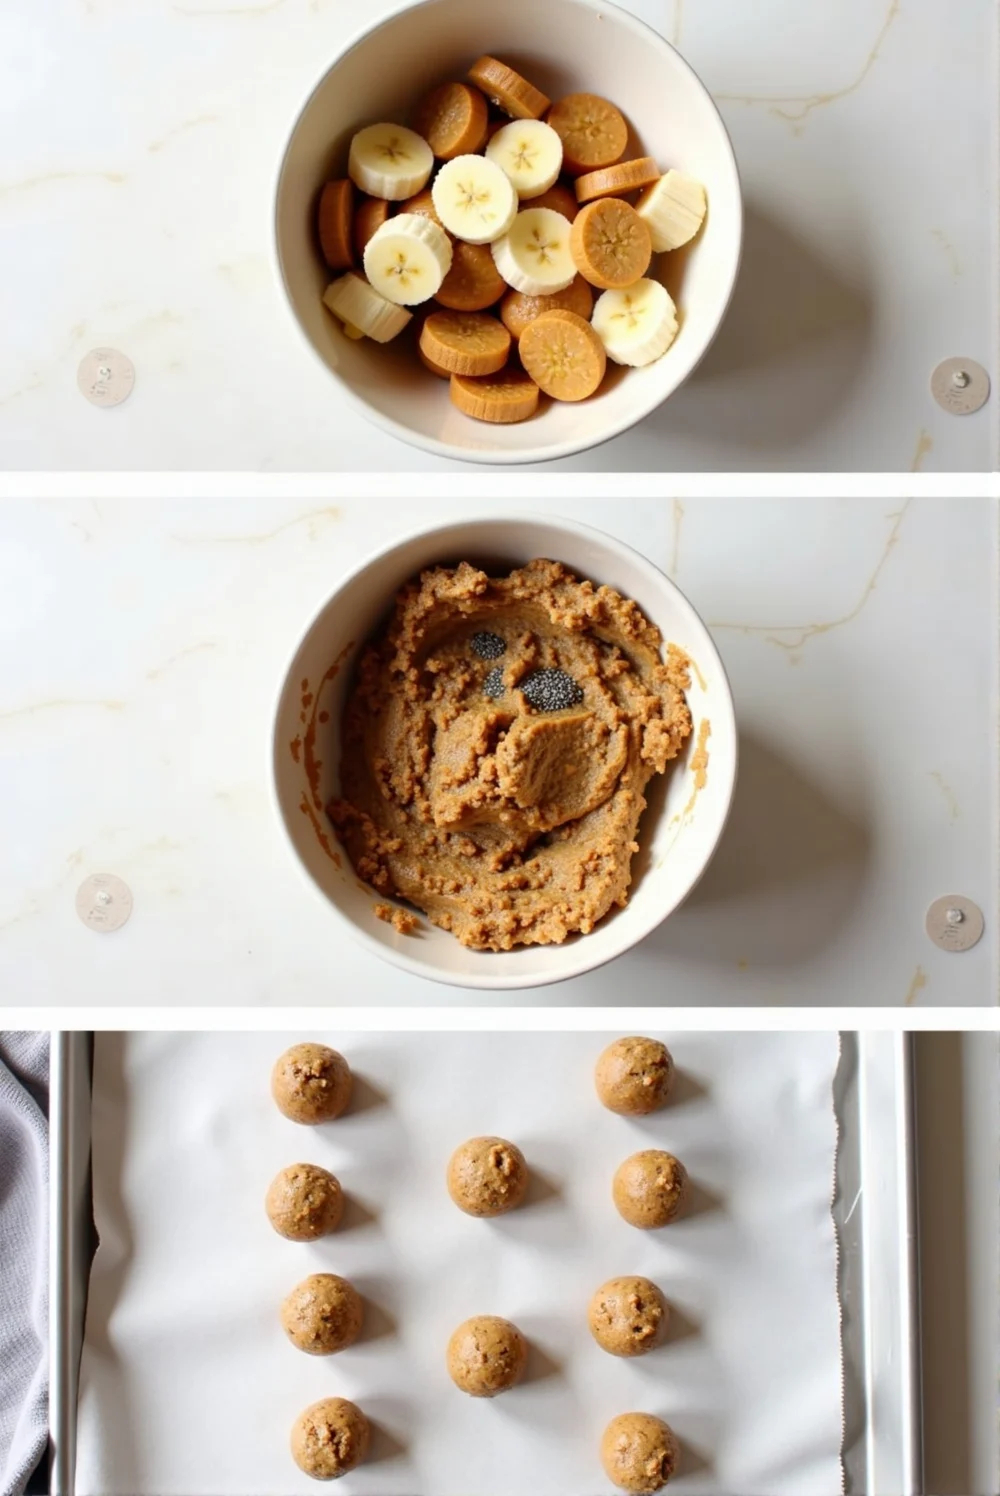
- Mash the Banana: In a bowl, mash the ripe banana until smooth.
- Mix Ingredients: Add peanut butter, oat flour, chia seeds, honey, and cinnamon to the mashed banana. Stir until a thick, sticky dough forms.
- Shape the Bites: Using your hands or a cookie scoop, roll the mixture into 1-inch balls and place them on a lined tray.
- Chill & Set: Refrigerate for at least 1 hour to allow the bites to firm up.
- Store & Serve: Keep the bites in an airtight container in the fridge for up to 1 week, or freeze them for up to 3 months.
Storage & Freezing Tips
These no-bake energy bites stay fresh in the fridge for up to 1 week, but if you’re making a big batch, it’s best to freeze them. Place the bites in a single layer on a baking sheet to freeze, then transfer them to a sealed bag or airtight container for up to 3 months. To serve, just let them thaw for a few minutes or offer them frozen as a cooling treat on hot days.
Serving Guidelines & Portioning
Because these bites are nutrient-dense and energy-packed, portion them based on your dog’s size and activity level:
- Small dogs (under 20 lbs): 1 bite per day
- Medium dogs (20-50 lbs): 2 bites per day
- Large dogs (50+ lbs): 3-4 bites per day
These treats are great before or after a hike, but should be fed in moderation as part of a balanced diet.
Common Questions
Can I use a different type of flour?
Yes! Coconut flour or almond flour are great grain-free alternatives.
Can I make these crunchy instead of soft?
Yes! You can bake them at 300°F (150°C) for 10-12 minutes for a firmer texture.
Are these safe for puppies?
Yes, but make them smaller for tiny puppies, and introduce them slowly to avoid digestive upset.
Can I skip the honey?
Yes! It’s optional—if you prefer, leave it out for a completely sugar-free version.

