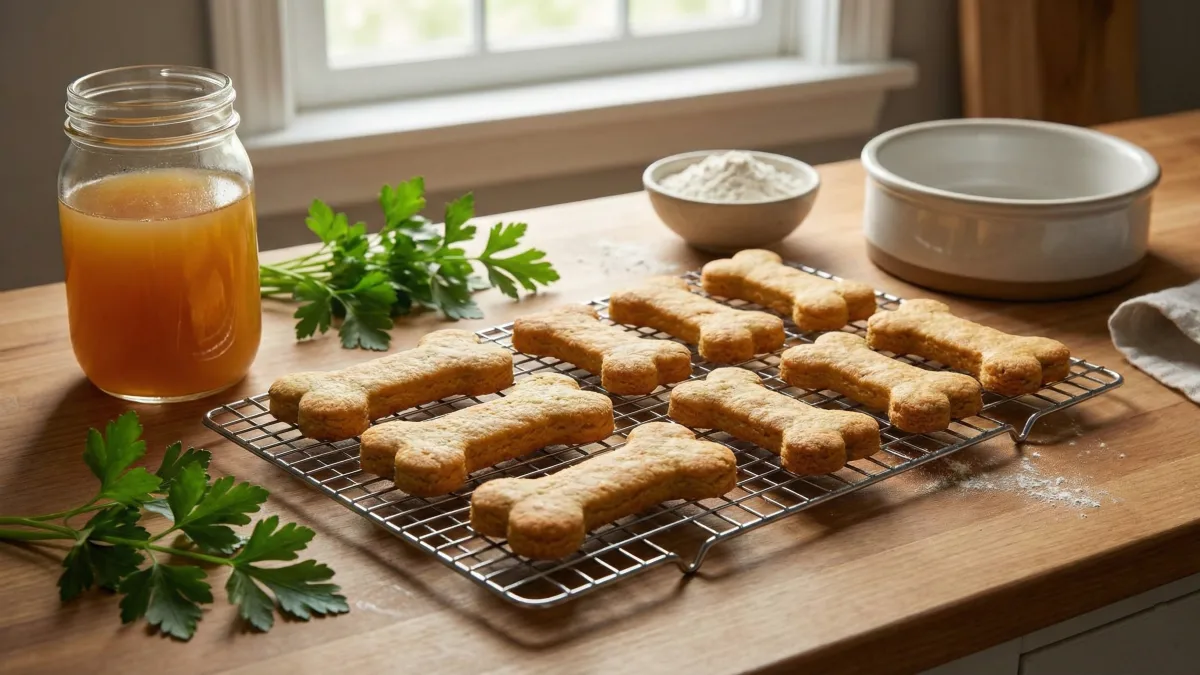
If your dog’s always on the move, you get it—energy doesn’t just come from anywhere. It’s the reason I started researching what truly fuels my hardworking pup. After all, I can’t expect him to chase, sniff, and stay sharp if his treats aren’t keeping up with his needs.
Turns out, not all snacks are created equal. Some might taste good, but they don’t always pack the punch a working dog requires. This isn’t about just handing over any old dog treat.
It’s about making sure your dog has the energy to keep pushing, performing, and doing what they do best. So, let’s talk about treats that give your dog that extra boost they deserve. Ready to fuel their hustle?
Save this Post for Later! ⬇️

#1. Homemade Beef & Sweet Potato Training Bars for Dogs: The Perfect Energy Boost
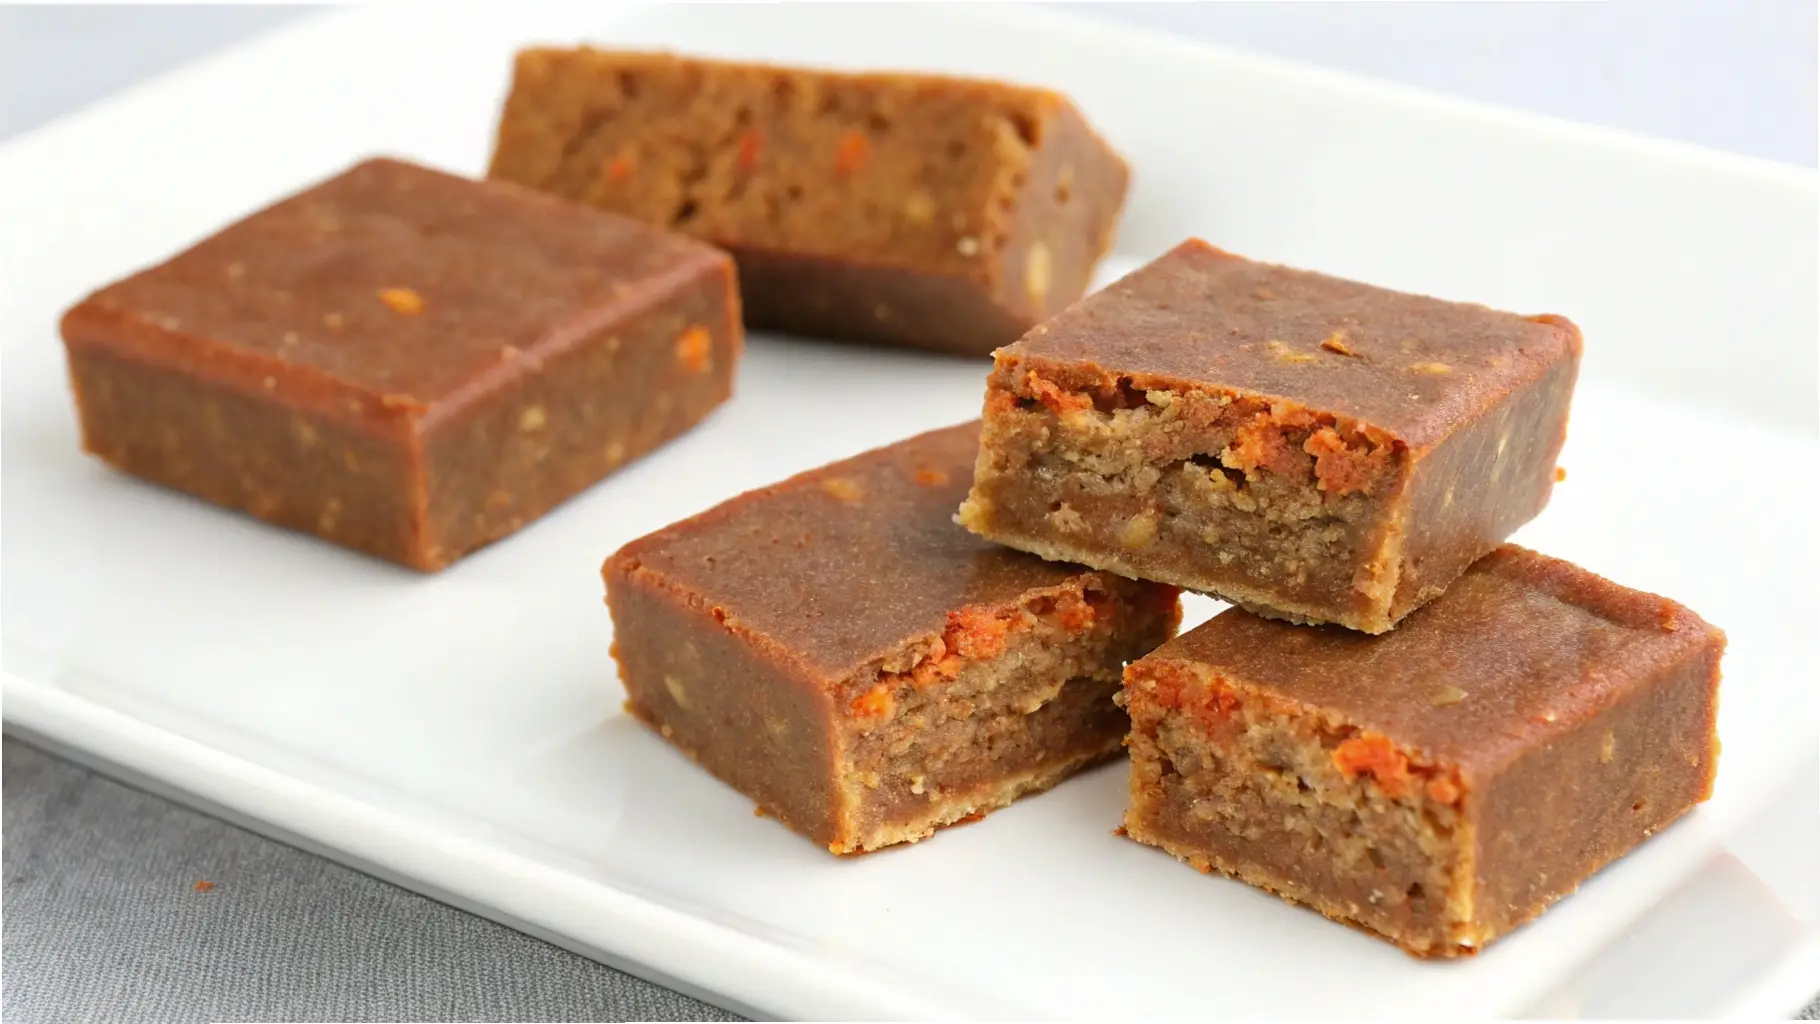
As a pet parent, I’ve always been on the lookout for ways to keep my dog energized and motivated, especially when training. After all, a happy, well-fed dog is more engaged and willing to learn.
That’s when I developed these Beef & Sweet Potato Training Bars, designed to offer a delicious and nutritious treat that supports both energy levels and training focus. These bars aren’t just another snack—they’re a tool to help your dog excel during training while keeping them happy and healthy.
I’ve seen firsthand how much of a difference the right treat can make in training. With these homemade bars, my dog’s energy skyrocketed, and I could tell he was enjoying his training more than ever.
Packed with lean beef for protein and sweet potatoes for a slow-releasing energy boost, they’re a win-win for any active dog. Whether you’re prepping for a big training session or simply looking for a healthy snack, these bars are a must-try!
Recipe Overview
These Beef & Sweet Potato Training Bars are more than just a tasty treat—they’re the perfect energy snack for active dogs. Full of lean protein and healthy carbohydrates, they’re designed to fuel your dog during training or after a long walk.
What makes these bars so great? First, they’re quick and easy to make, taking less than an hour from start to finish. They have a soft yet firm texture, ideal for breaking into smaller pieces for portion control.
What I love most about this recipe is how versatile it is. Not only are they great for training sessions, but they’re also perfect for any special occasion.
Whether you’re celebrating a milestone or just treating your pup to something extra special, these bars hit the spot. Plus, they’re easy to store, making it simple to batch prep for the week ahead.
Why You’ll Love This Recipe
As a dog owner, I know how important it is to have treats that work for your dog’s needs and your schedule. Here are some reasons why these Beef & Sweet Potato Training Bars are sure to become a favorite:
Ingredient
- Cost-effective: These homemade treats are much more affordable than store-bought training treats, plus you can control the ingredients.
- Ingredient control: You know exactly what’s going into these treats, ensuring they’re both safe and nutritious for your dog.
- Storage convenience: These bars can be refrigerated or frozen, giving you flexibility in how you store them.
- Training effectiveness: Their energy-boosting properties make them ideal for keeping your dog focused during training sessions.
- Portion control: The bars can be easily cut into smaller pieces, making portioning simple and preventing overfeeding.
- Time-saving: Prep and bake time is under an hour, so you won’t spend the whole day in the kitchen.
Essential Information
Here’s what you need to know about this recipe to get started:
- Prep Time: 10 minutes
- Cook Time: 20-25 minutes
- Total Time: 30-35 minutes
- Yield: 12 bars (adjust portions as needed)
- Size per Treat: Each bar can be cut into smaller pieces to suit your dog’s size.
- Shelf Life: These treats last up to one week when stored in the refrigerator, or up to three months when frozen.
- Storage Requirements: Store in an airtight container in the fridge. Freeze for longer storage.
- Equipment Needed: You’ll need a mixing bowl, spoon, an 8×8-inch baking pan, parchment paper, or non-stick spray.
Main Components
Here are the ingredients you’ll need to make these tasty training bars:
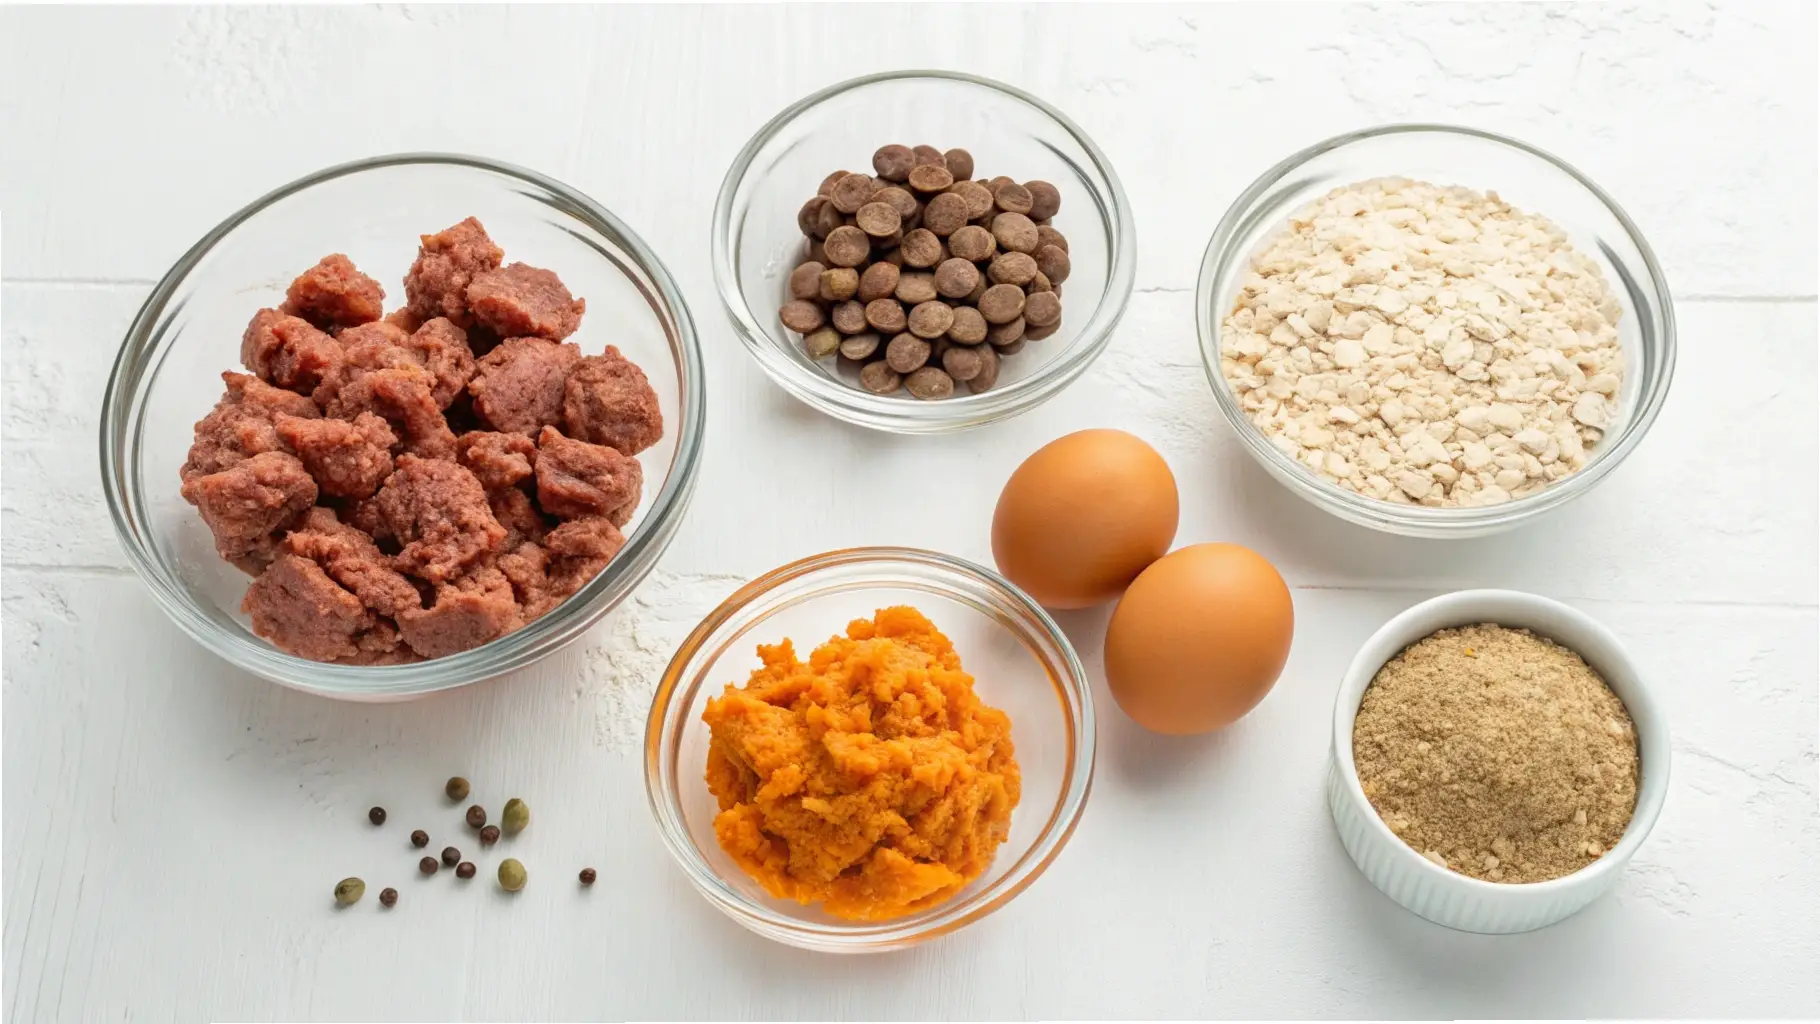
- 1 cup cooked lean ground beef: Provides protein to keep your dog energized.
- 1 cup mashed sweet potatoes: A great source of fiber and healthy carbs for sustained energy.
- 1 egg: Helps bind the ingredients together and provides extra protein.
- 1/4 cup oats: Adds fiber and gives the bars a nice texture.
Expert Tips
- Avoid Overbaking: Keep a close eye on your bars while they bake to ensure they don’t get too hard. The bars should be firm to the touch but not dry or brittle.
- Size Adjustments: If you have a small dog, consider cutting the bars into smaller pieces to prevent choking.
- Texture: If your dog prefers softer treats, try underbaking slightly, or add a tablespoon of water to the dough before baking.
- Make-ahead: These bars can be made in advance and stored in the fridge for up to a week, or frozen for up to three months. Perfect for batch prep!
Instructions
- Preheat the Oven: Preheat your oven to 350°F (175°C).
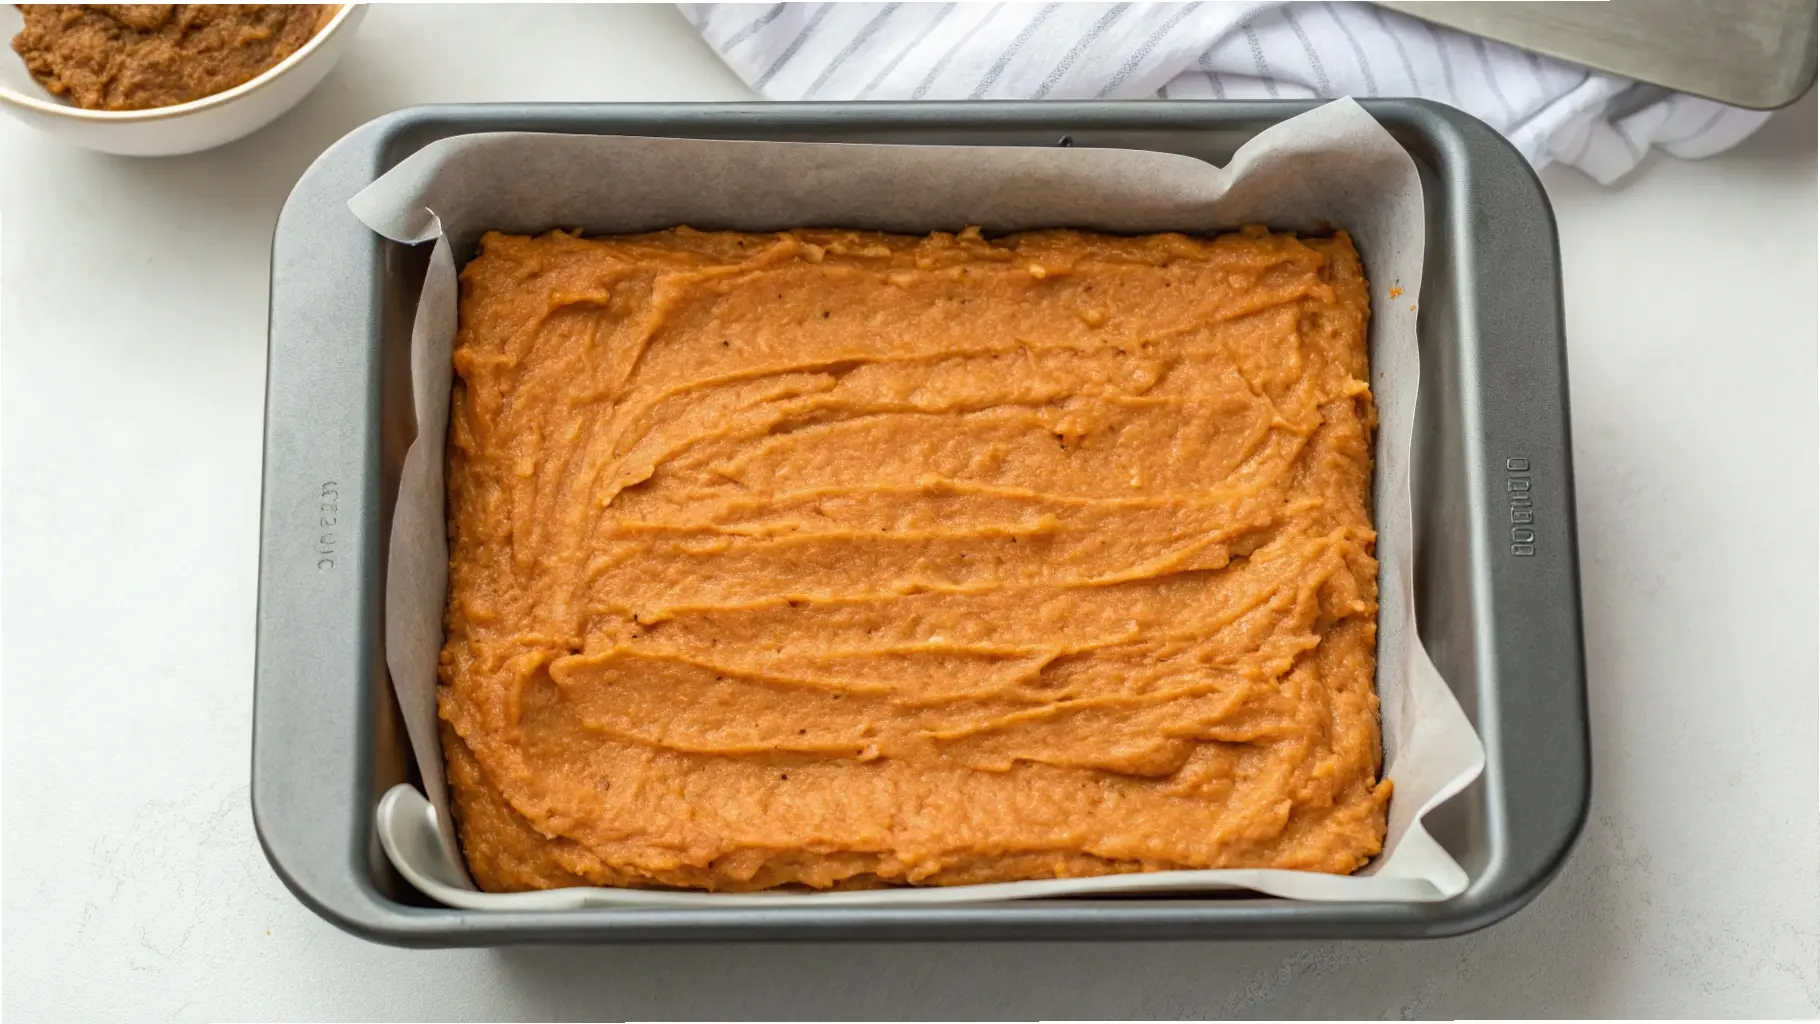
- Prepare the Pan: Line an 8×8-inch baking pan with parchment paper or lightly grease it.
- Mix the Ingredients: In a mixing bowl, combine the cooked ground beef, mashed sweet potatoes, egg, and oats. Stir until the mixture is well combined.
- Bake the Bars: Spread the mixture evenly in the prepared baking pan. Bake for 20-25 minutes, or until firm and lightly golden brown.
- Cool and Cut: Let the bars cool completely before cutting them into 12 pieces. Store in an airtight container in the fridge for up to one week.
Variations and Substitutions
Dietary Adaptations
- Grain-Free: Substitute the oats with ground flaxseed or coconut flour for a grain-free version.
- Protein Alternatives: Use ground turkey or chicken if your dog has a sensitivity to beef.
- Limited Ingredient Modifications: If your dog has allergies, consider using only sweet potatoes and ground meat, with no oats or egg.
Special Needs Modifications
- Soft Treat Variations: If your dog prefers a softer treat, reduce the baking time slightly or add a bit of water to the mixture before baking.
- Senior Dog Adaptations: If you’re making these treats for a senior dog, consider cutting them into smaller, bite-sized pieces to make chewing easier.
- Puppy-Friendly Versions: These treats are gentle enough for puppies. Make sure the pieces are small and appropriate for their size.
Pro Tips and Success Secrets
- Ingredient Selection: Choose high-quality, organic ingredients whenever possible. This ensures the treats are as healthy as possible for your dog.
- Batch Preparation: These bars are perfect for batch cooking. Double the recipe and freeze half for future use.
- Freezing Directions: After baking and cooling, freeze the bars in an airtight container for up to 3 months. Thaw before serving.
Serving Guidelines
- Size Recommendations by Dog Weight: For small dogs, break the bars into smaller pieces. For larger dogs, you can give a whole bar.
- Daily Portion Guidelines: Limit to 1-2 bars per day, depending on your dog’s size and activity level.
- Training Use Suggestions: Use these bars during training sessions to keep your dog motivated and energized.
- Special Occasion Serving Ideas: These bars are perfect for celebrating birthdays or milestones. Serve them as a treat after a long walk or training session.
Common Questions
- How long will these treats last?
When stored in an airtight container, these treats will last for up to one week in the fridge or up to three months in the freezer. - Can I make these treats smaller?
Yes! Simply cut the bars into smaller pieces to accommodate your dog’s size or training needs. - Are there any ingredient substitutions?
Yes! You can swap the beef for chicken or turkey, and you can replace the oats with ground flaxseed or coconut flour for a grain-free option. - How do I know when they’re done?
The bars should be firm to the touch and slightly golden around the edges. Avoid overbaking to keep them from becoming too dry.
#2. Peanut Butter & Banana Energy Bites for Working Dogs: Boost Their Performance with Every Bite

As an active dog parent, I’ve noticed how crucial it is to keep my dog fueled throughout the day, especially when we’re in the middle of a long training session or outdoor adventure.
This led me to create these Peanut Butter & Banana Energy Bites. They’re not just a treat—they’re a performance-enhancing snack, packed with protein, potassium, and healthy fats to keep your dog energized and engaged.
Whether your dog is running through agility drills or enjoying an outdoor hike, these treats will keep their energy up and their tail wagging.
After a few training sessions where I needed something quick to re-energize my dog, I decided to experiment with a few high-energy ingredients.
I chose peanut butter for its protein and healthy fat content, combined with bananas to provide a natural source of energy. The result? These tasty energy bites that not only taste amazing but also help your dog maintain peak performance. Plus, they’re super easy to make—no baking required!
Recipe Overview
These Peanut Butter & Banana Energy Bites are ideal for active dogs that need a quick energy boost. They’re packed with simple, nutritious ingredients like peanut butter, banana, and oats, making them an easy go-to snack for dogs on the move.
The best part? These bites require no baking, so they’re quick and simple to prepare, which is a lifesaver on those busy days.
What sets these energy bites apart is their dense, chewy texture, making them perfect for both small and large dogs. Not only are they great for replenishing energy after exercise, but they can also be used as training treats or even a special snack during playtime.
They’re incredibly versatile, so you can adjust the size to suit your dog’s needs. Plus, the addition of oats and bananas ensures a good balance of carbohydrates, proteins, and fats—helping your dog stay fueled for longer.
Why You’ll Love This Recipe
As a busy pet parent, it’s important to have quick and effective treats that help my dog stay active and healthy. Here are some reasons why I think you’ll love these Peanut Butter & Banana Energy Bites:
Ingredient
- Cost-effective: These treats are much more affordable than store-bought high-energy treats, and you can customize them to your dog’s taste.
- Ingredient control: You’ll know exactly what’s in your treats, which is great for avoiding unnecessary fillers and preservatives found in many commercial dog treats.
- No-bake convenience: This recipe is perfect for when you’re short on time. Simply mix the ingredients, roll the bites, and refrigerate.
- Energy-boosting: The healthy fats and natural sugars from the banana and peanut butter keep your dog energized throughout the day.
- Versatility: These treats work well as training rewards, a post-walk snack, or even a birthday treat.
- Storage-friendly: These bites keep well in the fridge, and you can make a big batch to have on hand for multiple occasions.
Essential Information
Here’s everything you need to know to prepare these delicious energy bites for your dog:
- Prep Time: 10 minutes
- Chill Time: 1 hour
- Total Time: 1 hour, 10 minutes
- Yield: 20-24 bites (depending on size)
- Size per Bite: Each bite should be about the size of a small walnut.
- Shelf Life: These energy bites will stay fresh for up to one week in the fridge.
- Storage Requirements: Keep in an airtight container in the refrigerator. You can also freeze them for up to 3 months.
- Equipment Needed: Mixing bowl, spoon, measuring cups, parchment paper, and a small dish for rolling the bites.
Main Components
The simple, nutritious ingredients for these bites include:
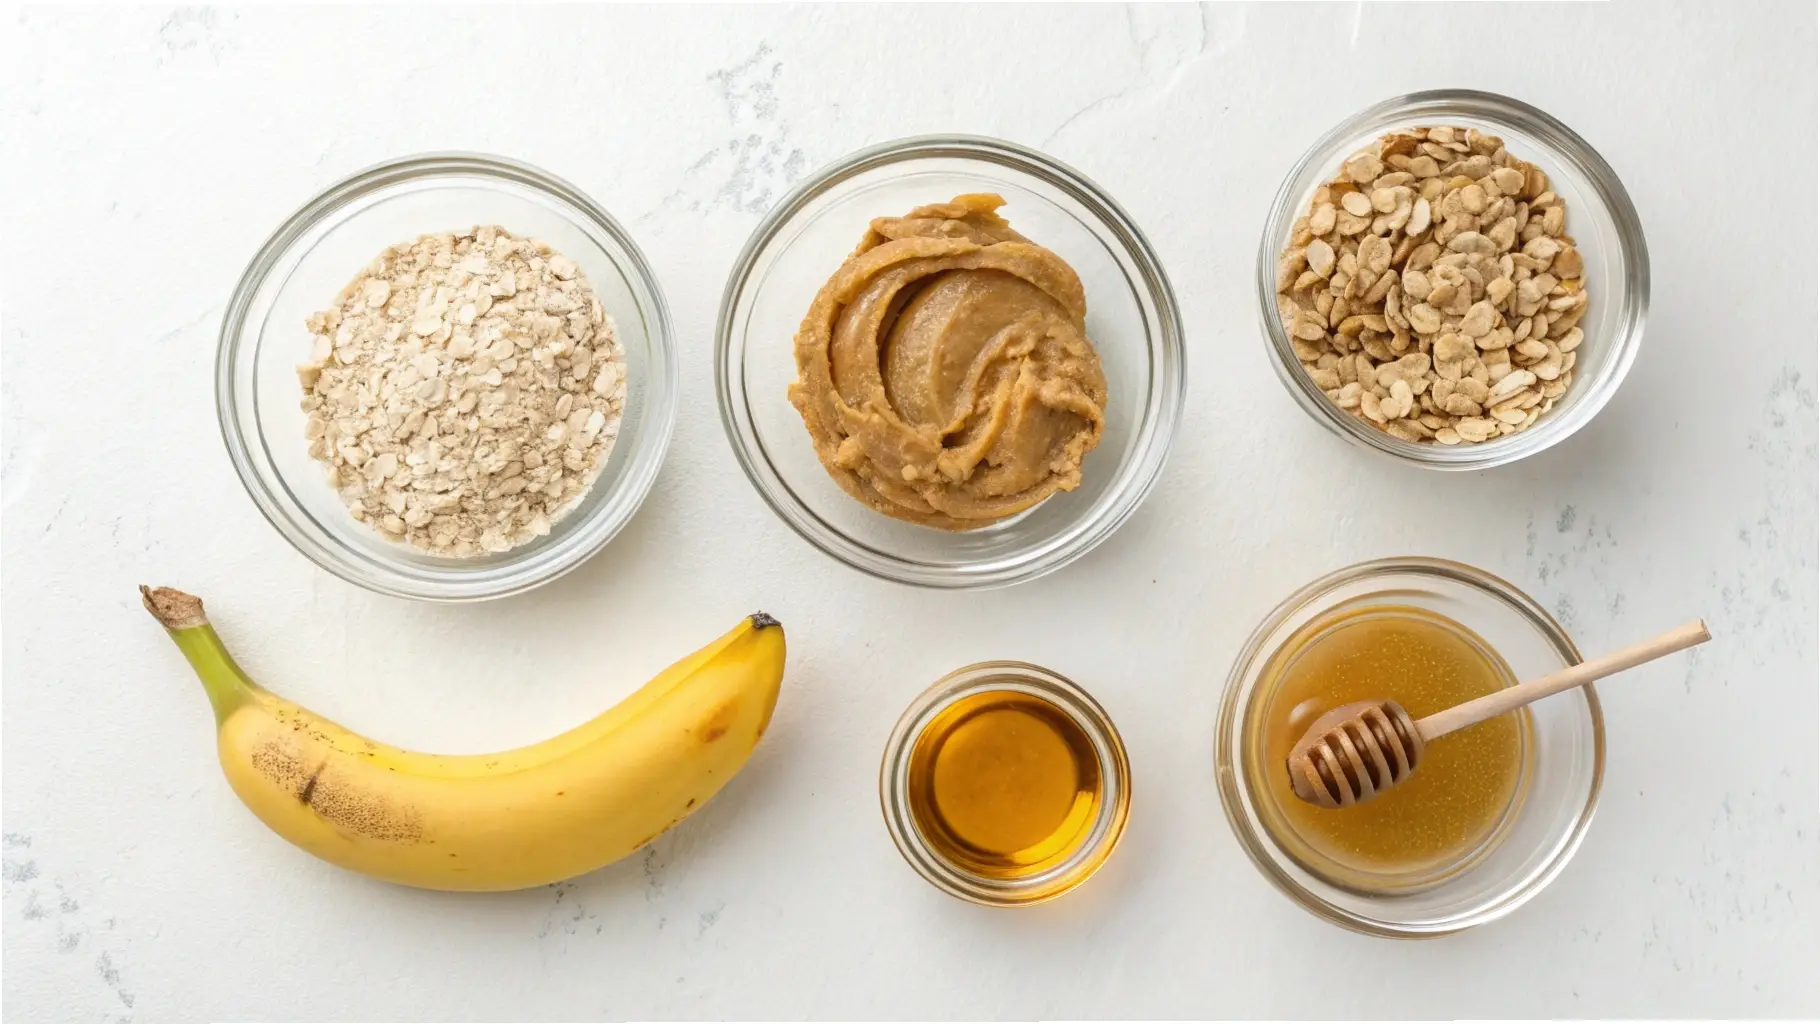
- 1 ripe banana: A natural source of potassium and fiber, bananas help regulate your dog’s energy levels.
- 1 cup peanut butter (unsweetened, xylitol-free): Peanut butter is packed with healthy fats and protein, providing lasting energy.
- 1 cup rolled oats: Oats offer fiber, which helps with digestion and provides sustained energy.
- 1 tablespoon honey: A touch of honey adds natural sweetness and provides a quick energy source.
Expert Tips
- Ingredient Selection: Always choose unsweetened peanut butter without xylitol, as xylitol is toxic to dogs. Organic peanut butter is a great option for added quality.
- Banana Ripeness: Make sure the banana is ripe for easier mashing. Overripe bananas have more natural sugars, providing extra energy for your dog.
- Chilling for Firmness: Allow the bites to chill for at least an hour in the fridge before serving. This helps them hold their shape and makes them easier to handle.
Instructions
- Mash the Banana: Start by mashing the ripe banana in a mixing bowl until it’s smooth. The more ripe it is, the easier this will be.
- Mix the Peanut Butter and Honey: Add the peanut butter and honey to the banana and stir well until combined. You may need to heat the peanut butter slightly if it’s too thick.
- Add the Oats: Stir in the oats until the mixture is fully combined. The oats should be well-coated with the peanut butter and banana mixture.
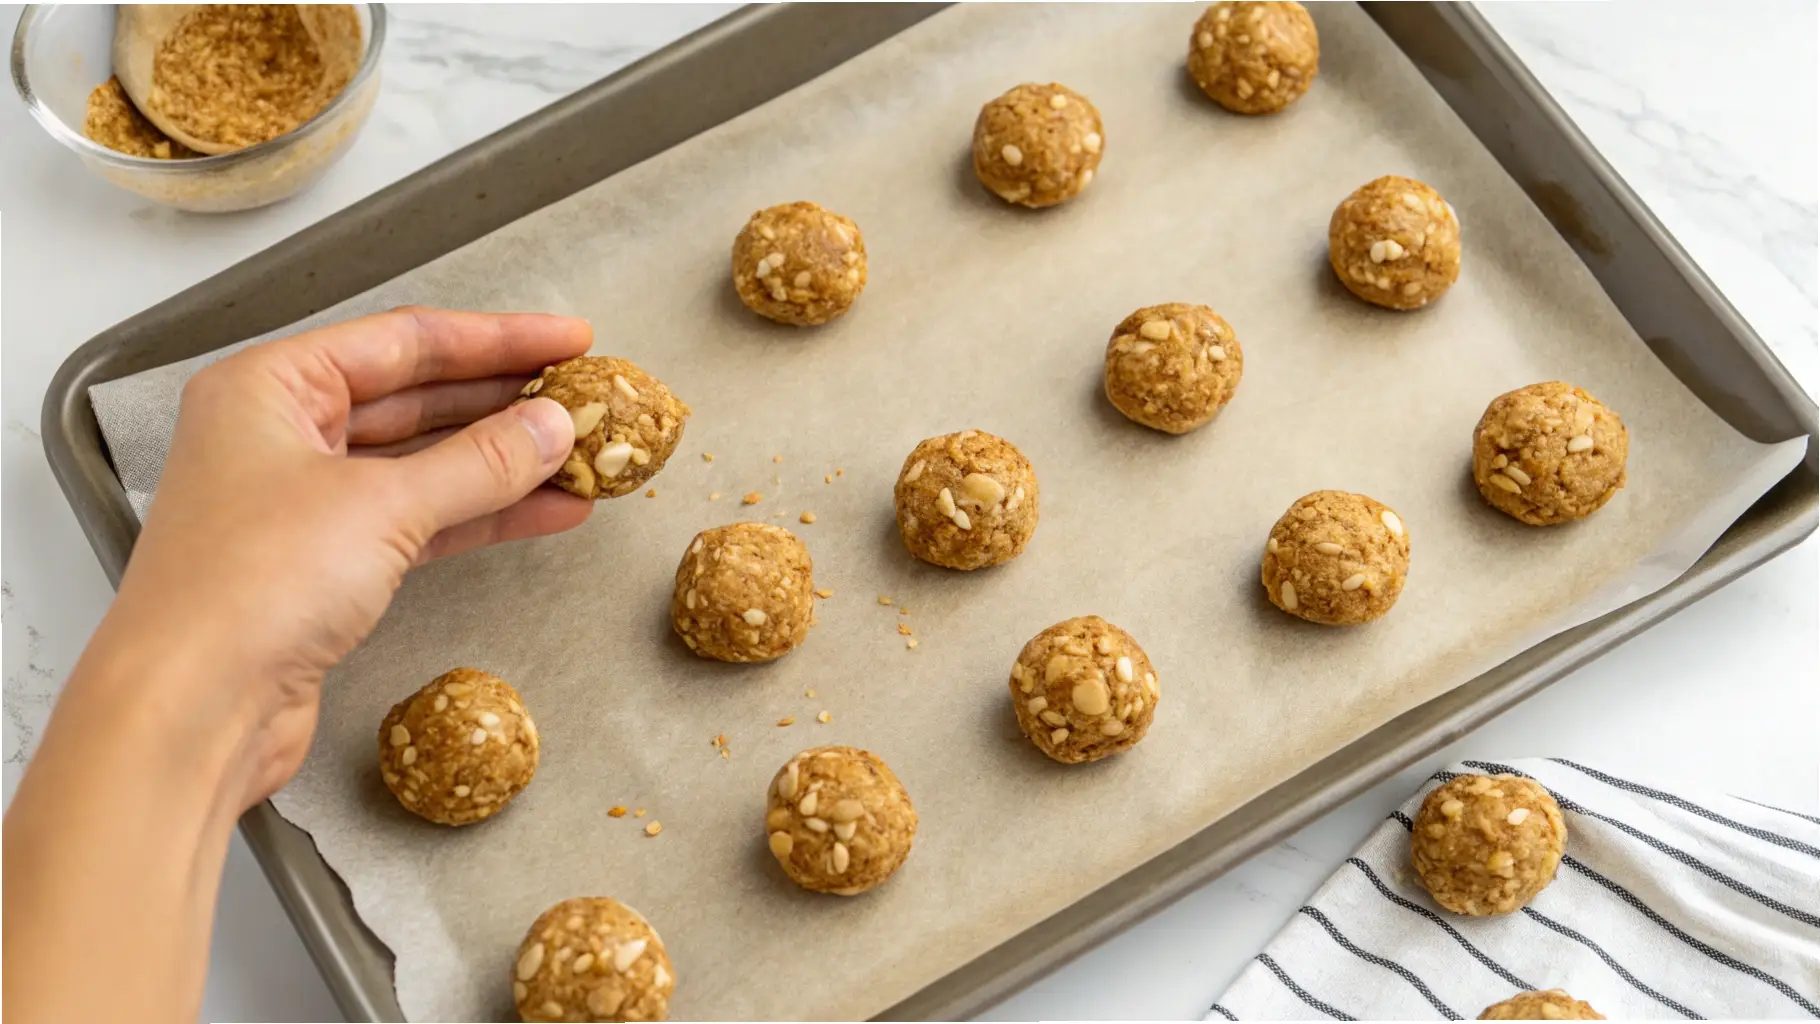
- Form the Bites: Using your hands or a spoon, form small balls about the size of a walnut (roughly 1 inch in diameter). You can roll them in additional oats for a little extra texture if you like.
- Chill: Place the bites on a baking sheet lined with parchment paper and refrigerate for at least 1 hour to firm up.
- Serve: Once chilled, the bites are ready to serve. Store in an airtight container in the fridge for up to one week or freeze for longer storage.
Variations and Substitutions
Dietary Adaptations
- Grain-Free: Use coconut flour or ground flaxseed in place of oats for a grain-free option.
- Protein Alternatives: If your dog has a peanut butter allergy, consider using almond butter or sunflower seed butter.
- Limited Ingredient Modifications: Skip the honey and opt for an extra ripe banana to sweeten the recipe naturally.
Special Needs Modifications
- Soft Treat Variations: For older dogs or those with dental issues, make the bites a little smaller or softer by adding a tablespoon of water or coconut oil to the mixture.
- Puppy-Friendly Versions: These bites are gentle enough for puppies. Just ensure the bites are small and manageable for their tiny mouths.
- Senior Dog Adaptations: If your senior dog has trouble with chewiness, break the bites into smaller pieces, or make the balls smaller so they can be easily consumed.
Pro Tips and Success Secrets
- Ingredient Selection: Always go for the best-quality ingredients. For instance, use organic peanut butter and bananas for healthier treats. Avoid peanut butter with added sugars or harmful preservatives.
- Batch Preparation: These treats freeze wonderfully! Make a big batch and store them in the freezer so you always have some ready.
- Chill for Firmness: If the mixture feels too sticky to form into balls, you can refrigerate it for 10 minutes to make it easier to handle.
Serving Guidelines
- Size Recommendations by Dog Weight: For smaller dogs, break the bites in half or use a spoon to form mini-sized bites. Larger dogs can have a whole bite.
- Daily Portion Guidelines: Limit to 1-2 bites per day, depending on your dog’s size and activity level.
- Training Use Suggestions: These bites work great as high-value training treats for motivated pups.
- Special Occasion Serving Ideas: Perfect for birthdays or as a special treat after a day of play.
Common Questions
- Can I use a different nut butter?
Yes, feel free to use almond butter, cashew butter, or sunflower seed butter as long as they’re free of xylitol and additives. - How long can I store these bites?
These bites will stay fresh in the fridge for up to one week, and can be frozen for up to 3 months. - My dog is allergic to oats. What can I use instead?
You can substitute oats with ground flaxseed or coconut flour to keep the texture similar. - How do I know when they’re ready to serve?
The bites should firm up in the fridge after at least 1 hour. They should hold their shape when you pick them up.
#3. Salmon & Sweet Potato Power Bites: The Perfect Fuel for Active Dogs

As a pet parent to a highly active dog, I’m always on the lookout for high-energy treats that not only taste good but also provide the essential nutrients my dog needs to stay sharp and strong.
That’s how I came up with these Salmon & Sweet Potato Power Bites—a simple, nutritious treat that packs a punch of protein, omega-3 fatty acids, and antioxidants to keep your dog feeling their best.
Whether you’re heading out for a hike, engaging in some fun play, or practicing agility drills, these bites will give your dog the energy they need to perform their best.
The inspiration for this recipe came from the need to provide my dog with a tasty, high-protein snack that would support their muscle recovery and overall health.
After experimenting with several combinations of dog-friendly ingredients, I settled on the powerful duo of salmon and sweet potato.
These ingredients not only promote energy and endurance but also support healthy skin and coat, making them perfect for a working dog. Plus, they’re easy to prepare, so you can whip them up and have them ready to go in no time!
Recipe Overview
These Salmon & Sweet Potato Power Bites are a great choice for high-energy dogs that need a nutritious snack to fuel their activities.
Sweet potatoes provide a natural source of carbohydrates, while salmon adds a hearty dose of protein and omega-3 fatty acids, which help support joint health and cognitive function.
The treat is soft and chewy, making it suitable for all dog sizes, whether you have a small dog or a large breed.
The best part about these treats is how versatile they are. You can adjust the size based on your dog’s needs—smaller bites for training sessions and larger ones for after a long day of exercise.
Whether your dog is recovering from a tough workout or just needs a little extra energy for playtime, these power bites will have them bouncing with energy and ready to take on the next challenge.
Why You’ll Love This Recipe
As a dog parent who understands the importance of maintaining your dog’s energy and health, I can confidently say that these Salmon & Sweet Potato Power Bites are a must-have in your treat arsenal. Here’s why:
- High in Protein: Salmon is an excellent source of lean protein, which is essential for muscle recovery and building strength in active dogs.
- Omega-3 Fatty Acids: These healthy fats promote joint health, reduce inflammation, and contribute to a shiny coat.
- Natural Carbs: Sweet potatoes are packed with vitamins and fiber, providing a steady source of energy for your dog’s daily activities.
- Customizable Size: You can easily adjust the portion size to suit your dog’s breed, size, and energy needs.
- No-Bake Convenience: This recipe requires minimal prep time and no baking, making it ideal for busy pet parents.
- Batch-Prep Friendly: Make a big batch, store them in the fridge or freezer, and have them ready for all your dog’s adventures.
Essential Information
Here’s a breakdown of everything you need to know to make these high-energy treats for your dog:
- Prep Time: 10 minutes
- Cook/Set Time: 20 minutes (for cooking the sweet potato)
- Total Time: 30 minutes
- Yield: Approximately 20-24 bites (depending on size)
- Size per Bite: About 1 inch in diameter
- Shelf Life: Up to 5 days in the fridge; 3 months if frozen
- Storage Requirements: Keep in an airtight container in the refrigerator. For long-term storage, freeze the bites in a freezer-safe bag or container.
- Equipment Needed: Baking sheet (if baking sweet potatoes), mixing bowl, spoon, parchment paper
Main Components
The key ingredients in these Salmon & Sweet Potato Power Bites are carefully selected to provide maximum energy and nutrition for your dog:
- 1/2 cup cooked salmon: Rich in high-quality protein and omega-3 fatty acids, salmon supports muscle health and cognitive function.
- 1/2 cup cooked sweet potato: A great source of complex carbohydrates, fiber, and vitamins like vitamin A and C, sweet potatoes help maintain steady energy levels.
- 1/4 cup oats: Oats provide additional fiber and help bind the ingredients together.
- 1 tablespoon ground flaxseed: Flaxseed is packed with omega-3s, antioxidants, and fiber, which support healthy digestion and skin.
- 1 egg: The egg acts as a binder and adds an extra dose of protein.
Expert Tips
- Salmon Options: You can use fresh, cooked salmon or canned salmon (in water, not oil). If using canned salmon, drain it well to remove excess liquid.
- Sweet Potato Prep: To cook sweet potatoes, you can bake, steam, or microwave them. Be sure to remove the skin before mashing for a smoother texture.
- Consistency: If the mixture is too dry, add a splash of water or broth to achieve a sticky dough-like consistency that’s easy to shape into bites.
Instructions

- Prepare the Sweet Potato: Begin by cooking your sweet potato until it’s tender (about 20 minutes if boiling or steaming). Once cooked, mash it until smooth.
- Cook the Salmon: If using fresh salmon, bake or pan-fry it. Make sure to remove the skin and bones before flaking the fish into small pieces. If using canned salmon, simply drain and break it apart.
- Mix the Ingredients: In a large bowl, combine the mashed sweet potato, cooked salmon, oats, ground flaxseed, and the egg. Stir until everything is well mixed.
- Form the Bites: Using your hands or a spoon, form small balls (about 1 inch in diameter) from the mixture. If the mixture is too sticky, dampen your hands with water to make shaping easier.
- Chill: Place the bites on a baking sheet lined with parchment paper and refrigerate them for at least 30 minutes to firm up.
- Serve: Once chilled, these bites are ready to serve. Store them in an airtight container in the fridge for up to 5 days or freeze them for long-term storage.
Variations and Substitutions
Dietary Adaptations
- Grain-Free: Substitute the oats with coconut flour or ground flaxseed to make the recipe completely grain-free.
- Protein Alternatives: If your dog is sensitive to fish, try using chicken or turkey as an alternative protein source.
- Limited Ingredient Modifications: If your dog has food sensitivities, simplify the recipe by eliminating the oats and flaxseed and using only the salmon and sweet potato.
Special Needs Modifications
- Senior Dog Adaptations: If your senior dog has dental issues, consider making the bites smaller and softer by adding a little more water or broth to the mixture.
- Puppy-Friendly Versions: Ensure the bites are small enough for puppies, and consider reducing the sweet potato content to avoid too much fiber, which can sometimes upset young pups’ stomachs.
Pro Tips and Success Secrets
- Batch Preparation: These bites can be made in bulk and stored in the fridge for a week or frozen for up to three months. Just make sure they’re stored in an airtight container to prevent freezer burn.
- Texture: If your mixture is too dry and not sticking together well, add a spoonful of water or low-sodium broth to help it bind.
- Size Adjustments: You can scale these treats for different dog sizes by adjusting the bite size accordingly. Small dogs will enjoy smaller bites, while larger dogs can handle bigger pieces.
Serving Guidelines
- Size Recommendations by Dog Weight: For small dogs, keep the bites to around half the size (about 1/2 inch in diameter), while larger dogs can enjoy the full-size treat.
- Daily Portion Guidelines: For active dogs, 1-2 bites per day should suffice as a high-energy snack. Always adjust based on your dog’s individual activity level.
- Training Use Suggestions: These bites work wonderfully as training rewards. Break them into smaller pieces to ensure your dog stays focused without overeating.
- Special Occasion Serving Ideas: Serve these bites as a special treat after a long hike or a busy day of training.
Common Questions
- Can I use canned salmon instead of fresh?
Yes, canned salmon is a great alternative. Just make sure it’s in water, not oil, and drain it well before using. - How long can I store these power bites?
These bites last up to 5 days in the fridge and up to 3 months in the freezer. Just be sure they’re stored in an airtight container. - Can I use a different type of fish?
Absolutely! If your dog is not a fan of salmon, try tuna, whitefish, or even chicken as an alternative protein. - What if the bites are too dry?
If the dough is too crumbly, simply add a small amount of water or broth until the mixture sticks together.
#4. Peanut Butter & Banana Protein Poppers: The Ultimate Power Snack for Your Dog

When you have an active working dog, you know that energy levels need to be maintained at all times.
That’s why I created these Peanut Butter & Banana Protein Poppers—an irresistible, high-energy treat that combines the natural energy-boosting properties of bananas with the protein-packed goodness of peanut butter.
These treats are perfect for keeping your dog fueled during long workdays or intense training sessions, ensuring they stay strong and focused throughout their tasks.
My inspiration for this recipe came from observing how much my dog thrives on protein and healthy fats, particularly when they’re in the middle of an intense training routine.
The creamy peanut butter and the potassium-rich banana are the perfect match to support energy and muscle function, while adding some heart-healthy fats into the mix.
After a few tries to perfect the flavor and consistency, I ended up with a soft and chewy treat that my dog couldn’t get enough of. They loved the taste, and I loved knowing they were getting the fuel they needed.
Recipe Overview
These Peanut Butter & Banana Protein Poppers are packed with protein, healthy fats, and natural sugars from the banana, making them the perfect high-energy snack for your dog.
The soft texture makes them easy for dogs of all sizes to chew, and the combination of peanut butter and banana is a surefire hit with almost every pup.
You can even make the recipe in small bite-sized pieces for training or larger ones for a post-workout recovery snack.
Whether you’re headed out for a run with your dog, engaging in agility training, or just want to ensure your dog has enough energy for the day, these protein poppers will give them a quick boost while satisfying their taste buds. Plus, the recipe is quick and easy to prepare, so you can have fresh treats on hand in no time.
Why You’ll Love This Recipe
These Peanut Butter & Banana Protein Poppers will quickly become a favorite in your dog’s treat rotation for a few good reasons:
- Protein-Rich: Peanut butter provides a healthy dose of protein to support muscle repair and overall strength, especially after physical activities.
- Natural Energy Boost: Bananas are full of potassium and natural sugars that give dogs the quick energy boost they need during their work or play.
- Healthy Fats: Peanut butter also contains beneficial fats that contribute to your dog’s shiny coat and healthy skin.
- Soft and Chewy Texture: Ideal for dogs of all sizes, this texture is easy for even senior dogs or puppies to enjoy.
- Quick Prep: The recipe is simple and requires minimal effort—perfect for busy pet parents.
- No-Bake Recipe: These treats are no-bake, which makes preparation a breeze. Just mix, shape, and let them set.
Essential Information
Here’s everything you need to know to make these high-energy treats for your dog:
- Prep Time: 10 minutes
- Cook/Set Time: 1 hour (for freezing)
- Total Time: 1 hour 10 minutes
- Yield: 20-24 treats (depending on size)
- Size per Treat: 1-inch diameter (can be adjusted for smaller or larger sizes)
- Shelf Life: 1 week in the fridge, up to 3 months in the freezer
- Storage Requirements: Store in an airtight container in the fridge or freeze for longer storage
- Equipment Needed: Mixing bowl, spoon, parchment paper, freezer-safe tray or plate
Main Components
This treat is made from a few wholesome ingredients that give your dog the energy they need to power through their day:
- 1/2 cup peanut butter (unsweetened, xylitol-free): The star ingredient, providing protein and healthy fats, as well as a rich, savory flavor.
- 1 ripe banana: Full of potassium and natural sugars, bananas help maintain energy levels and are great for muscle recovery.
- 1/2 cup oats: Oats are a wonderful source of fiber and help bind the ingredients together while providing steady energy.
- 1/4 cup protein powder (optional): For an extra protein boost, you can add a dog-safe, unflavored protein powder (such as chicken or beef protein) to enhance the nutritional value.
Expert Tips
- Peanut Butter Selection: Always use peanut butter that is free from xylitol, which is toxic to dogs. Look for unsweetened and natural varieties for the healthiest option.
- Banana Ripeness: The riper the banana, the sweeter the treat will be. Overripe bananas work best in this recipe as they mash easily and add natural sweetness.
- Consistency: If the mixture is too sticky, add more oats until it reaches a dough-like consistency. If it’s too dry, a small amount of water or broth can help.
Instructions

- Mash the Banana: Begin by mashing the banana in a mixing bowl. You want it to be smooth with only small chunks remaining.
- Add Peanut Butter: Stir the peanut butter into the mashed banana until they’re fully combined. If the peanut butter is too stiff, warm it slightly to make mixing easier.
- Add Oats and Protein Powder: Mix in the oats and protein powder (if using). Stir until the mixture becomes firm enough to hold its shape but not too dry.
- Shape the Treats: Use a spoon or your hands to form small bite-sized balls (about 1 inch in diameter). You can make these larger or smaller based on your dog’s size and needs.
- Freeze: Place the shaped treats on a tray lined with parchment paper and freeze for at least 1 hour, or until solid.
- Serve: Once frozen, these treats are ready to serve! Store leftovers in the fridge for up to 1 week or freeze for long-term storage.
Variations and Substitutions
Dietary Adaptations
- Grain-Free: For a grain-free option, substitute the oats with ground coconut flour or almond flour. You’ll need to adjust the quantity slightly, as these flours are more absorbent.
- Different Protein: If you prefer to add extra protein but don’t want to use powder, you can replace the protein powder with finely ground chicken or turkey breast for an added protein punch.
- Low-Sugar Option: If your dog needs a lower-sugar treat, reduce the amount of banana used and substitute it with unsweetened applesauce.
Special Needs Modifications
- Senior Dog Adaptations: Senior dogs can benefit from softer treats. To make these treats even softer, add a bit more peanut butter or a splash of water to the mixture.
- Puppy-Friendly Versions: You can reduce the oat content to make these treats easier for puppies to digest. Use smaller portions for training rewards as well.
Pro Tips and Success Secrets
- Batch Preparation: These treats can be made in bulk and stored in the fridge for a week, or frozen for longer storage. Having them on hand will make it easier to give your dog a quick energy boost whenever they need it.
- Texture and Consistency: If your mixture feels too loose, simply add more oats until it holds its shape. The right consistency should allow you to roll the treats into balls without them falling apart.
- Freeze for Convenience: These treats freeze beautifully. You can batch-freeze them and just grab a few whenever you need a quick snack or training reward.
Serving Guidelines
- Size Recommendations by Dog Weight: For small dogs, make the treats smaller (about 1/2 inch in diameter). Larger dogs can handle the full-size treat or even a double portion depending on their energy needs.
- Daily Portion Guidelines: Limit your dog to 1-2 treats per day, depending on their size and activity level. These treats are calorie-dense, so adjust accordingly.
- Training Use Suggestions: Break these treats into small pieces for training sessions. Their high-energy content makes them ideal as quick, motivating rewards during work or training.
- Special Occasion Serving Ideas: Serve these treats after a workout or training session as a recovery snack, or as a special birthday treat.
Common Questions
- Can I use a different nut butter?
Yes, almond butter can be substituted for peanut butter, but make sure it doesn’t contain any harmful ingredients like xylitol or added sugars. - How long can I store these treats?
These treats will last for up to a week in the fridge or up to 3 months in the freezer. - What if my dog has a peanut allergy?
If your dog is allergic to peanuts, you can substitute the peanut butter with sunflower seed butter or another nut butter that is safe for dogs. - Can I make these treats softer?
Yes! For dogs that have trouble with harder treats, simply add a little more peanut butter or a splash of water to make the mixture softer.
#5. Sweet Potato & Chicken Energy Bites: A Savory Boost for Active Dogs

If you’ve been looking for a high-energy treat that’s packed with wholesome, nutritious ingredients for your hardworking dog, look no further than these Sweet Potato & Chicken Energy Bites.
As a pet parent with an active dog, I know firsthand how important it is to give them the fuel they need to keep going, especially when they’re working hard or training intensely.
That’s why I developed these bites, combining the rich, natural energy of sweet potatoes with lean chicken protein to create a treat that supports sustained energy, muscle recovery, and overall well-being.
These energy bites are not only incredibly tasty but also offer a variety of health benefits that will support your dog’s active lifestyle.
After testing several combinations, I found that the mild sweetness of sweet potatoes pairs beautifully with the savory flavor of chicken, creating a treat that dogs just can’t resist.
They’re easy to make, nutrient-packed, and the perfect size for training, post-workout recovery, or an energy boost during long working hours.
Recipe Overview
The Sweet Potato & Chicken Energy Bites are a hearty, savory snack made with whole foods that pack a punch of nutrients.
Sweet potatoes are full of complex carbohydrates and fiber, providing your dog with a steady release of energy, while chicken offers lean protein that helps build and repair muscles.
Together, these ingredients make a satisfying, high-energy treat that supports your dog’s muscles, joints, and overall health.
These treats are perfect for working dogs who need long-lasting energy. They are also soft enough to be used during training or as a quick snack between activities.
Whether your dog is engaged in agility, working as a service dog, or just loves an intense play session, these treats will keep them going strong.
Why You’ll Love This Recipe
Here’s why these Sweet Potato & Chicken Energy Bites will become a favorite for your dog:
- Protein-Packed: Lean chicken provides the essential amino acids your dog needs for muscle repair and energy.
- Complex Carbs for Energy: Sweet potatoes are rich in complex carbohydrates, which break down slowly to provide lasting energy throughout the day.
- Fiber-Rich: The fiber in sweet potatoes aids digestion and ensures your dog feels satisfied and energetic.
- Customizable: You can adjust the recipe for different dietary needs or dog sizes, making it versatile for all types of dogs.
- Soft & Easy to Chew: These bites are soft enough for dogs of all ages, including seniors and puppies, to enjoy without difficulty.
- Great for Training: The bite-sized pieces make them perfect for use during training sessions as they’re easy to handle and quick to eat.
Essential Information
Here’s everything you need to know about this energy-packed treat:
- Prep Time: 20 minutes
- Cook/Set Time: 30 minutes (for baking)
- Total Time: 50 minutes
- Yield: 20-25 bites (depending on size)
- Size per Treat: 1-inch diameter (adjustable)
- Shelf Life: 1 week in the fridge, up to 2 months in the freezer
- Storage Requirements: Store in an airtight container in the fridge, or freeze for longer storage
- Equipment Needed: Baking sheet, parchment paper, mixing bowl, spoon
Main Components
This simple recipe uses nutrient-rich, dog-friendly ingredients that promote energy and health:
- 1/2 cup cooked chicken (shredded or ground): A lean source of protein to help build muscle and provide energy.
- 1/2 cup mashed sweet potato: Packed with complex carbohydrates, fiber, and essential vitamins like A and C.
- 1/4 cup rolled oats: A great source of fiber and energy, oats help bind the ingredients together.
- 1 egg: Provides additional protein and helps hold the mixture together.
- 1 tablespoon coconut oil: Adds healthy fats that support skin health and energy.
- 1/4 teaspoon turmeric (optional): Turmeric can help with joint inflammation and muscle recovery, which is great for working dogs.
Expert Tips
- Chicken Prep: Make sure the chicken is thoroughly cooked and free of any added seasoning or salt. You can use shredded rotisserie chicken or cook fresh chicken at home.
- Sweet Potato Cooking: Cook the sweet potato by boiling or baking it until it’s soft. Then mash it thoroughly to remove any lumps, which will help create a smoother dough for the bites.
- Texture Adjustments: If the mixture feels too dry, add a splash of water or broth to achieve the right consistency. The dough should be firm enough to hold its shape but not too sticky to handle.
Instructions

- Prepare the Sweet Potato: Cook the sweet potato by boiling or baking until tender. Once cooked, peel and mash it until smooth.
- Cook the Chicken: If using raw chicken, cook it thoroughly (boil, bake, or pan-cook) and then shred or grind it into small pieces. Ensure there is no seasoning.
- Combine Ingredients: In a large mixing bowl, combine the mashed sweet potato, cooked chicken, oats, egg, and coconut oil. Stir well until all ingredients are fully incorporated. If you’re using turmeric, add it now for its anti-inflammatory benefits.
- Shape the Bites: Use your hands or a spoon to shape the mixture into small, bite-sized balls (about 1 inch in diameter). Arrange them on a baking sheet lined with parchment paper.
- Bake: Preheat your oven to 350°F (175°C). Bake the treats for 25-30 minutes or until they are golden brown and firm to the touch. Be sure to check them halfway through to ensure even baking.
- Cool and Serve: Let the treats cool completely on a wire rack before serving. Once they’re cool, store them in an airtight container in the fridge for up to 1 week or freeze for longer storage.
Variations and Substitutions
Dietary Adaptations
- Grain-Free: Substitute the oats with a grain-free flour like coconut flour or almond flour. You may need to adjust the quantity as these flours are more absorbent.
- Protein Alternatives: For dogs that are sensitive to chicken, turkey or lean beef can be used as alternatives. Ground meat works best in this recipe.
Special Needs Modifications
- Senior Dog Adaptations: If you have a senior dog, consider making the treats softer by adding more mashed sweet potato or a bit of water to the dough. This will make it easier for them to chew.
- Puppy-Friendly Versions: For puppies, adjust the portion size of the bites to be smaller, and ensure the treats are not too hard. They should be easily breakable.
Pro Tips and Success Secrets
- Batch Preparation: These energy bites freeze well, so consider making a large batch and freezing extras for later use. This ensures you always have a nutritious, high-energy treat on hand.
- Texture Troubleshooting: If the dough is too sticky, dust your hands with a little flour to prevent it from sticking. If it’s too dry, add a bit more sweet potato or water.
- Serve Immediately After Exercise: For the best results, serve these treats to your dog immediately after intense activity or training to support muscle recovery and energy replenishment.
Serving Guidelines
- Size Recommendations by Dog Weight: For small dogs, make the bites smaller (about 1/2 inch in diameter). Larger dogs can handle the regular size or a double portion if needed.
- Daily Portion Guidelines: Limit your dog to 1-2 energy bites per day, depending on their size and activity level. These treats are nutrient-dense, so moderation is key.
- Training Use Suggestions: Use these bites as training rewards during longer sessions or after a job well done. Their savory flavor will keep your dog motivated.
- Special Occasion Serving Ideas: Serve these treats as a special post-training snack or as a reward after a long day of work.
Common Questions
- Can I substitute sweet potatoes with another veggie?
Yes, you can use pumpkin or carrots as substitutes for sweet potatoes, but sweet potatoes are the best for providing energy and nutrients. - How long can I store these treats?
These treats last up to 1 week in the fridge and up to 2 months in the freezer. Always store them in an airtight container. - Can I make these bites without eggs?
Yes, you can use a flax egg (1 tablespoon ground flaxseed mixed with 3 tablespoons water) as an egg replacement in this recipe. - My dog doesn’t like chicken. Can I use beef or turkey?
Absolutely! Ground turkey or lean beef are great alternatives that will still provide the necessary protein for your dog.


