Making homemade dog treats can be a fun and rewarding experience, especially when you know exactly what goes into them.
If you’re looking for ways to treat your dog to something special, homemade meat-based dog treats are a great option.
These treats are packed with protein and tailored to your dog’s needs, making them a healthy and tasty alternative to store-bought snacks.
Whether you have a puppy, an adult dog, or a senior, these recipes can be adapted to suit every age and stage.
Save this Post for Later! ⬇️

#1. Ground Beef Jerky Dog Treats
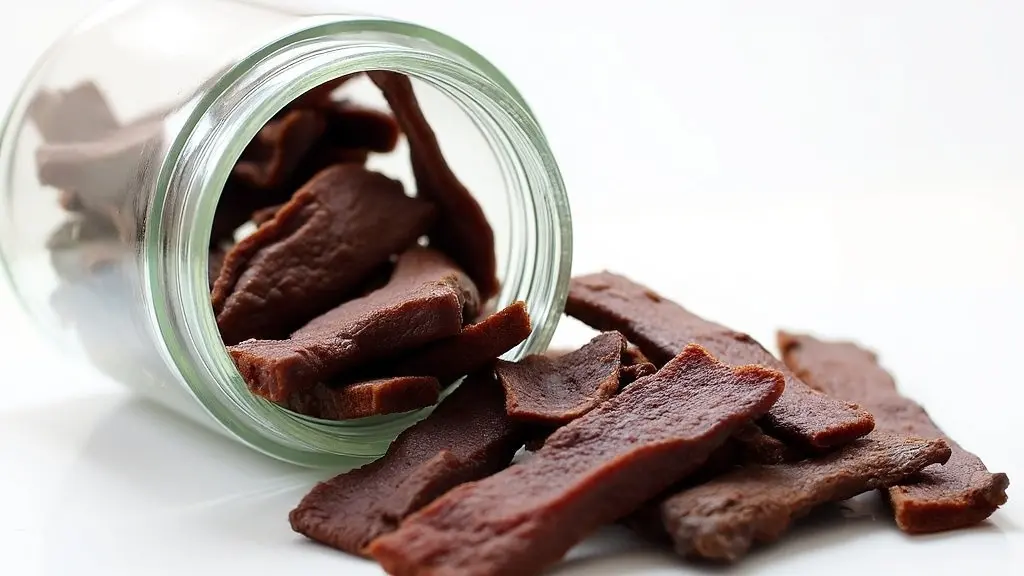
Creating homemade treats for your dog is a great way to ensure they get the best quality ingredients in every bite. With this easy and customizable recipe for ground beef jerky dog treats, your dog will enjoy a tasty and nutritious snack that is packed with protein.
Whether you’re looking for a healthy chew for your pup or a treat that supports dental health, this recipe has you covered.
The lean ground beef jerky not only satisfies your dog’s taste buds but also provides a boost of protein and promotes healthy chewing habits.
Basic Information:
This simple and satisfying recipe for Ground Beef Jerky Dog Treats is the perfect dental chew. By dehydrating lean ground beef, you’ll create a chewy and protein-packed snack that your dog will love.
With a yield of approximately 4 cups, the treats weigh about 7 ounces and are suitable for dogs of all ages, from puppies to seniors. The best part? They are grain-free and made with limited ingredients, so they’re great for dogs with sensitivities or food allergies.
Time Requirements:
Creating these jerky treats does take some time, but the effort is worth it. Prep time is quick, requiring only about 15 minutes to get everything ready.
The dehydration process takes around 8 hours in the oven, but you’ll need an additional 4-5 hours to ensure that the treats are fully dehydrated and crisp. Overall, the process will take approximately 13-15 hours, including resting time.
While the time commitment may seem lengthy, the rewards are fantastic. These treats can last up to 3 weeks at room temperature when stored in an airtight container, and refrigeration extends their shelf life even further.
The long-lasting nature of these treats makes them ideal for preparing in bulk and having on hand for your dog’s snacking needs.
Nutritional & Health Information:
These ground beef jerky treats are packed with benefits. With about 25-30 calories per 1-ounce serving, they offer a healthy, protein-rich snack that helps support your dog’s muscle maintenance and overall health.
The act of chewing also supports dental health by promoting saliva production and helping to clean teeth. It’s important to note that you should adjust portion sizes depending on your dog’s size and consult with your veterinarian for any specific dietary needs or limits.
As with any treat, moderation is key. Overfeeding can lead to an upset stomach or an imbalance in your dog’s diet, so be sure to offer these treats in moderation and avoid using them as a primary food source.
Additionally, using lean beef is crucial to avoid excessive fat intake, which could lead to digestive problems.
Equipment Needed:
To make these jerky treats, you don’t need too much specialized equipment. A large bowl, parchment paper, and baking sheets are essential for preparing the meat.
The star of the show is your dehydrator or oven – either works perfectly for drying out the jerky. If you don’t have a dehydrator, don’t worry; the oven works just as well when set to a low temperature.
Once dehydrated, storing the treats properly is essential to keeping them fresh. Use airtight containers for room temperature storage, and for longer shelf life, keep them refrigerated.
If you want to prepare large batches, you can even freeze the treats to store them for up to six months.
Ingredients:
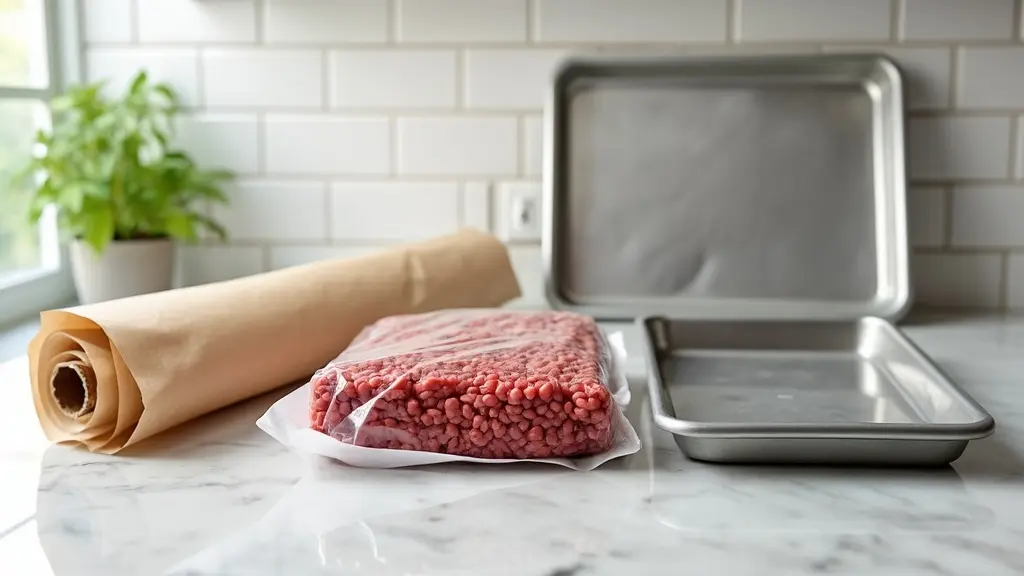
- 1 to 1¼ pounds (approximately 450-570 grams) lean ground beef
- Parchment paper
- Baking sheets
- Dehydrator or oven
You can experiment with optional add-ins, such as a small amount of low-sodium beef broth for extra flavor or a sprinkle of turmeric to boost the anti-inflammatory properties of the treats.
If you prefer a different meat, ground turkey or chicken can easily replace the beef, allowing for even more variety in your dog’s treat options.
Instructions:
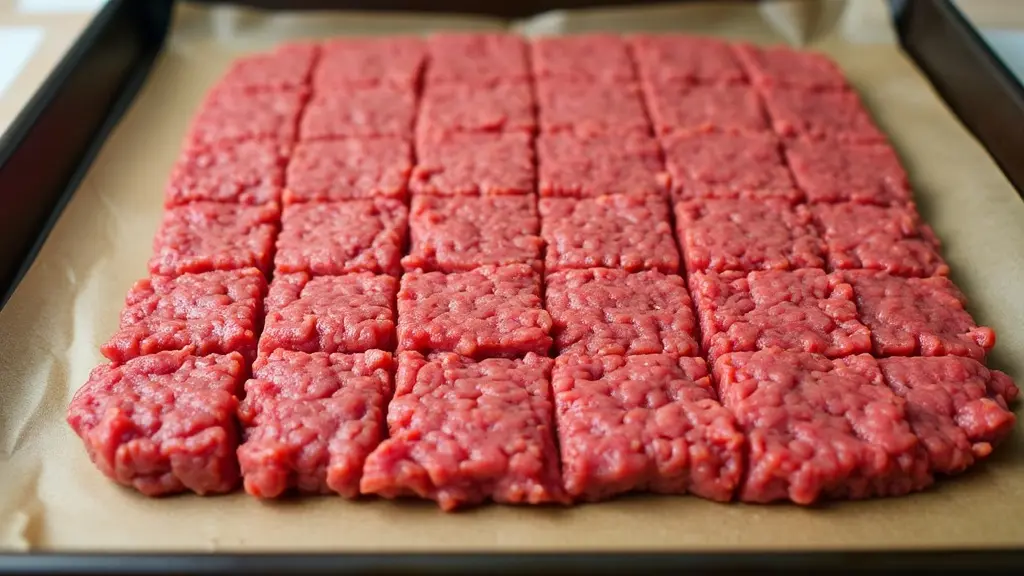
Start by preheating your oven to 200°F (93°C), or set your dehydrator to 145°F (63°C). Then, line your baking sheet with parchment paper to prevent the meat from sticking.
Once the baking sheet is prepared, place the lean ground beef onto it and use your hands or a greased rolling pin to flatten the meat to about 1/8 inch thick.
Scoring the meat in a checkerboard pattern is an excellent way to make it easier to break into bite-sized pieces later on.
Now, it’s time for dehydration! Place your baking sheet in the preheated oven or dehydrator and let the beef dehydrate for 8 hours. After 8 hours, you’ll need to drain any excess grease that has seeped out, then break the beef into the scored pieces.
To ensure even drying, transfer the pieces to a cooling rack and place them back in the oven or dehydrator for an additional 4-5 hours. Once fully dehydrated, let the treats cool completely before storing.
Expert Tips and Variations:
When preparing these treats, it’s important to avoid some common mistakes. First, always opt for lean ground beef; using fattier beef can make the jerky greasy and difficult to dehydrate.
Secondly, avoid overcrowding your dehydrator or baking sheet, as this can lead to uneven drying. Proper spacing ensures that air can circulate and dry the jerky evenly.
You can prepare these jerky treats in bulk, making them an excellent option for those who like to have a stash of healthy snacks ready for their dogs.
Once dehydrated, store the jerky in an airtight container at room temperature for up to 3 weeks, or refrigerate them for up to a month. For even longer storage, freezing is a great option, keeping your treats fresh for up to 6 months.
These treats not only satisfy your dog’s chewing needs but also promote overall health.
With minimal ingredients and the option to customize with safe flavor enhancers or nutritional boosters, this jerky recipe is a fantastic way to spoil your furry friend while keeping them healthy and happy.
#2. Homemade Beef and Cheddar Dog Biscuits

Homemade Beef and Cheddar Dog Biscuits are a delightful and nutritious snack that combines lean ground beef with rich cheddar cheese.
These treats are not only tasty but also packed with protein, making them an excellent choice for supporting your dog’s muscle maintenance.
Whether you’re looking for training treats or simply a special bite to share with your furry friend, these savory biscuits are sure to be a hit.
These homemade dog biscuits are suitable for all dog ages, from puppies to senior dogs, and are made with simple, wholesome ingredients.
They’re easy to prepare and bake, and the best part is that you can feel confident knowing exactly what goes into the treats you’re feeding your pet.
Ingredients:
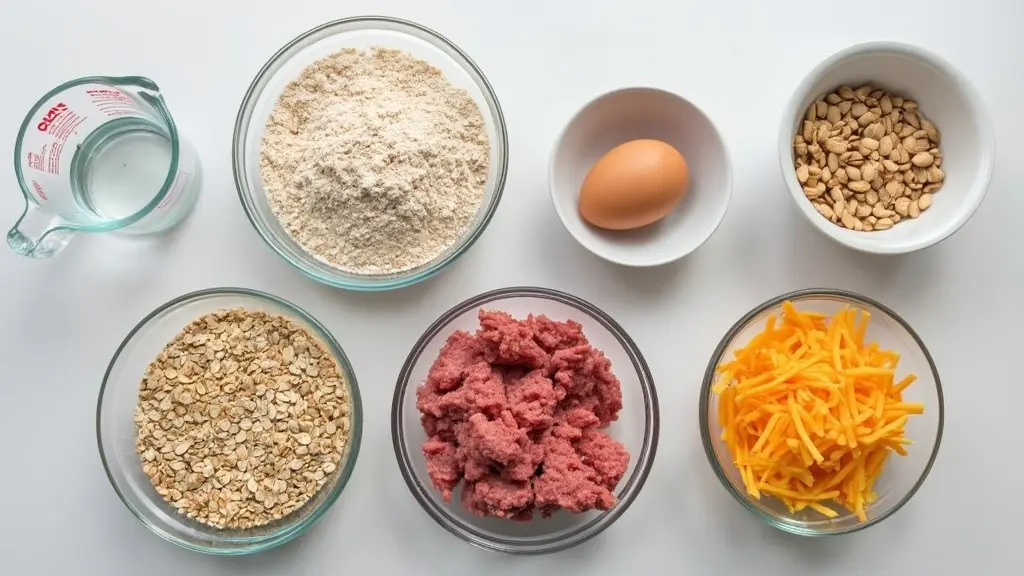
- 1 cup (120g) oat flour
- 1 cup (120g) whole wheat flour
- 1 cup (100g) shredded cheddar cheese
- 1 cup (85g) cooked lean ground beef
- 1 egg
- ¼ cup (60ml) water
Before starting, be sure that your ground beef is cooked and cooled. This ensures that the dough comes together properly and doesn’t get too runny.
Additionally, use fresh ingredients to avoid any risk of contamination, especially with the cheese and beef.
If you want to personalize the recipe further, you can consider adding a few optional ingredients, like a small splash of low-sodium beef broth for extra flavor or even a sprinkle of turmeric for its anti-inflammatory benefits.
These variations will give the treats a unique twist while still remaining safe and beneficial for your dog.
Preparation and Cooking Instructions:
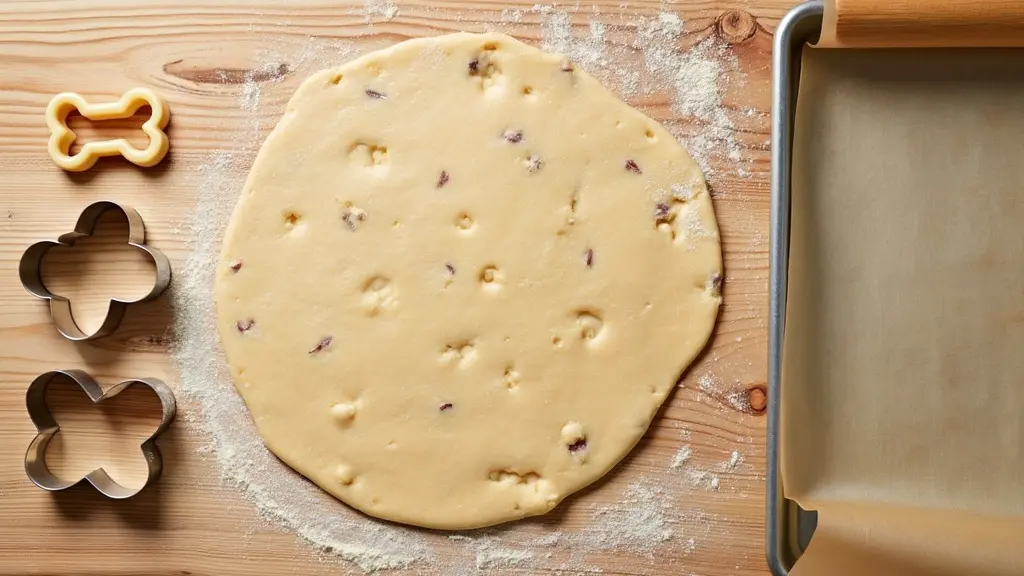
Preheat the oven: Start by preheating your oven to 350°F (175°C), ensuring it reaches the right temperature for baking. Line a baking sheet with parchment paper to prevent the biscuits from sticking and make cleanup easier.
Mix the dough: In a large bowl, combine oat flour, whole wheat flour, shredded cheddar cheese, and cooked ground beef. Stir well, ensuring the ingredients are evenly mixed. Add in the egg and water, continuing to mix until the dough forms. The dough should be firm but slightly pliable.
Shape the biscuits: Once the dough is ready, roll it out on a lightly floured surface to about ¼ inch (6mm) thick. You can either use a cookie cutter to create fun shapes or simply cut the dough into squares or rectangles using a knife. This step is great for getting creative and personalizing the biscuits for your dog.
Bake the treats: Place the shaped dough onto the prepared baking sheet and bake in the preheated oven for 25 minutes. Keep an eye on them, and once they are golden brown around the edges, they’re done. The baking time may vary slightly depending on your oven and the thickness of the biscuits, so adjust accordingly.
Cool and store: Once baked, let the biscuits cool completely on a wire rack. This step is essential to ensure they harden up and maintain their crisp texture. After cooling, store the treats in an airtight container at room temperature for up to 2 weeks. If you want to store them for a longer period, place them in the refrigerator for up to 1 month, or freeze them for up to 3 months.
Nutritional Benefits and Considerations:
These biscuits are not only a delicious snack but also provide several health benefits for your dog. The high protein content from the lean ground beef supports muscle maintenance, and the act of chewing can help improve your dog’s dental health.
However, it’s important to always monitor your pet while they’re enjoying their treats, as even hard biscuits can pose a choking hazard if not chewed properly.
While these biscuits are nutritious, it’s crucial to practice moderation. Overfeeding any treat can lead to unwanted weight gain, especially in older or less active dogs.
If you’re unsure about the number of biscuits to give your dog each day, consult your veterinarian to determine the best serving size based on their individual dietary needs.
Storage and Shelf Life:
Room Temperature: The biscuits will last for up to two weeks when stored in an airtight container at room temperature. Be sure to check them for any signs of spoilage before giving them to your dog.
Refrigeration: For extended freshness, refrigerate the biscuits in a fridge-safe container for up to 1 month.
Freezing: These treats can also be frozen to keep them fresh for up to 3 months. This is especially useful if you make a large batch and want to keep them on hand for future use. Simply place the biscuits in a sealed freezer bag to maintain their freshness.
Expert Tips and Variations:
To ensure that your biscuits turn out perfectly every time, avoid overmixing the dough or underbaking them. If the dough feels sticky or too wet, you can add a bit more flour until it becomes easier to handle.
Another common mistake to avoid is not allowing the treats to cool completely before storing them. Storing them while they’re still warm can cause moisture to build up inside the container, leading to soggy treats.
If you want to save time, consider preparing the dough ahead of time.
You can refrigerate it for up to a day before baking, but make sure to let the dough come to room temperature before rolling it out. This will make the shaping process easier and prevent cracking.
#3. Beef and Oat Cookie Dog Treats

If you’re looking for a homemade treat that not only satisfies your dog’s taste buds but also supports their health, these Beef and Oat Cookie Dog Treats are the perfect choice.
Combining lean ground beef and oats, they offer a crunchy, protein-packed snack that can double as a training treat or a dental chew.
These cookies are simple to make and can be customized to fit your dog’s dietary needs. Plus, they’re versatile and easy to store for long-term use!
These homemade cookies are suitable for dogs of all ages—from playful puppies to seasoned seniors.
With their high protein content and fiber-rich oats, your dog can enjoy a tasty snack that supports their muscles and digestive health. Let’s dive into the details of how you can prepare this delicious treat at home!
Ingredients for Beef and Oat Cookie Dog Treats
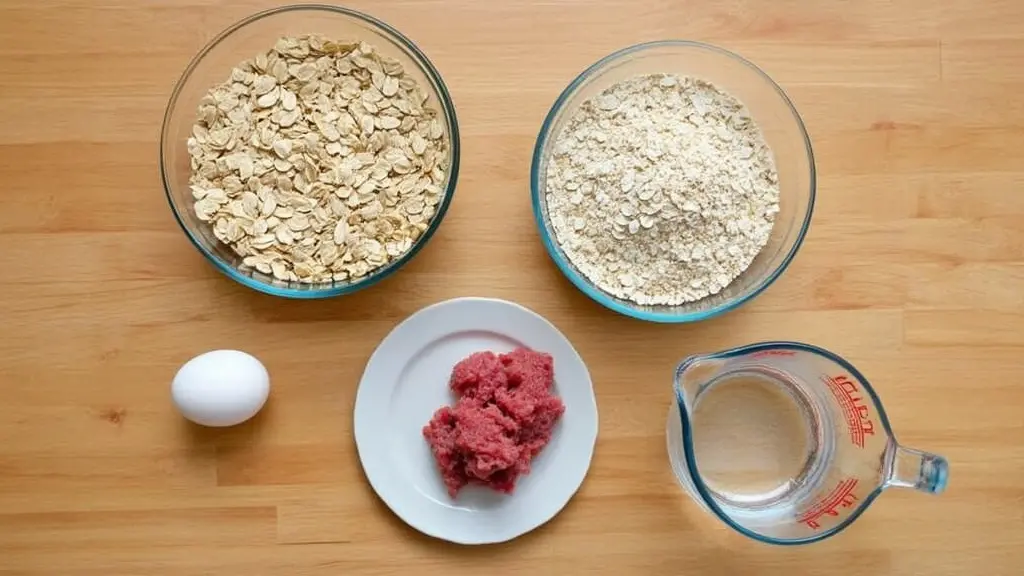
Here’s what you’ll need to make approximately 24 treats (depending on the size you cut them):
- 1 cup (120g) oat flour
- 1 cup (120g) rolled oats
- ½ cup (85g) cooked lean ground beef
- 1 egg
- ¼ cup (60ml) water
The ingredients are simple and easy to find at your local grocery store. Oat flour and rolled oats serve as the base, offering fiber and essential nutrients. Lean ground beef adds a delicious, protein-rich punch, while the egg helps bind everything together.
If you want to enhance the flavor, you can add a small amount of low-sodium beef broth or a sprinkle of turmeric for its anti-inflammatory properties.
Preparation and Cooking Process
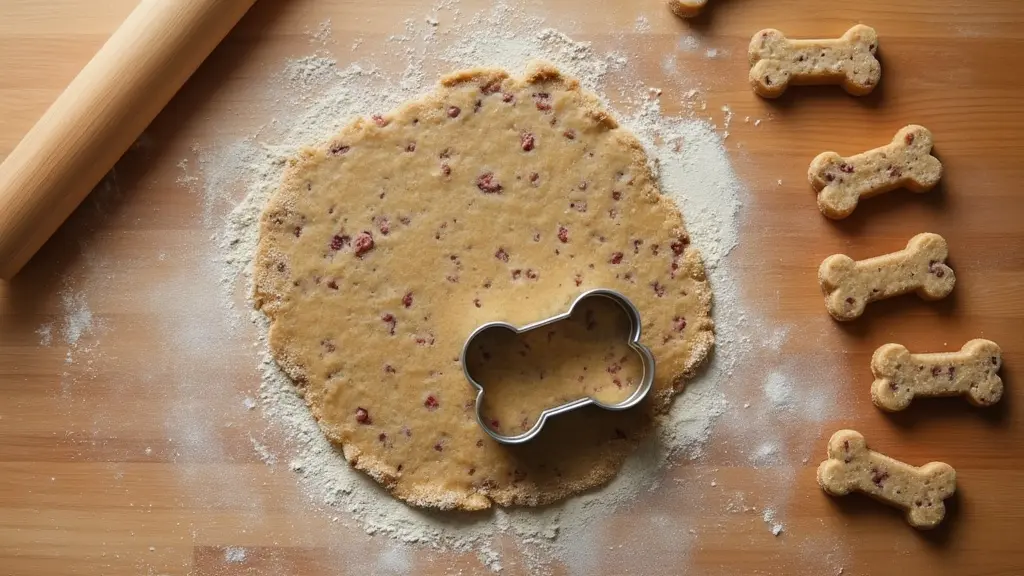
Before you start, preheat your oven to 350°F (175°C). Line a baking sheet with parchment paper to ensure your cookies don’t stick and bake evenly. Now, gather a large mixing bowl and combine the oat flour and rolled oats.
Once the dry ingredients are mixed well, add the cooked lean ground beef, egg, and water. Stir everything together until a dough forms. You’ll want a dough that’s firm enough to shape but not too dry or crumbly.
When it comes to shaping the dough, you can roll it out on a lightly floured surface to about ¼ inch (6mm) thickness.
For fun shapes, use cookie cutters to cut out your desired designs. If you don’t have cookie cutters, you can simply cut the dough into small squares or rectangles using a knife.
Place the shaped treats onto the parchment-lined baking sheet, making sure to give each cookie a bit of space to expand during baking.
Bake the cookies in the preheated oven for 20-25 minutes. The edges should turn golden brown, signaling that they’re ready to be removed.
Keep an eye on them to ensure they don’t overbake, which could lead to a tougher texture. Allow the cookies to cool completely on a wire rack before storing them in an airtight container.
Safety Considerations: A Quick Guide
It’s important to use high-quality, fresh ingredients when preparing homemade dog treats. For the beef, choose lean ground beef to avoid unnecessary fat that could make the treats greasy and less healthy for your dog.
Additionally, always make sure that the beef is thoroughly cooked and cooled before adding it to the mixture. As for the oats, check that the oat flour is free of any additives or preservatives that could harm your dog.
Another crucial safety tip is to monitor your dog while they’re enjoying the treat. While these cookies are designed to be safe, they still pose a choking hazard, especially for dogs that tend to gulp their food.
Always serve them in appropriate portions and adjust the treat size based on your dog’s size and dietary needs.
Expert Tips for the Best Beef and Oat Cookie Dog Treats
To ensure your cookies turn out perfectly every time, avoid using fatty beef. Fatty meat can cause the treats to spoil quickly, reducing their shelf life and leading to greasy cookies.
Be mindful of the baking time—overbaking will result in hard, dry cookies, while underbaking can leave them too soft. Adjust the baking time as necessary to achieve the perfect golden-brown edges.
If you’re planning ahead, these treats can be made in batches and stored for later use. Store them in an airtight container at room temperature for up to two weeks.
For longer storage, you can refrigerate them for up to a month or even freeze them for up to three months. The versatility in storage options makes this recipe a great choice for busy pet owners.
Health Benefits of Beef and Oat Cookie Dog Treats
These treats not only taste great but also come packed with health benefits. The lean ground beef helps to maintain your dog’s muscle mass and supports overall strength, while the oats provide a source of dietary fiber, which is great for digestive health.
Additionally, the chewing action required to consume these crunchy treats can help promote dental health by reducing plaque buildup and massaging the gums.
Your dog will love the taste of these treats, and you’ll feel good knowing that they’re getting a healthy, homemade snack that supports their well-being.
However, as with any treat, moderation is key. Overindulgence could lead to an imbalance in your dog’s diet, so always consult with your veterinarian to determine the right amount of treats based on your dog’s age, size, and nutritional needs.
#4. Chicken and Sweet Potato Dog Biscuits

Treating your dog to homemade, nutritious snacks is a great way to ensure they’re getting the best ingredients.
These chicken and sweet potato dog biscuits combine lean protein with fiber-filled sweet potatoes, creating a delightful and health-boosting treat your dog will love.
They’re not only ideal for training but also serve as dental chews, making them a perfect addition to your dog’s daily routine.
These treats are designed for dogs of all sizes and ages, including puppies, adults, and seniors.
With just a few simple ingredients, you can make about 30 biscuits (depending on size) that are both tasty and healthy. Let’s dive into the recipe!
Time Requirements
When you’re preparing homemade dog treats, it’s important to keep track of your time to ensure a smooth cooking process.
This recipe offers a quick prep time of just 20 minutes, making it manageable even on busy days. The baking process takes around 30 minutes, giving you time to relax as the treats bake to golden perfection.
With a total time of approximately 50 minutes, this recipe is a convenient and quick option for busy pet owners.
Plus, with a shelf life of up to two weeks at room temperature and longer storage in the fridge, these biscuits will be ready whenever your dog needs a snack.
Nutritional & Health Information
These dog biscuits are a powerhouse of nutrition. Each biscuit contains around 40-50 calories, making them suitable for most dogs, but portion control is essential. If you’re training or rewarding your dog frequently, be sure to adjust the size based on your dog’s weight and needs.
Packed with high-quality protein from lean chicken and fiber from sweet potatoes, these biscuits are great for supporting muscle maintenance and promoting dental health.
The chewy texture helps remove plaque and tartar, which is especially beneficial for dogs that love to chew. However, moderation is key—consult your veterinarian for personalized serving recommendations, especially if your dog has special dietary needs.
Equipment Required
To make these treats, you’ll need a few basic kitchen items. A mixing bowl and a baking sheet lined with parchment paper are essential.
Cookie cutters can add a fun touch to the biscuits, but if you don’t have any, you can easily shape the dough into small squares or rectangles by hand.
Storage is just as important as preparation. Keep your biscuits in an airtight container to maintain freshness for up to two weeks at room temperature.
If you prefer to store them for a longer time, the refrigerator is a safe bet to extend their shelf life.
Ingredients
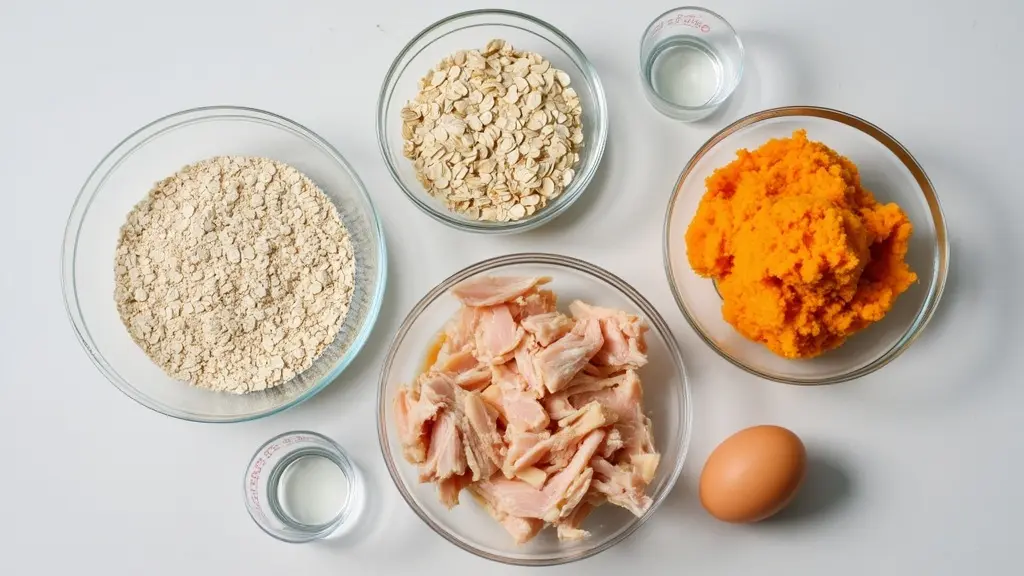
Here’s what you’ll need to get started:
- 1 cup (120g) oat flour
- 1 cup (120g) rolled oats
- 1 cup (200g) cooked, shredded chicken breast
- 1 cup (200g) cooked, mashed sweet potato
- 1 egg
- ¼ cup (60ml) water
These ingredients are simple but offer a solid nutritional foundation. Ensure your chicken is cooked without any seasoning or bones, as these can pose risks to your dog’s health.
Fresh, high-quality ingredients make all the difference, so be sure to choose good-quality meat and produce for the best results.
Optional Add-ins/Variations
While the basic recipe is excellent on its own, you can take your biscuits to the next level with some optional add-ins. A splash of low-sodium chicken broth can enhance the flavor, making the biscuits even more appealing to your dog.
For a nutritional boost, consider adding a sprinkle of turmeric, which has known anti-inflammatory properties. You can also experiment with alternative flours like coconut flour for a grain-free option, perfect for dogs with dietary restrictions.
Instructions
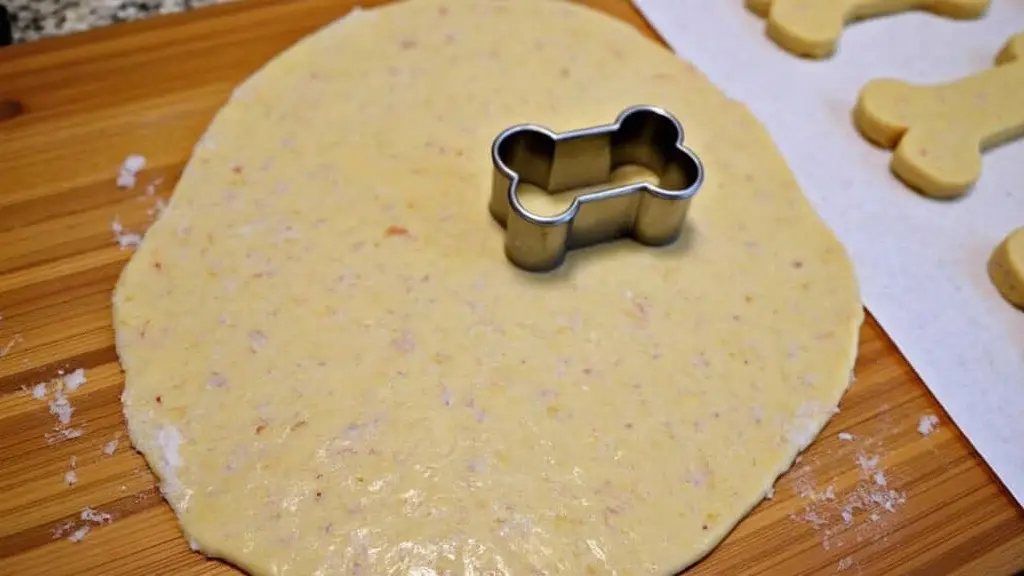
- Preheat your oven to 350°F (175°C) and line a baking sheet with parchment paper.
- Mixing: In a large bowl, combine the oat flour and rolled oats. Add the cooked, shredded chicken breast, mashed sweet potato, egg, and water. Stir until a dough forms.
- Shaping: Roll the dough on a lightly floured surface to about ¼ inch (6mm) thickness. Use cookie cutters to cut out shapes or, if you prefer, cut the dough into small squares or rectangles by hand.
- Baking: Place the shaped treats onto the prepared baking sheet and bake for 30 minutes, or until the edges turn golden brown.
- Cooling and Storage: Let the treats cool completely on a wire rack. Store them in an airtight container at room temperature for up to two weeks. For longer storage, refrigerate the treats.
Safety Considerations
When making dog treats, safety should always be a top priority. Be sure the chicken used in this recipe is lean and fully cooked without any seasoning, as some spices and additives can be harmful to dogs.
Also, monitor your dog while they enjoy the treats to avoid choking hazards, especially if the biscuits are a little too large for smaller breeds.
Lastly, ensure that all ingredients are fresh and sourced from reputable suppliers to avoid contamination. This will help ensure that your dog receives only the best, safest treats!
#5. Chicken and Carrot Dog Biscuits Recipe
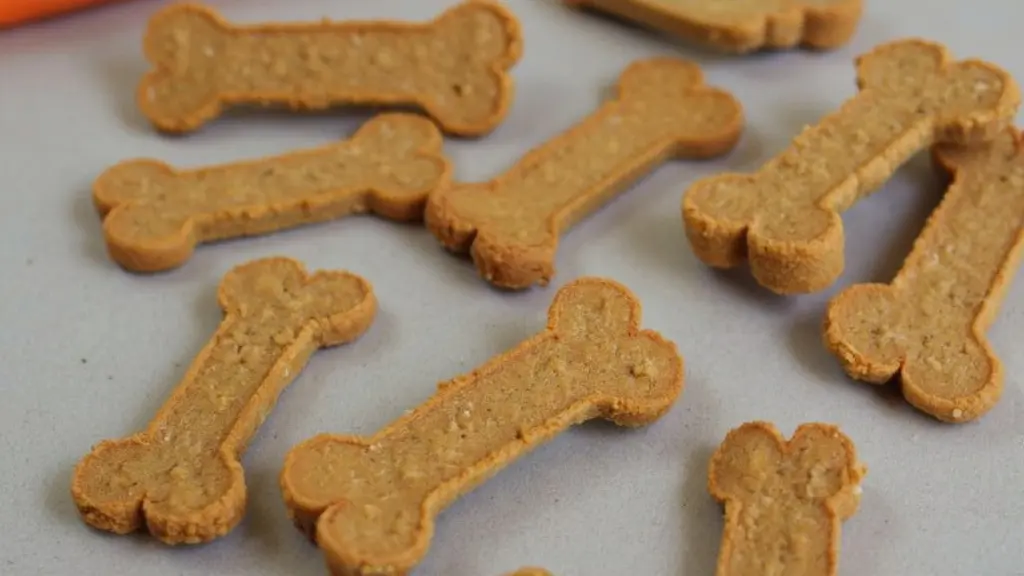
These wholesome chicken and carrot dog biscuits are a delicious, nutritious treat that combines lean chicken with the natural sweetness and fiber of carrots.
These treats are perfect for your dog’s daily routine and can be used for training or as a satisfying chew. With the added benefit of being protein-packed and fiber-rich, your pup will love these biscuits while enjoying a healthy snack.
Recipe Description:
Type of Treat: These dog biscuits are versatile and can be used as training treats or as dental chews, helping to promote good oral health while satisfying your dog’s hunger.
They are designed to be easy to digest and can be given to dogs of all ages, from puppies to seniors. Their crunchy texture helps to clean your dog’s teeth while chewing, contributing to better overall oral hygiene.
Total Yield: This recipe yields approximately 30 biscuits, though the exact number may vary depending on the size of the biscuits.
Feel free to make them smaller for puppies or larger for bigger breeds. The dough is easy to work with and can be adjusted to suit your pet’s needs.
Dietary Categories: These biscuits are grain-free, making them an excellent option for dogs with food sensitivities or those on a limited ingredient diet.
The use of oat flour and rolled oats provides fiber without the gluten, which is perfect for dogs who may experience digestive issues from traditional grain-based products.
Suitable For: These chicken and carrot biscuits are suitable for dogs of all ages. Whether you have a playful puppy, an adult dog, or a senior pup, these treats provide the right balance of nutrition and taste.
Always consider your dog’s dietary needs, and consult with a veterinarian if you are unsure about portion sizes or any special dietary requirements your dog may have.
Time Requirements
Prep Time: Preparation takes approximately 20 minutes. During this time, you’ll gather your ingredients and prepare them for mixing.
It’s a good idea to ensure your chicken is shredded and your carrots are finely grated before starting. This step makes the mixing process smoother and quicker.
Cook Time: These treats bake in just 30 minutes, creating the perfect crunchy texture. The baking time can vary depending on your oven, so it’s essential to keep an eye on the biscuits, especially toward the end of the cooking process. You’ll know they are ready when the edges are golden brown.
Setting/Freezing Time: No freezing is required. After baking, simply allow the biscuits to cool completely on a wire rack. Once cooled, they’re ready to serve to your furry friend!
Total Time: The total time for preparing and baking these biscuits is about 50 minutes. This includes both the prep and cook time, and gives you enough time to prepare your dog’s next favorite snack.
Shelf Life: These biscuits can be stored at room temperature for up to 2 weeks. If you’d like them to last longer, consider refrigerating them, where they’ll stay fresh for up to a month. They also freeze well for up to 3 months, so you can make a larger batch and store extras for later.
Nutritional & Health Information
Calories per Biscuit: Each biscuit contains approximately 40-50 calories. This makes them an ideal snack for training purposes or as an occasional treat without overloading your dog with excess calories.
Nutritional Facts: These biscuits are high in protein, thanks to the lean chicken breast, which is vital for maintaining muscle health. The addition of carrots provides a fiber boost, which aids in digestion and supports overall gut health.
The exact nutritional content may vary based on the specific ingredients you use, but overall, these biscuits are a great way to offer your dog a balanced treat.
Treat Size Recommendations by Dog Size: For small dogs, break the biscuits into smaller pieces to prevent overfeeding.
Larger breeds can enjoy the full-sized biscuits, or you can adjust the size based on your dog’s dietary needs. Always make sure that treats are appropriately sized for your dog’s breed and age.
Health Benefits: The combination of protein-rich chicken and fiber-packed carrots offers numerous health benefits. The chewing action not only satisfies your dog’s need for a tasty snack but also helps in maintaining dental health by preventing plaque build-up.
Additionally, the protein content supports muscle growth and maintenance, while the carrots provide vitamins that help with vision and immune function.
Warnings or Contraindications: While these biscuits are a healthy choice, always ensure the chicken is lean to avoid excess fat. It’s important to monitor your dog during chewing, especially if they are prone to swallowing large pieces, to prevent choking hazards.
As with any treat, moderation is key, and it’s recommended to consult your veterinarian for specific advice regarding your dog’s diet.
Equipment Required
To make these delicious biscuits, you will need some basic kitchen equipment. You’ll need a large mixing bowl for combining the ingredients, a baking sheet lined with parchment paper for easy cleanup, and a wire rack for cooling the biscuits after baking.
A cookie cutter is optional if you want to shape your biscuits into fun, recognizable forms, but you can also cut them into simple squares or rectangles if you prefer a quick and easy approach.
For storage, an airtight container is essential to keep the treats fresh at room temperature. If you plan to store them in the fridge, use a refrigerator-safe container for longer shelf life.
Ingredients
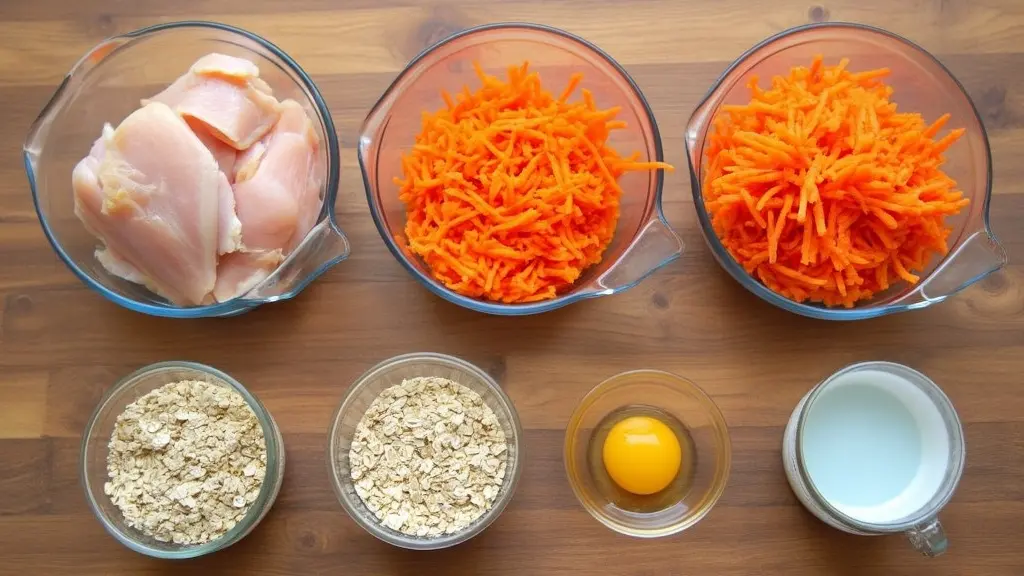
- 1 cup (120g) oat flour
- 1 cup (120g) rolled oats
- 1 cup (200g) cooked, shredded chicken breast
- 1 cup (130g) finely grated carrots
- 1 egg
- ¼ cup (60ml) water
Optional Add-ins/Variations: For extra flavor, you can add a small amount of low-sodium chicken broth to the mixture, giving it a more savory taste.
A sprinkle of turmeric can be a great addition for its anti-inflammatory properties, which could benefit older dogs or those with joint issues. If you’re aiming for a grain-free treat, you can substitute the oat flour with coconut flour, which is another dog-safe alternative.
Safety Notes for Each Ingredient: Make sure all ingredients are fresh and safe for dogs. It’s important to source high-quality chicken breast to avoid any unwanted additives or preservatives. Also, when preparing the carrots, ensure they are finely grated to avoid any choking hazards.
Instructions
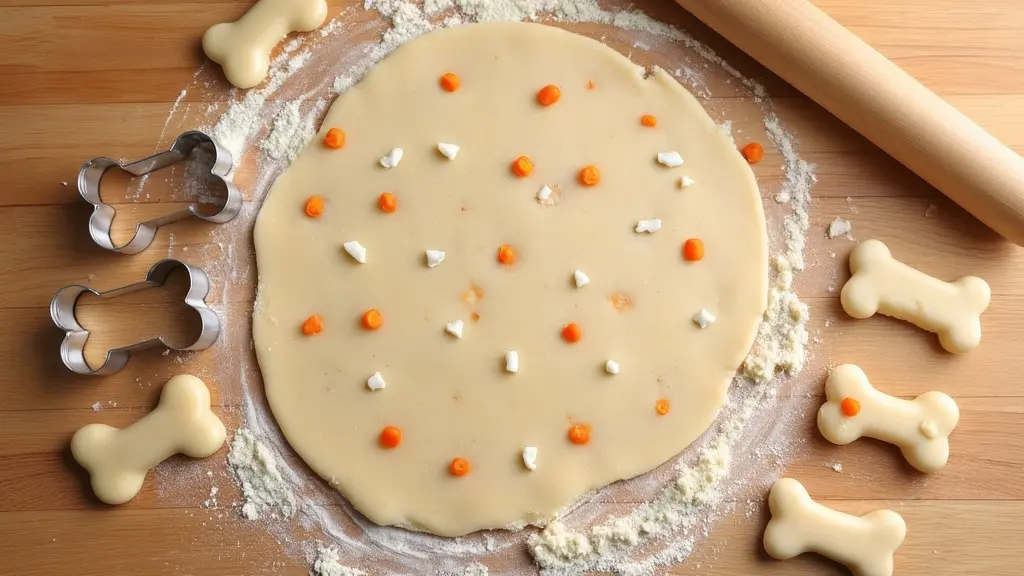
Preparation: Start by preheating your oven to 350°F (175°C). While the oven is heating, line a baking sheet with parchment paper for easy clean-up. Having everything ready to go will make the process faster and more efficient.
Mixing: In a large bowl, mix together the oat flour and rolled oats. Then, add the cooked, shredded chicken, grated carrots, egg, and water. Stir everything together until the dough comes together. If the dough is too sticky, you can add a little extra oat flour.
Shaping: Once the dough is well-mixed, roll it out on a lightly floured surface to about ¼ inch (6mm) thick. Use cookie cutters to create fun shapes, or simply cut the dough into small squares or rectangles. If you don’t have cookie cutters, shaping the dough by hand works just as well.
Baking: Place the shaped biscuits onto the prepared baking sheet. Bake them for about 30 minutes or until the edges are golden brown. Keep an eye on them, as baking times may vary slightly depending on your oven.
Cooling and Storage: After baking, allow the treats to cool completely on a wire rack. Once cooled, store the biscuits in an airtight container at room temperature for up to 2 weeks. For longer storage, keep them in the refrigerator.
Expert Tips and Variations
Common Mistakes to Avoid: One common mistake when making dog biscuits is not draining excess moisture from the grated carrots. If too much moisture is left in the carrots, the dough can become too soft and difficult to shape.
Another mistake is cutting the biscuits too thickly, which can result in uneven baking. Make sure to keep the thickness consistent for the best results.
Make-Ahead Instructions: You can prepare the dough in advance and store it in the fridge for up to 24 hours before baking. This makes it a convenient option when you want to make a batch ahead of time.
Storage Recommendations:
Room Temperature: These biscuits will stay fresh for up to 2 weeks in an airtight container.
Refrigerated: For longer shelf life, store them in the fridge for up to 1 month.
Frozen: These biscuits freeze well and can last for up to 3 months. Simply place them in a freezer-safe bag and thaw them as needed.


